Install and Config Event ManagementWordPress Theme
- created: 03/16/2017
- latest update: 03/16/2017
- by: ovatheme
We would like to thank you for purchasing our theme! We are very pleased you have chosen our theme for your website, you will not be disappointed! Before you get started, please be sure to always check out these documentation files. We outline all kinds of good information, and provide you with all the details you need to use our theme.
The our team are always happy to help you with any questions or recommendations you have about the our theme.
If you need any help or support please contact us through the Themeforest Messaging system or directed at jakjim@gmail.com
Note: If you contact us directed at jakjim@gmail.com, please attach info about purchase code:

Then open file and find "Item Purchase Code" like
Item Purchase Code: cdf581e0-ed42-41a2-ab3f-26bb5fb9c874
After purchasing our theme from Themeforest, you will need to download theme package for your use. To download the package, please login to your Themeforest account, navigate to “Downloads”, click the “Download” button in the left of the theme, choose “All files & documentation” to download our theme package to your computer. The theme package includes:
Theme File: Includes eventmana.zip file that consists of everything you need to install the theme.
Child Theme File: Includes eventmana-child.zip file
Document Folder: Includes Documentation file that helps you get to know about theme and guides you to build your site with our theme.
Licensing Folder: Includes the licensing files of Themeforest purchase.
- To use theme, you must be running WordPress 4.4 or higher, PHP 5.6 or higher, and mysql 5 or higher. Follow below checklist to ensure your host can work well with theme:
+ Your web host has the minimum requirements to run WordPress.
+ They are running the latest version of WordPress.
+ You can download the latest release of WordPress from official WordPress website.
+ You did create best secure passwords FTP and Database.
1: Automatically updated the theme when a new version is released:
Read more : http://www.wpexplorer.com/envato-market-plugin-guide/
2: Update theme by manually via FTP or via WordPress Admin Panel :
b, Download "Installable WordPress file only" :
c, Extract the theme package .ZIP file to a folder of the theme name.
d, Use FTP client software (FileZilla, SmartFTP, CuteFTP, etc...) to upload your theme on your hosting.
e, It's upload replace your old theme with your new theme with path on your hosting is : /wp-content/themes/
f, Deactive Event Mana Plugin >> Delete Event Mana Plugin
g, You will see message require install Event Mana Plugin >> Click message to install again pluign .
h, You also can update Visual Composer like way update Event Mana plugin (Step f,g).
J, Update Done, Check again your website
Then Download Theme Package, you can follow video to install & import demo data:
- You don't have to active license visual compsoer to use because we purchased extend license for this theme.
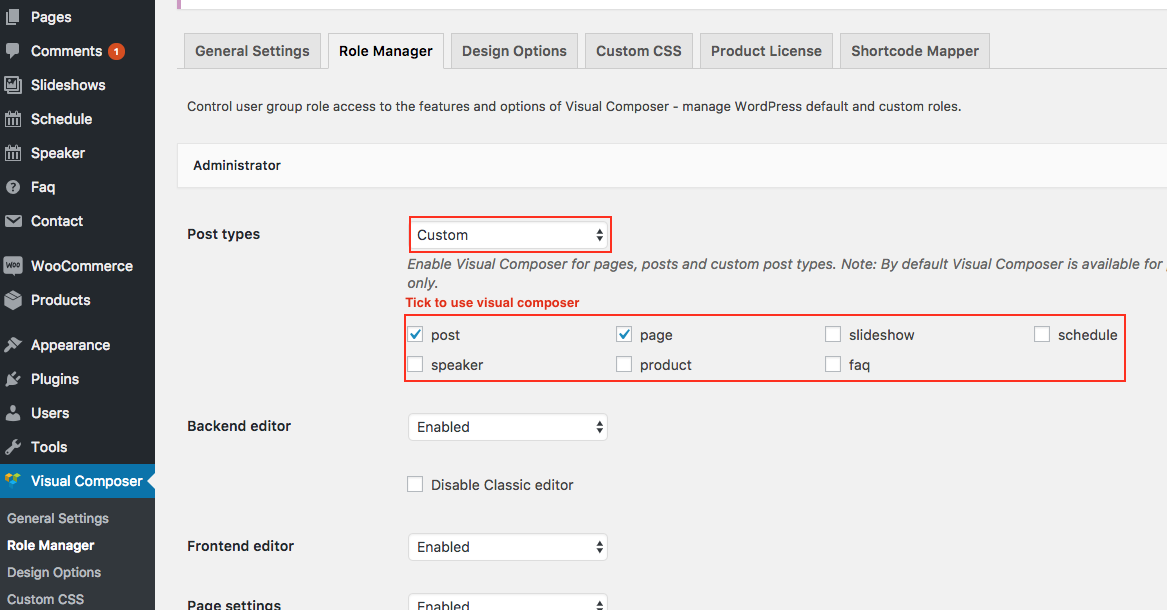
- Config Visual Compsoer to use for Post/Page/Custom Post: Go to Visual Composer >> Role manager
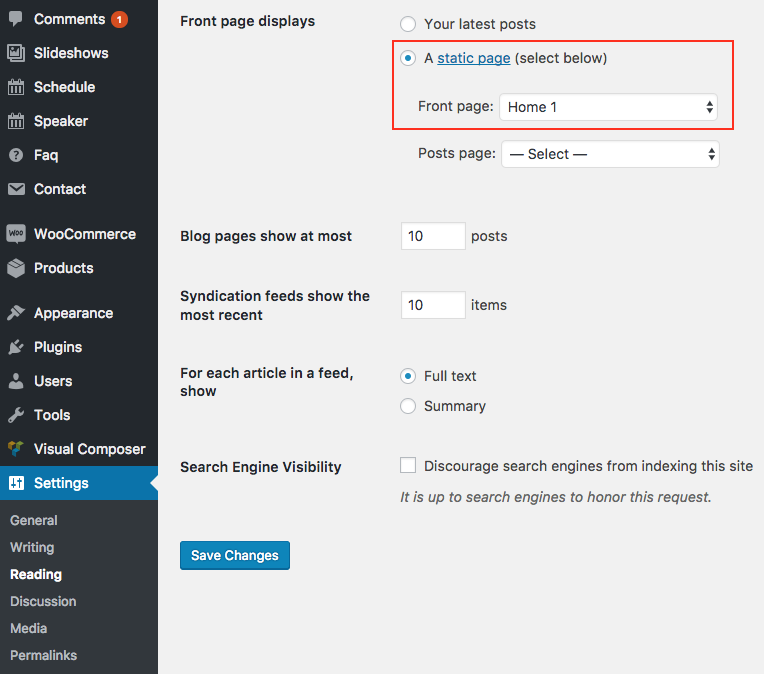
Go to Settings >> Reading
- You have to create search result page
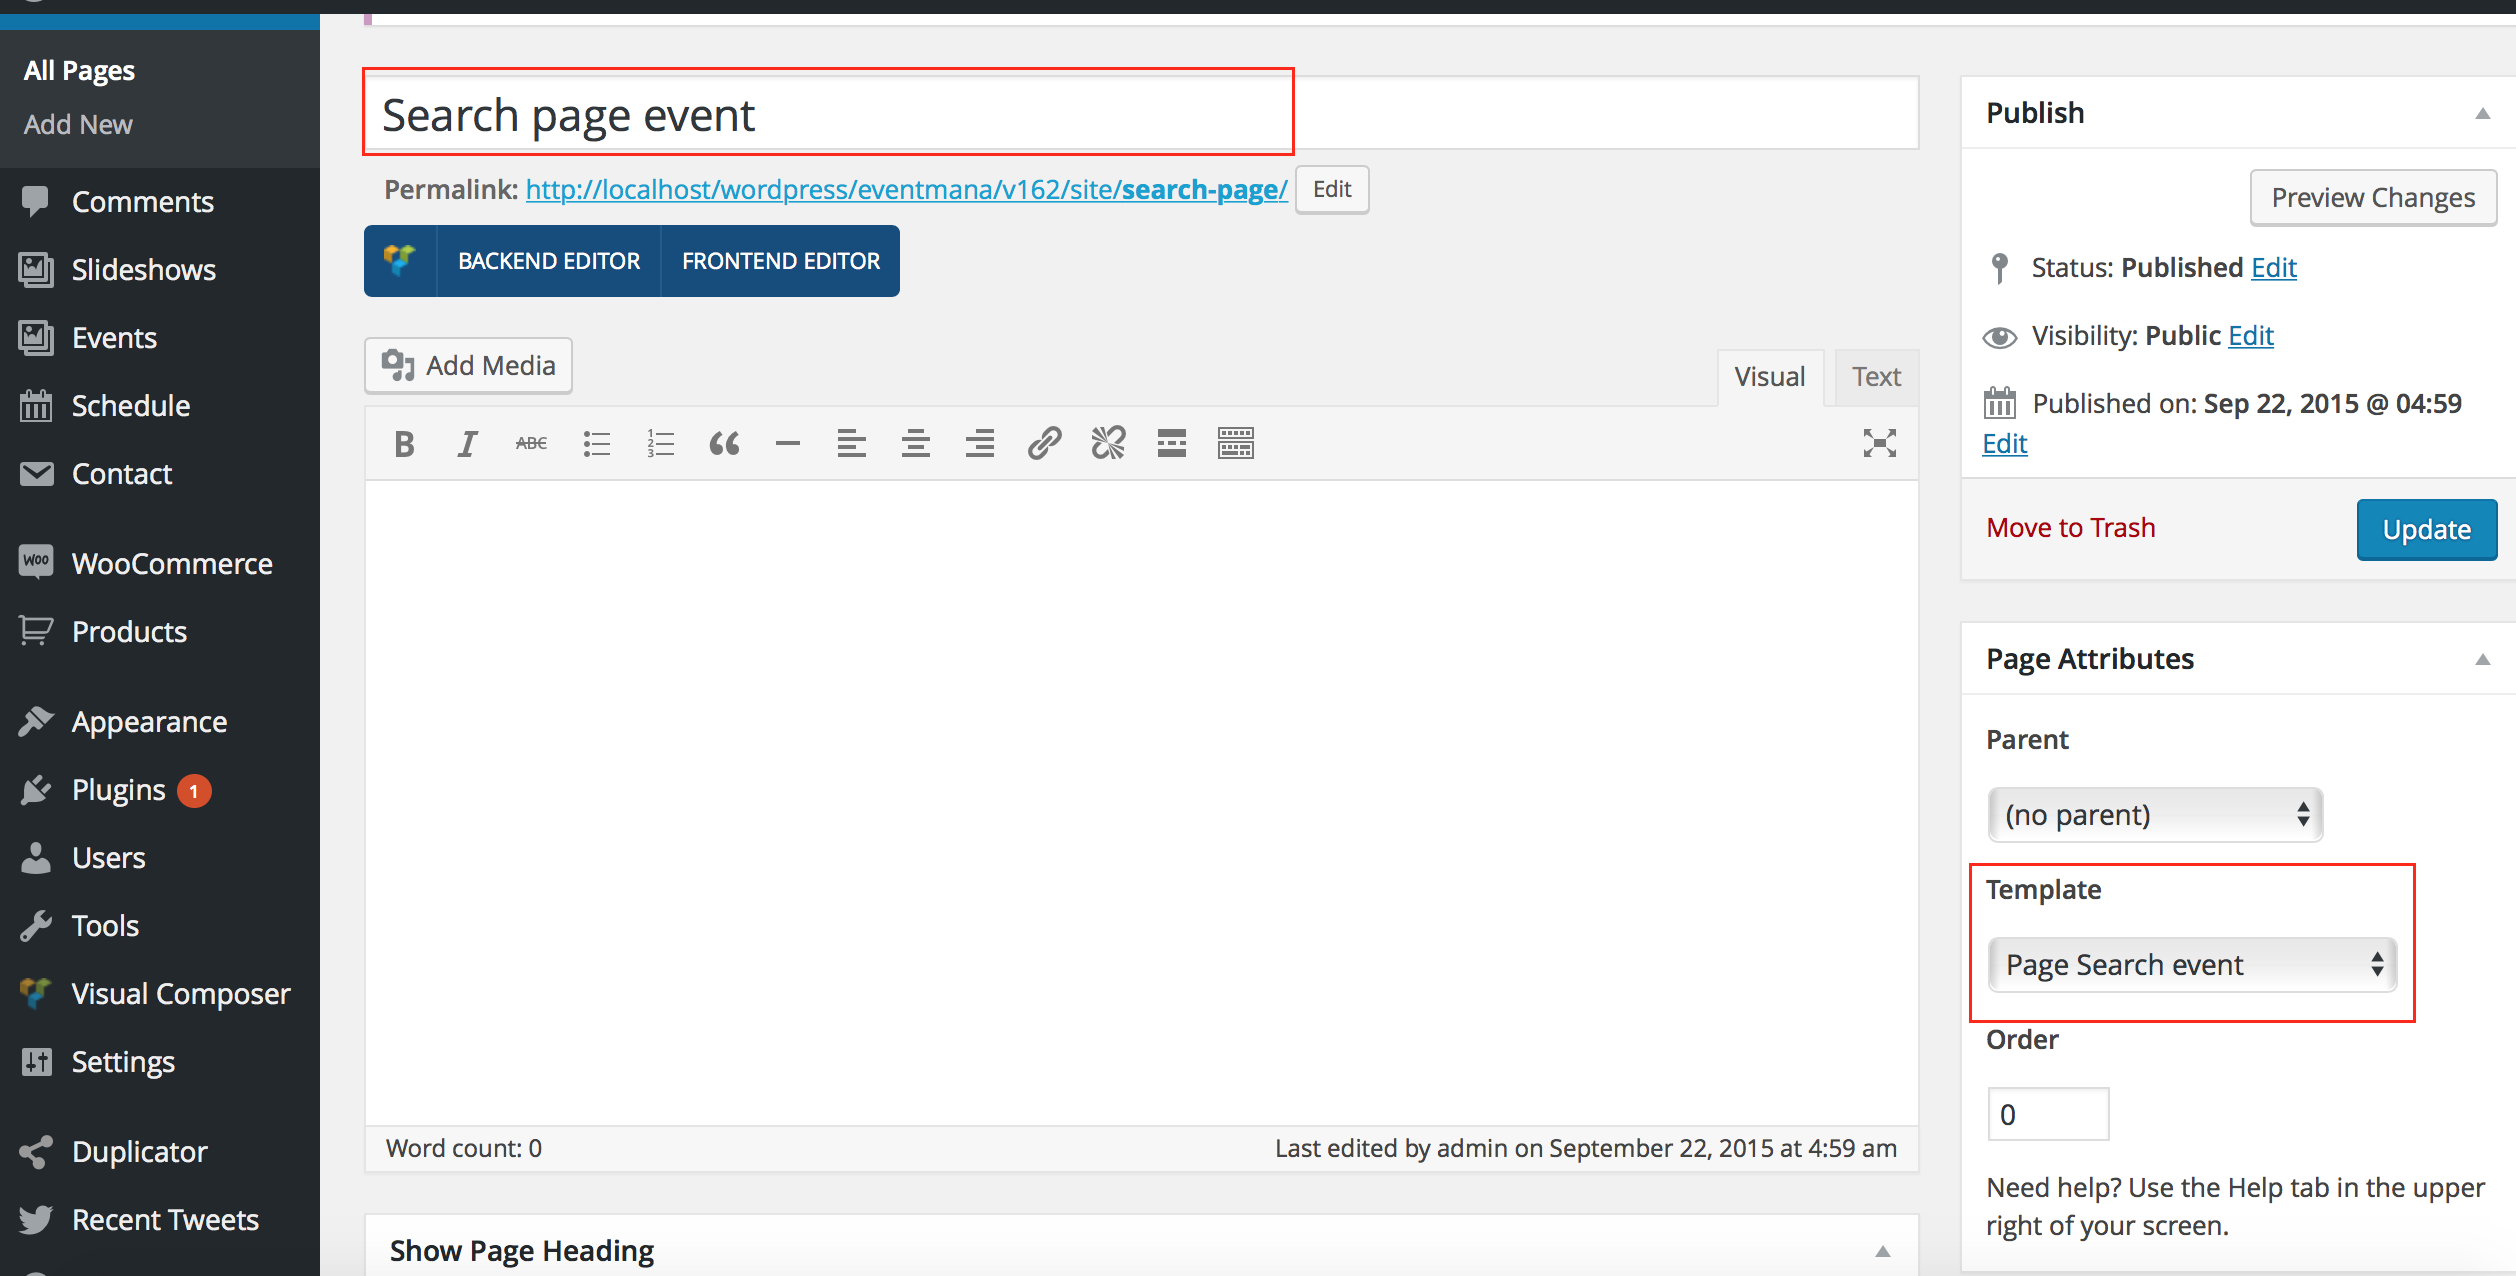
- Go to Appearance >> Widgets >> Choose "Event list page" >> Edit "Search Event" widget
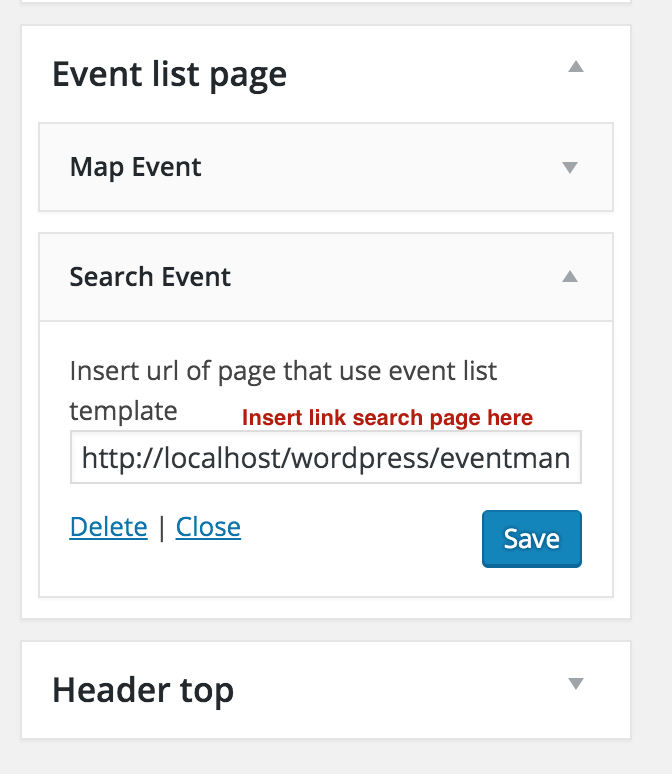
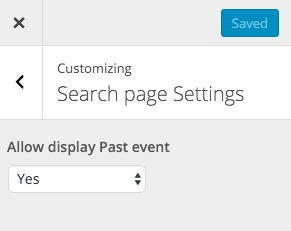
- Option for display Result Appearance >> Customizer >> Search page Settings
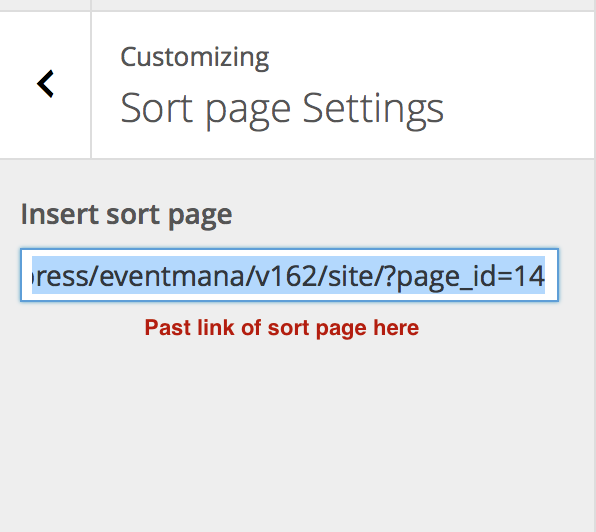
- Create Sort page

- Config in Appearance >> Customize >> Sort page settings
- Make event list page

- Option for display Result Appearance >> Customizer >> List page Settings

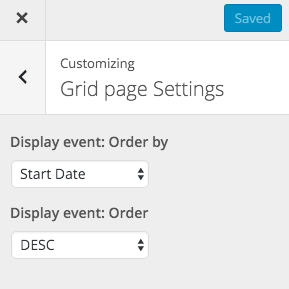
- Make Grid page

- Option for display Result Appearance >> Customizer >> Grid page Settings
- Make Event Past page
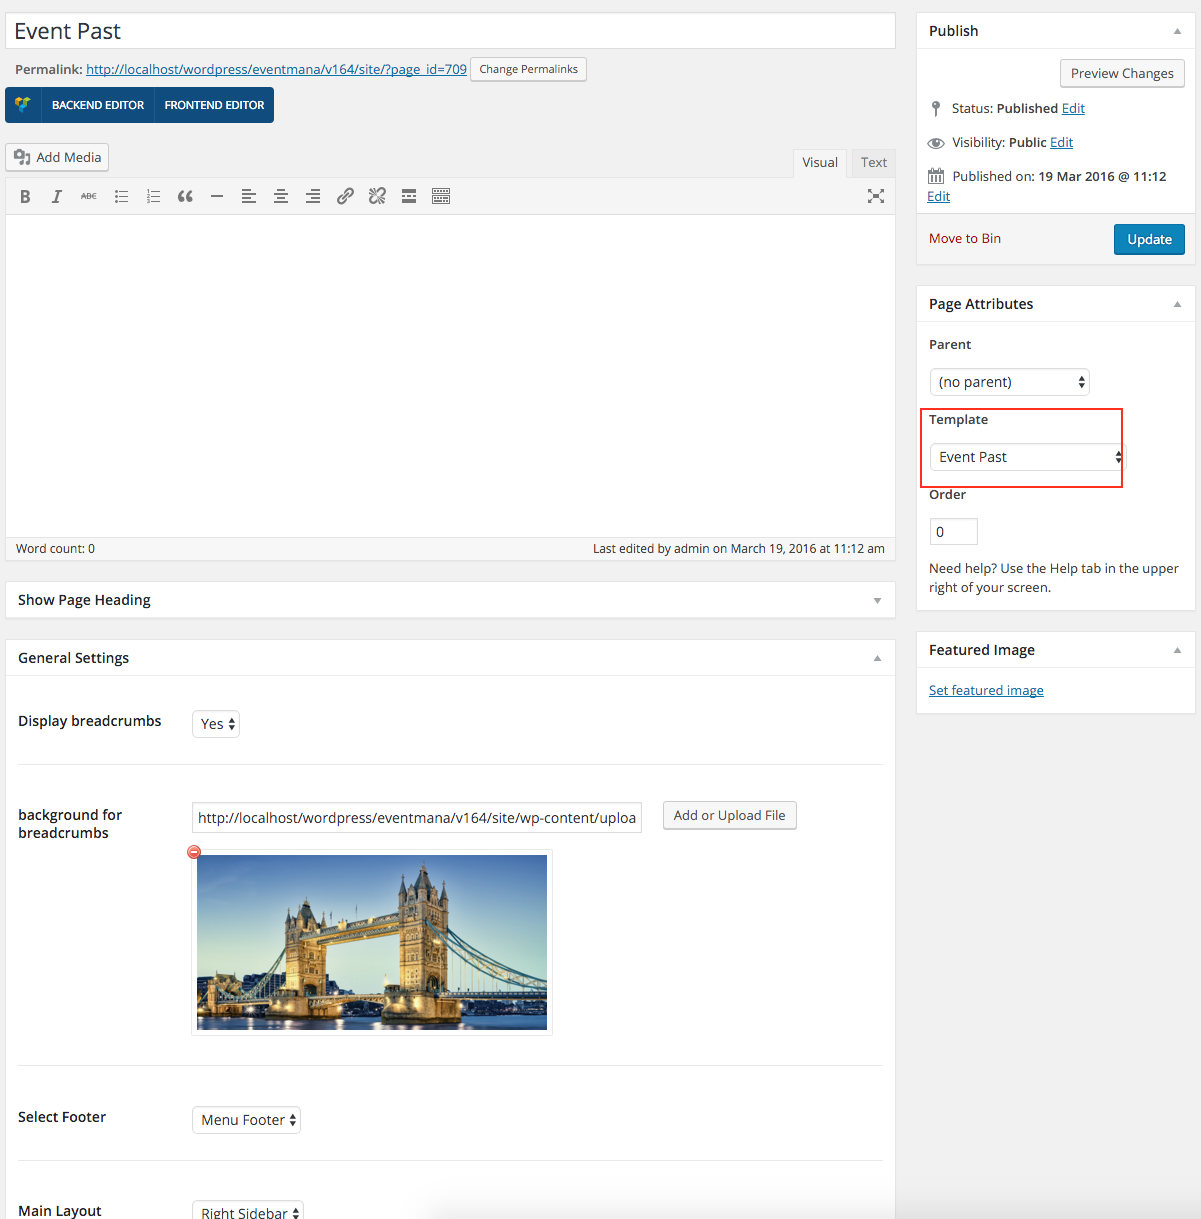
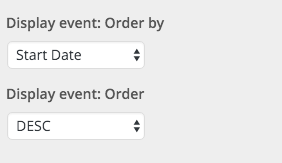
- Option for display Result Appearance >> Customizer >> Event past page Settings
- Make Upcoming page
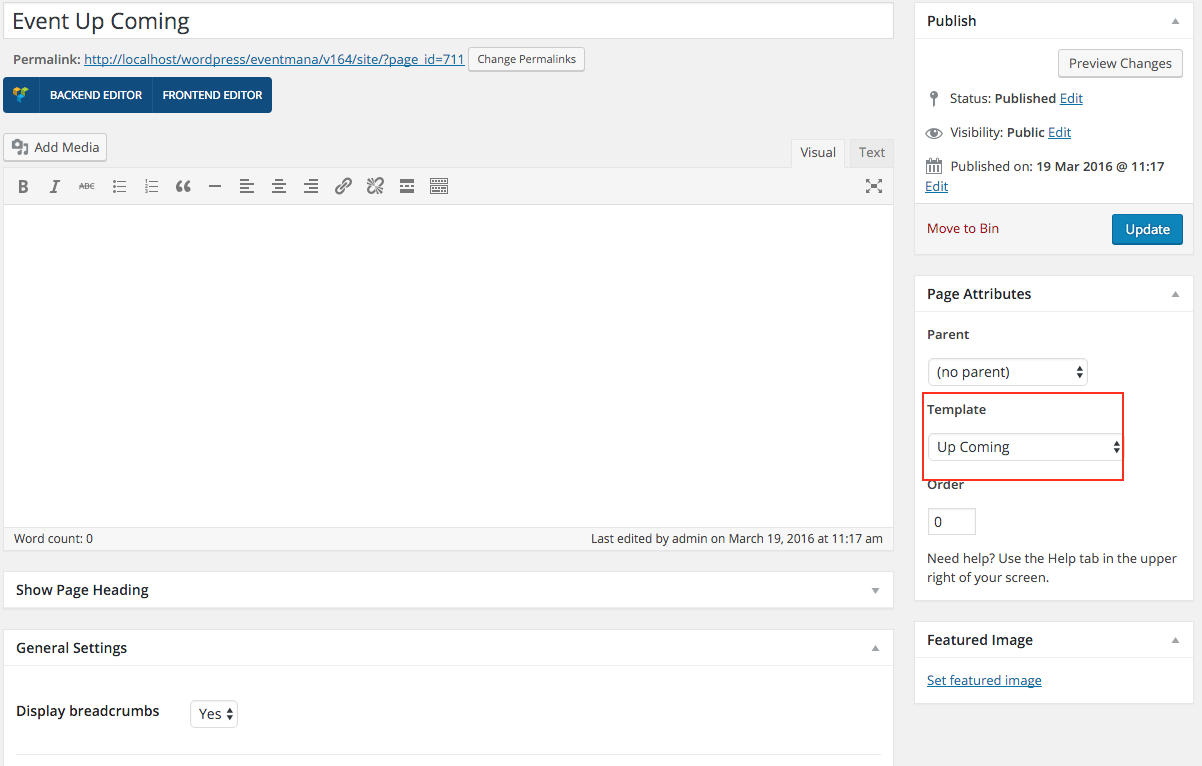
- Option for display Result Appearance >> Customizer >> Event upcoming page Settings
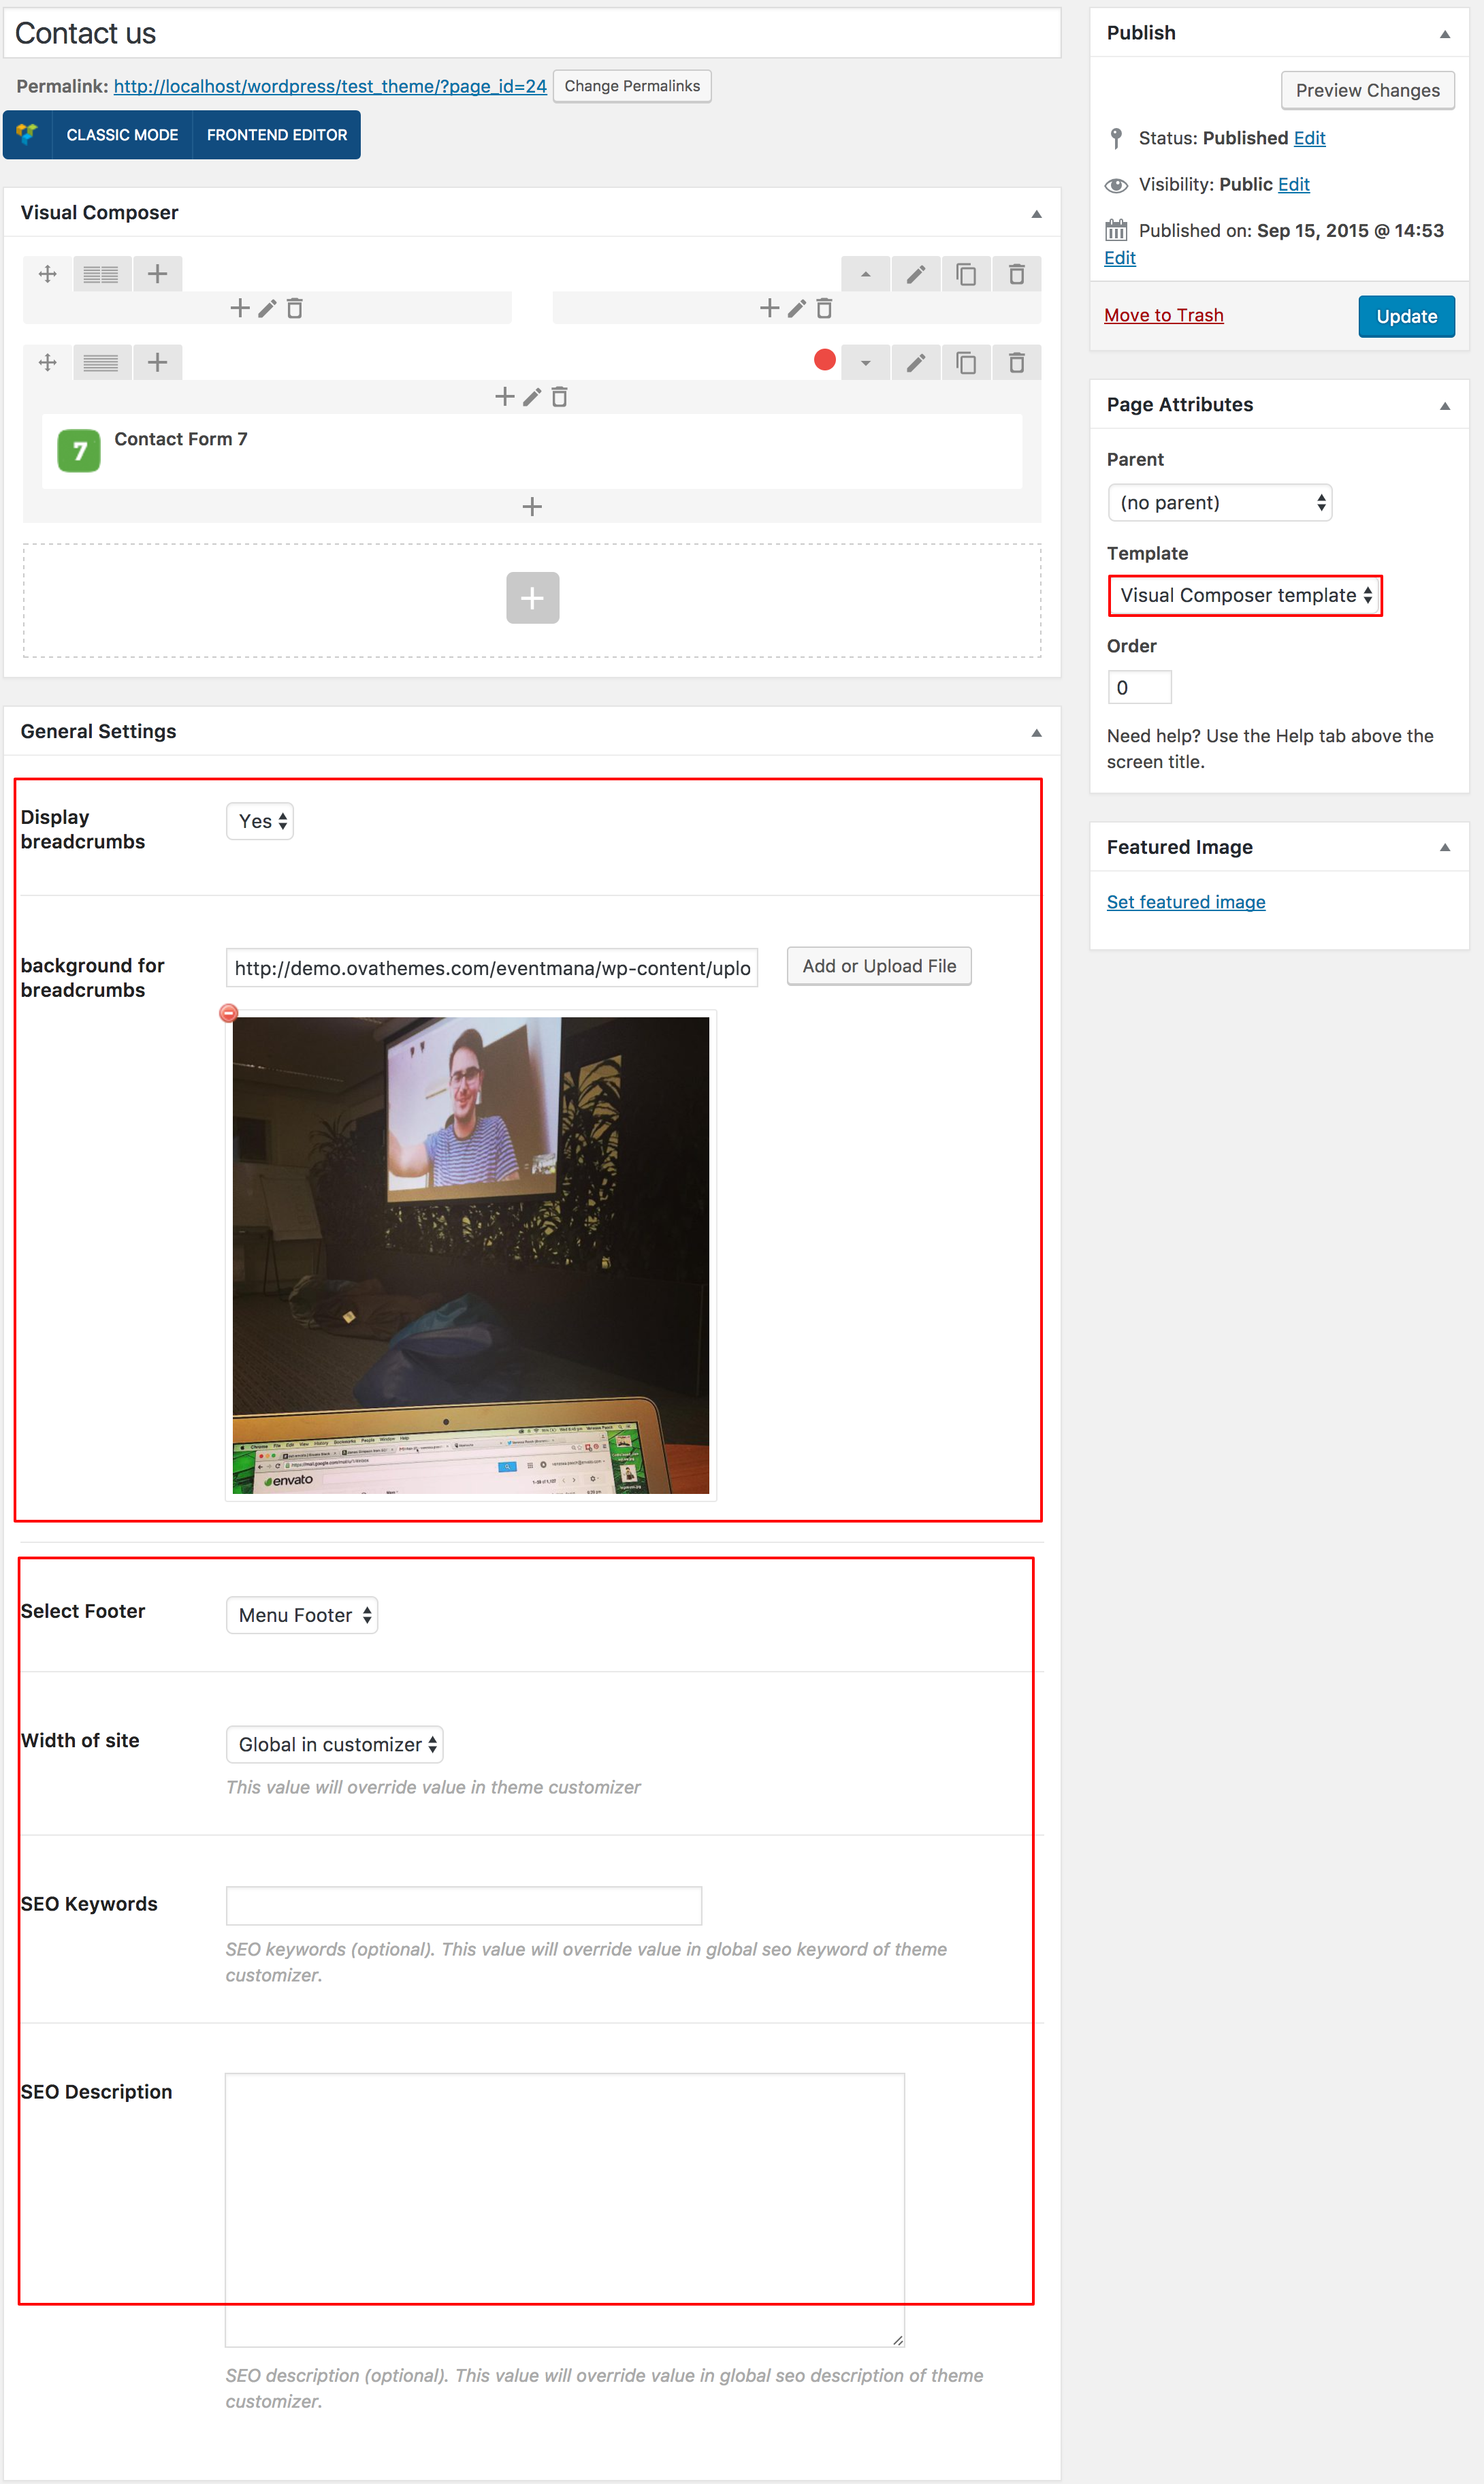
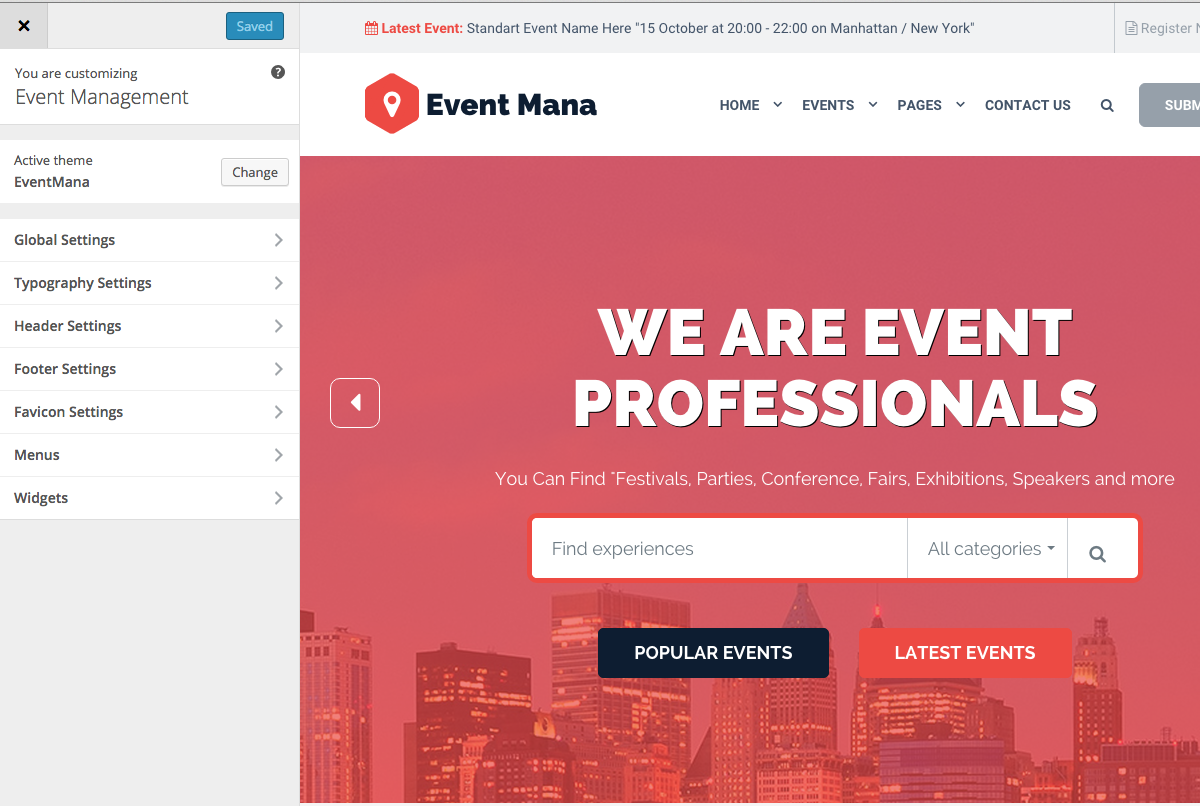
You can use some option for theme in: Appearance >> Customize
1: Slideshow header
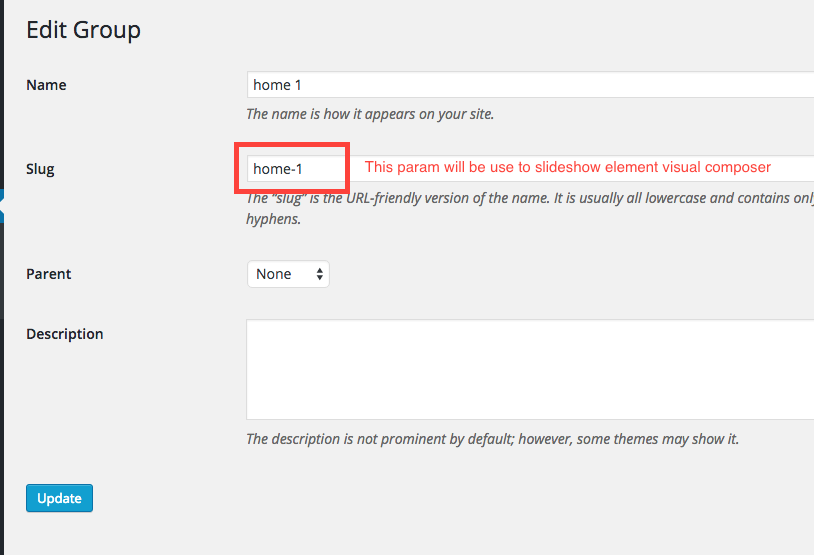
- Step 1: Create group
Slideshows >> Group >> Add new
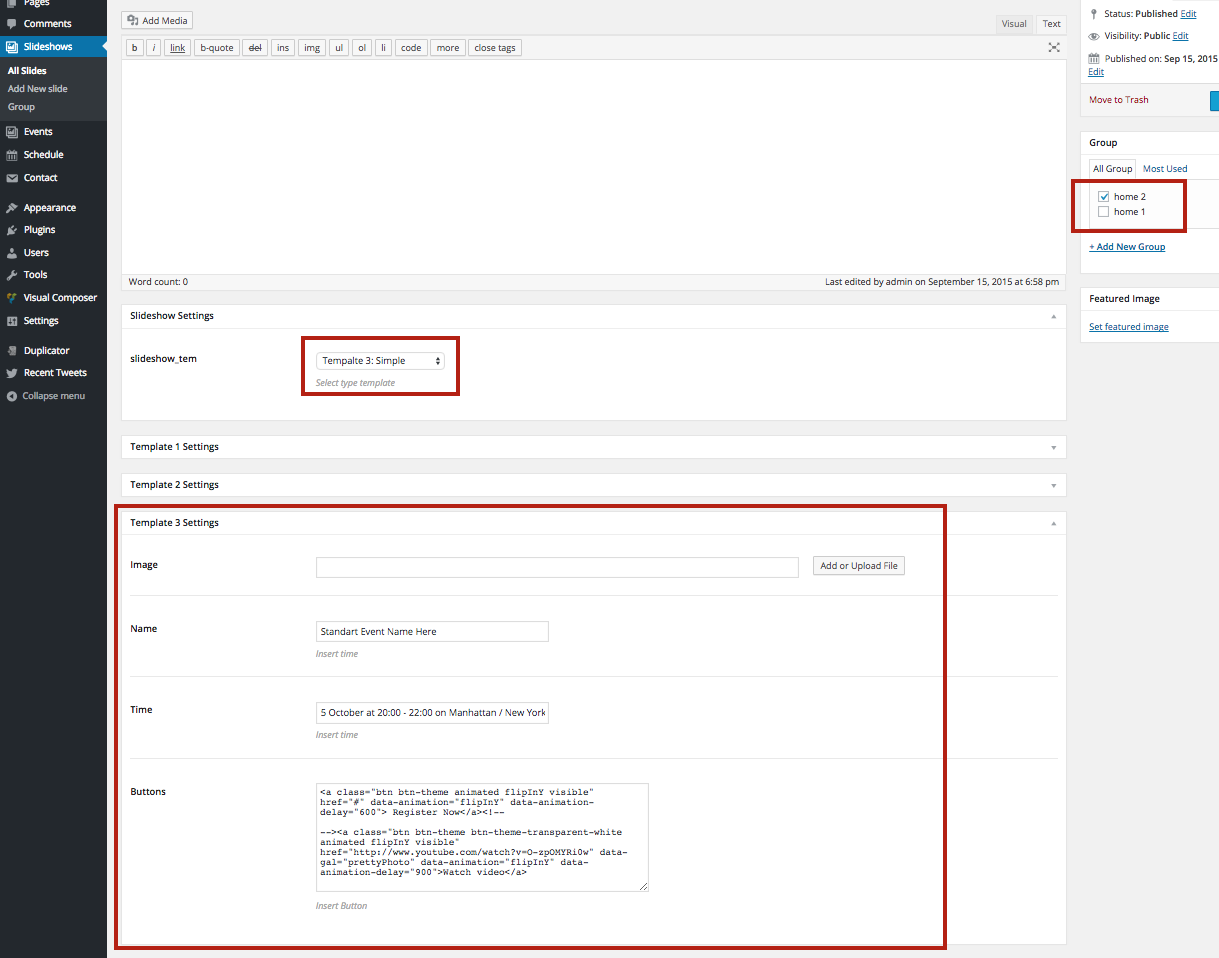
- Step 2: Create slide
+ Countdown Slide
+ Search Slide
+ Simple Slide
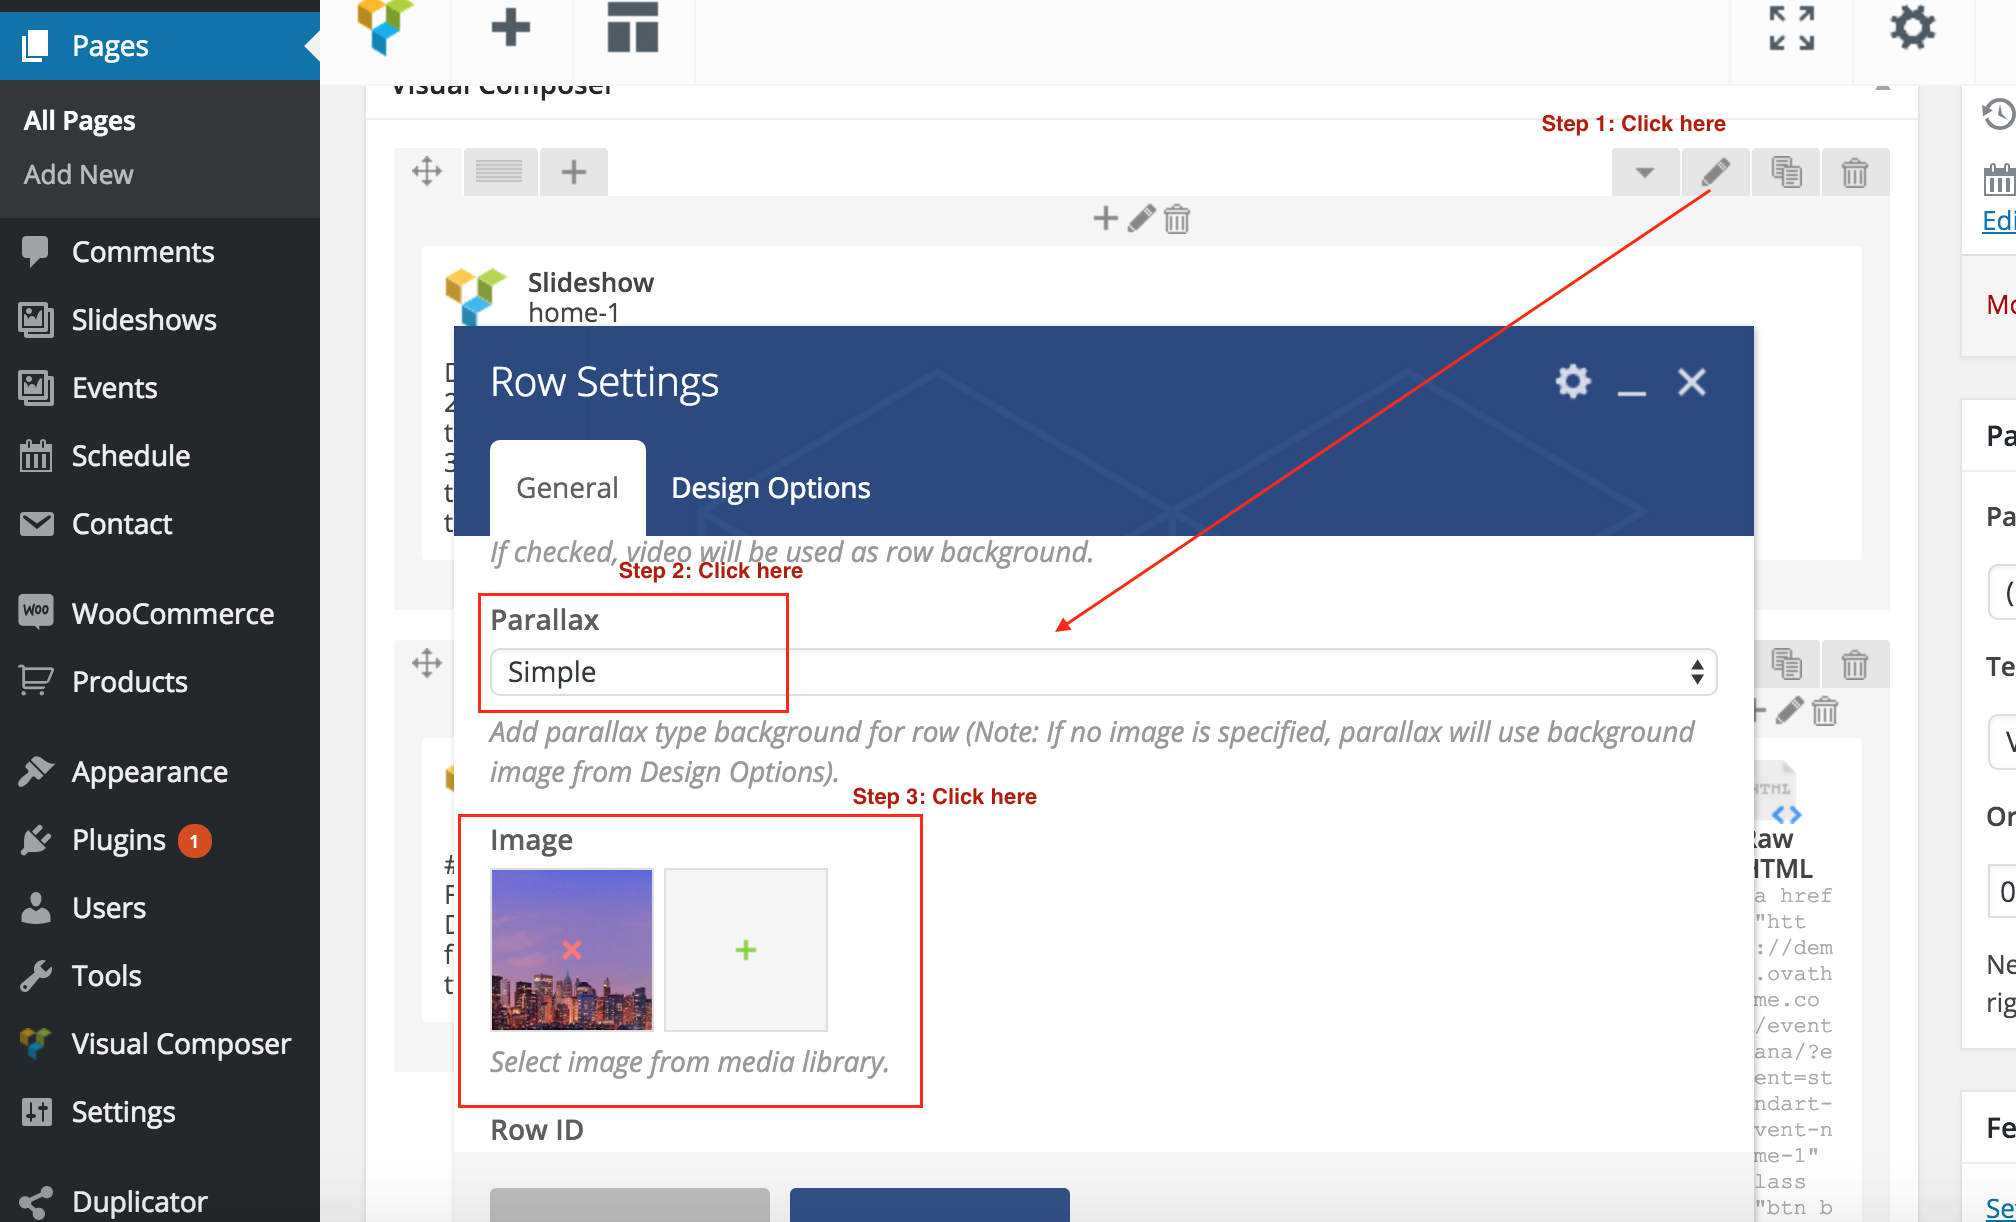
- You can change background in slideshow in Row setting
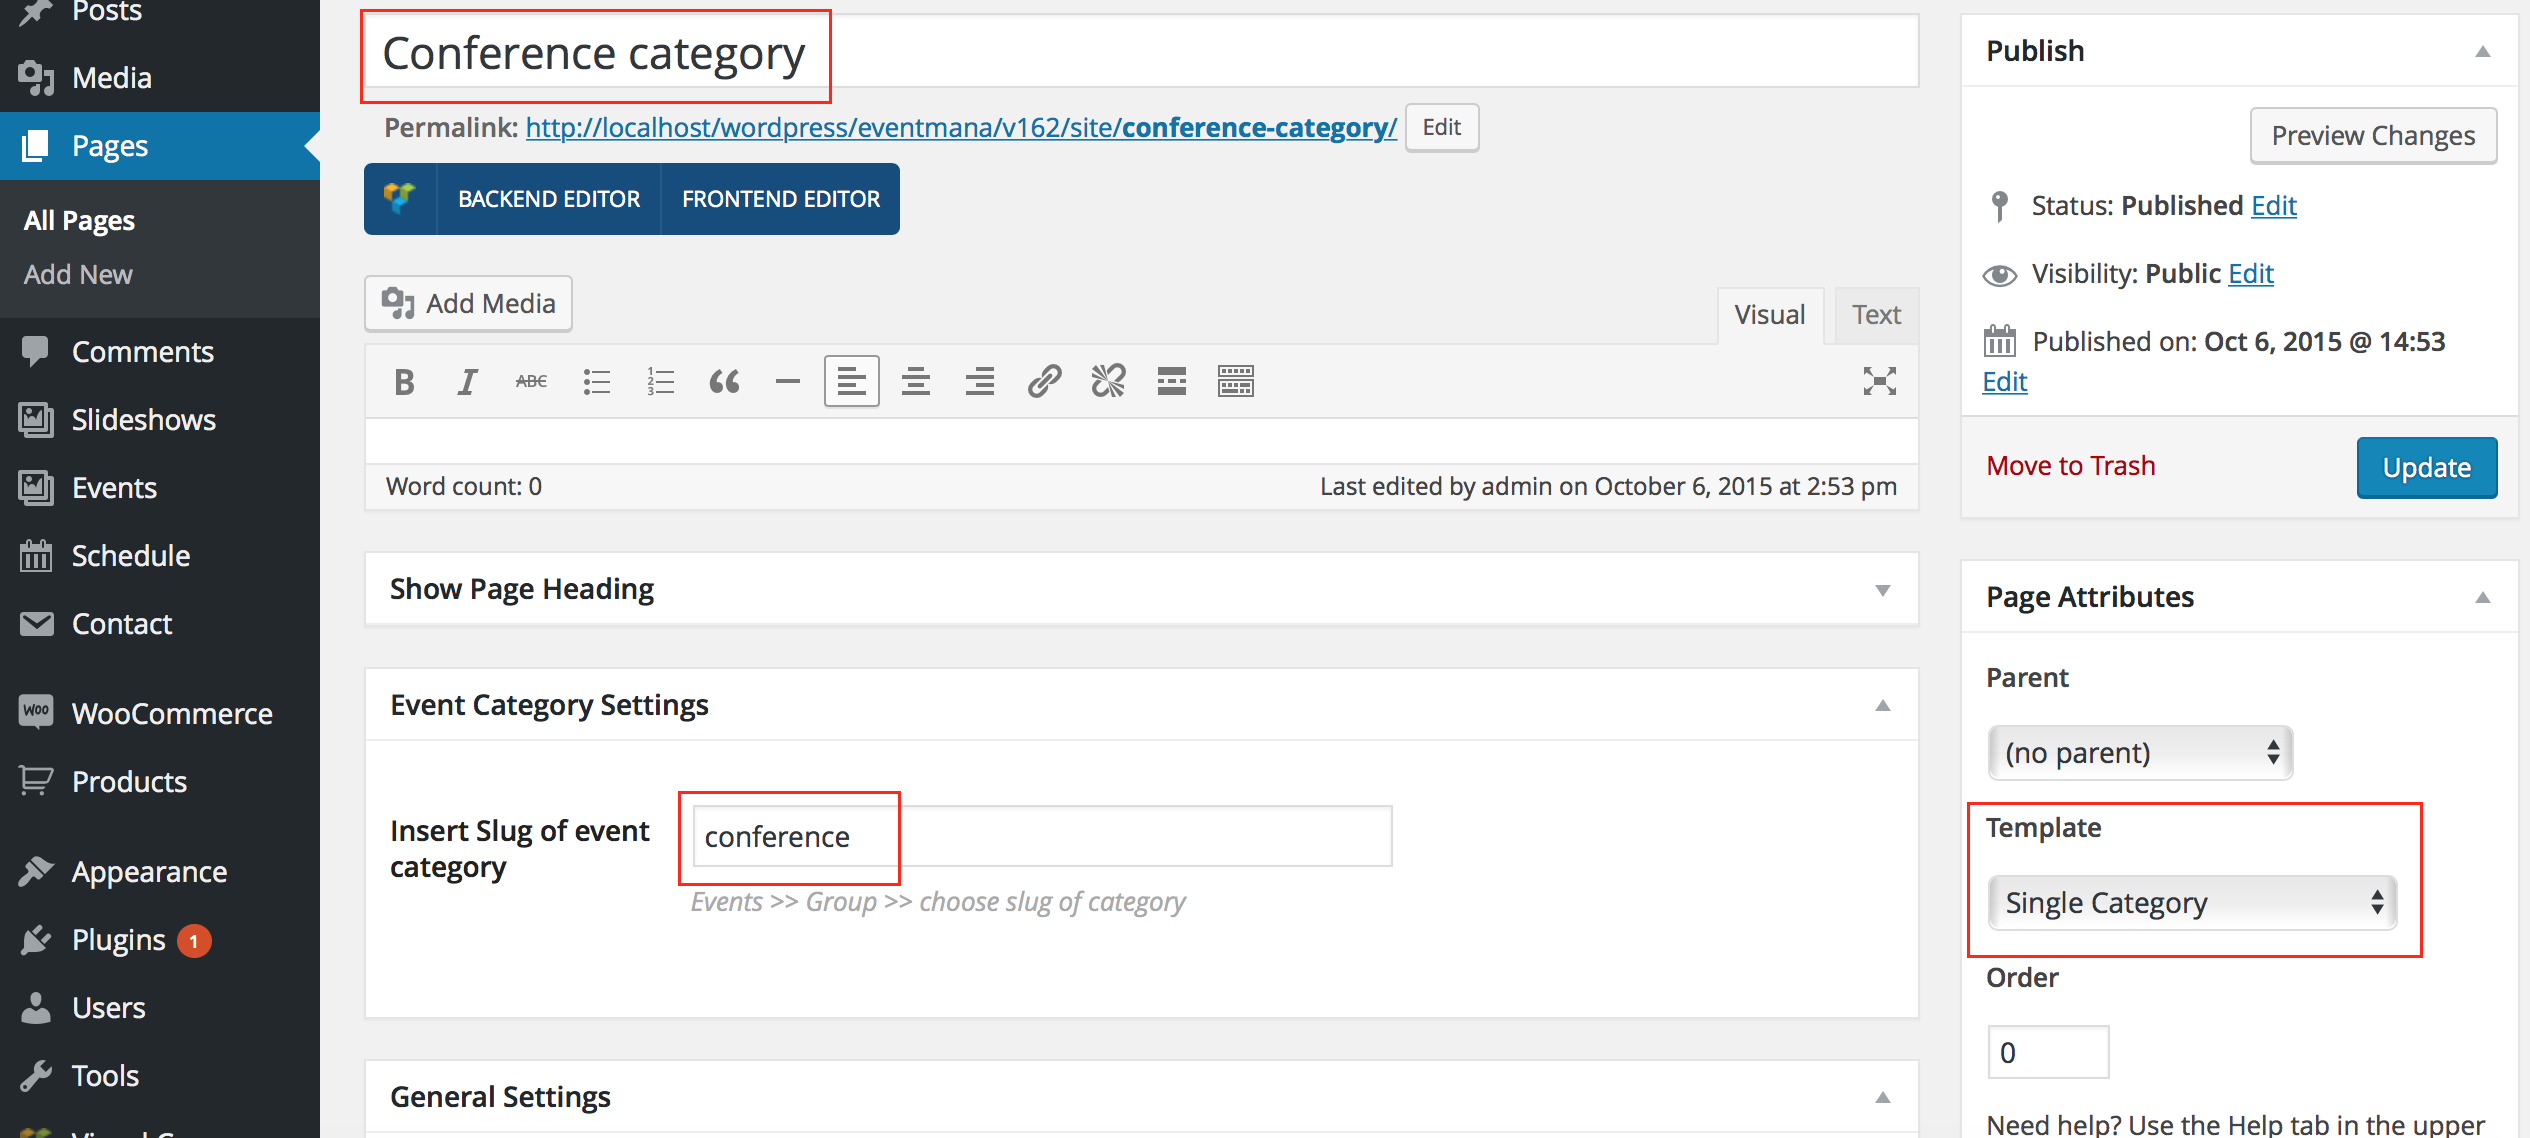
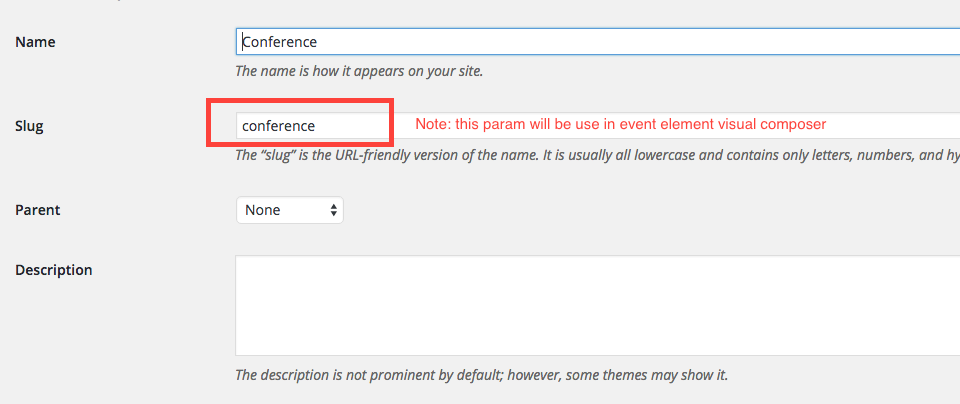
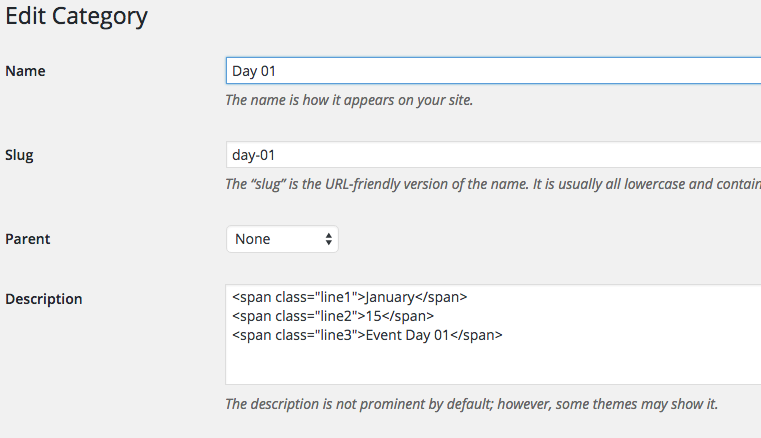
- Create category
- Create item event

- Create category
This is frontend
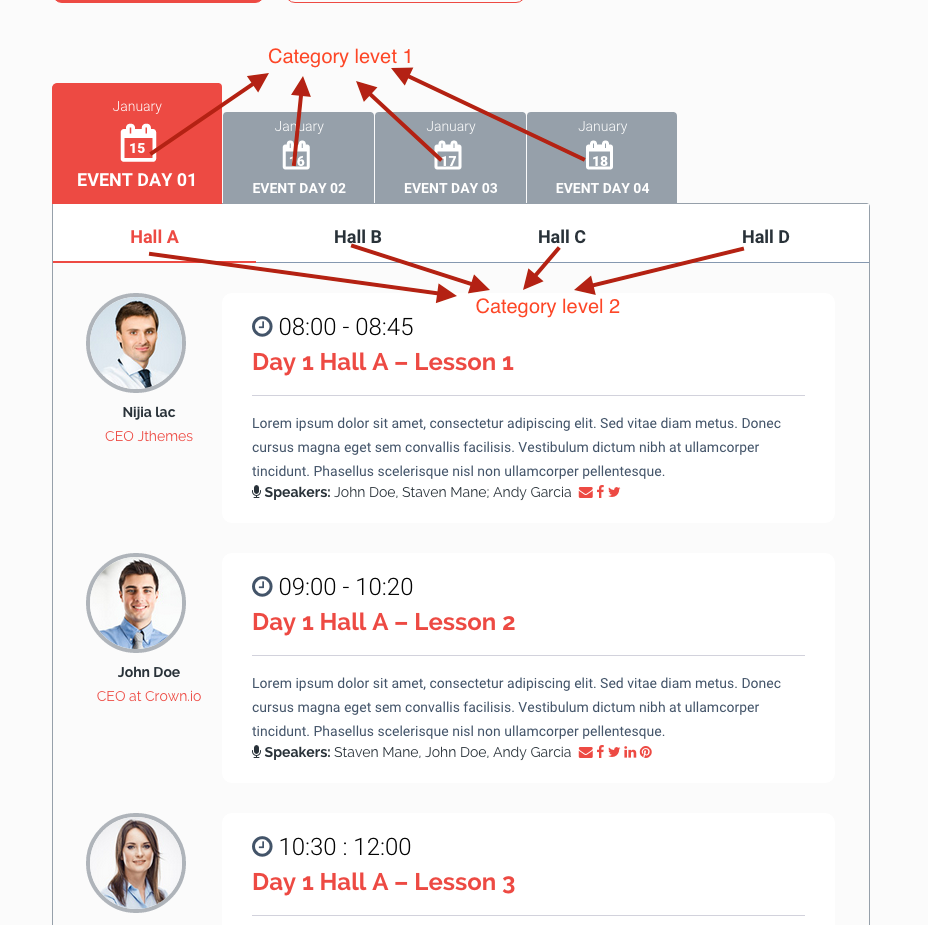
Create category level 1:
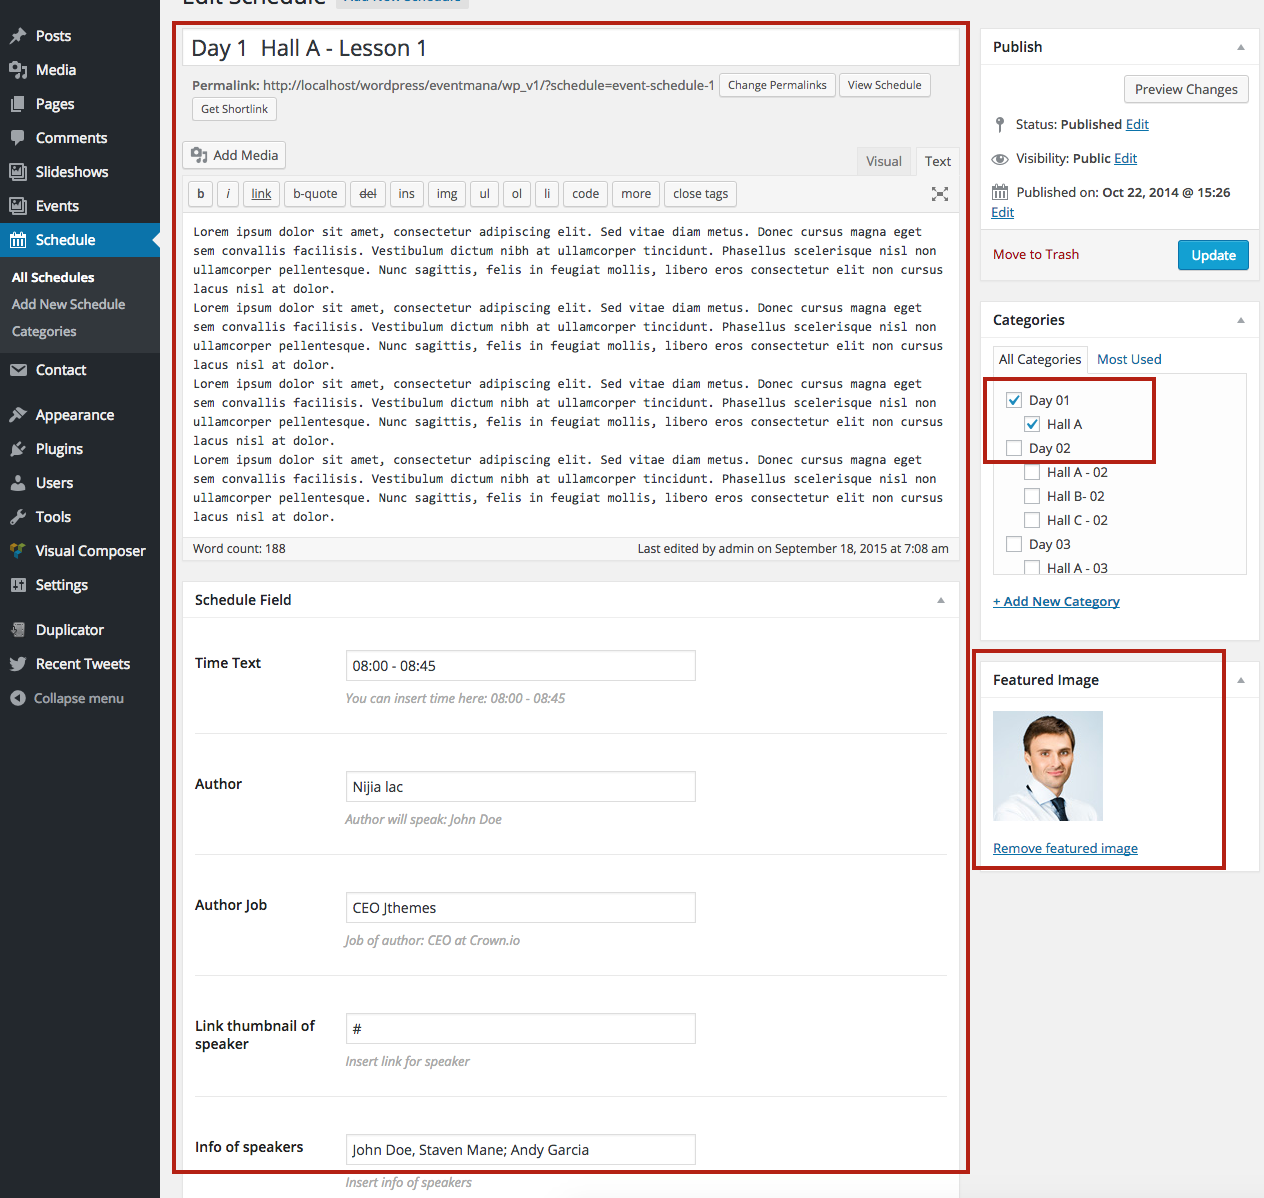
Create category level 2:

Create item for schedule
Step 1: Surely you installed Woocommerce plugin
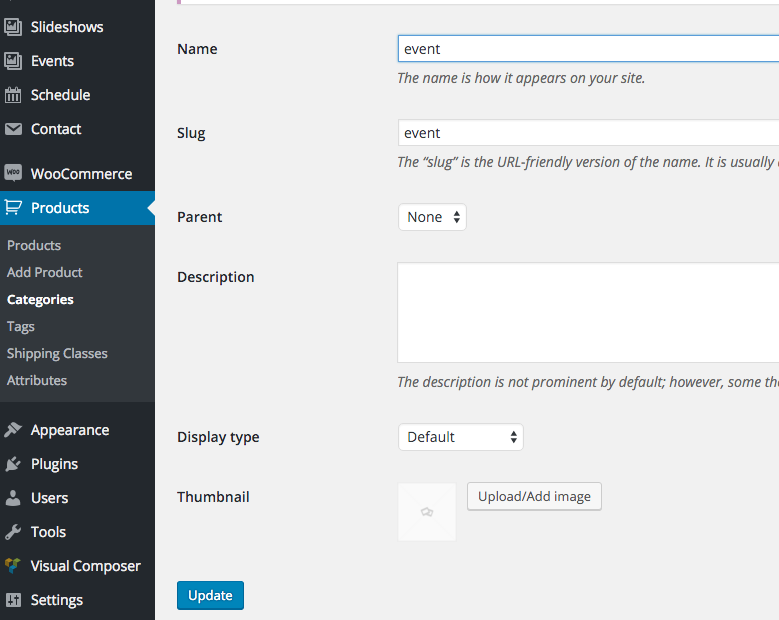
Step 2: Create catetory
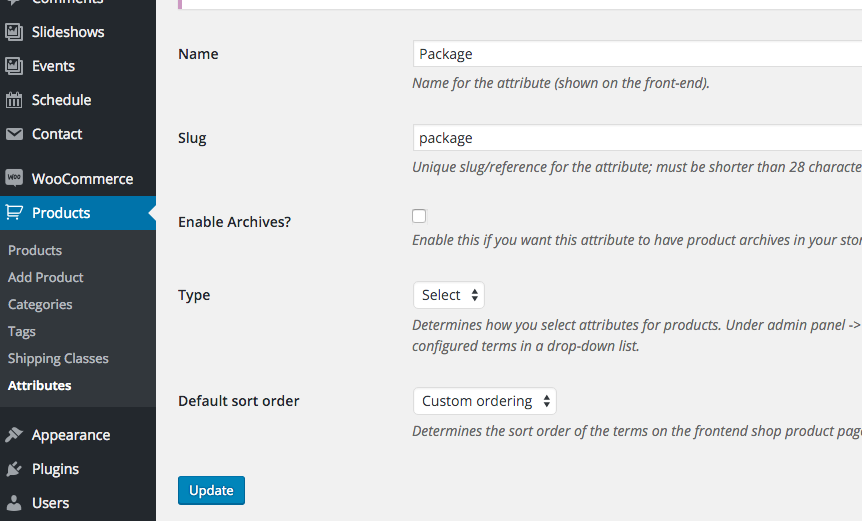
Step 3: Create Attribute


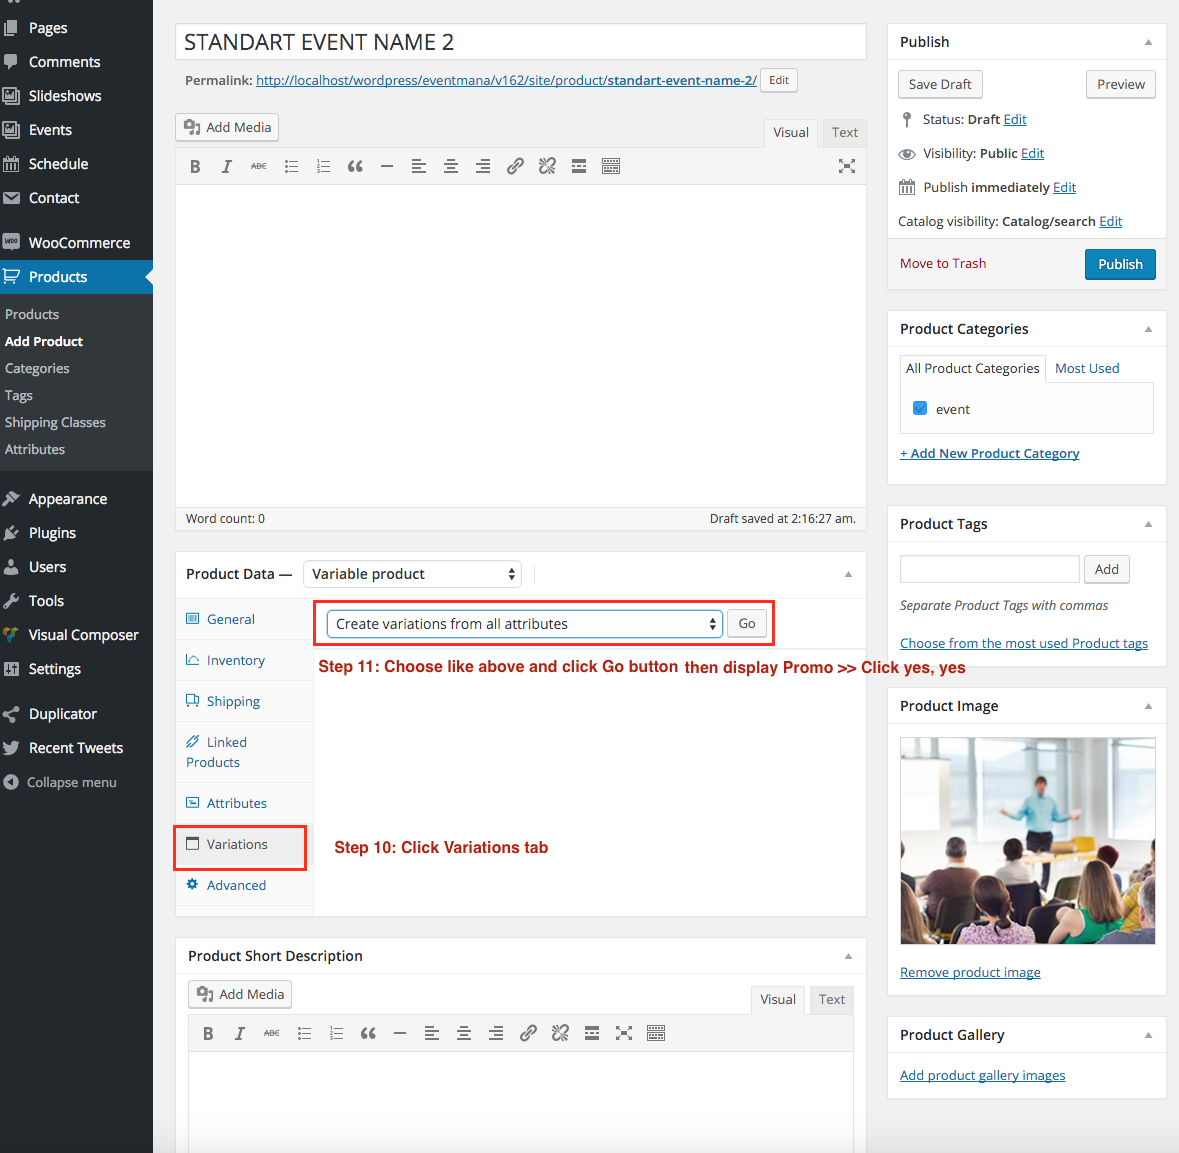
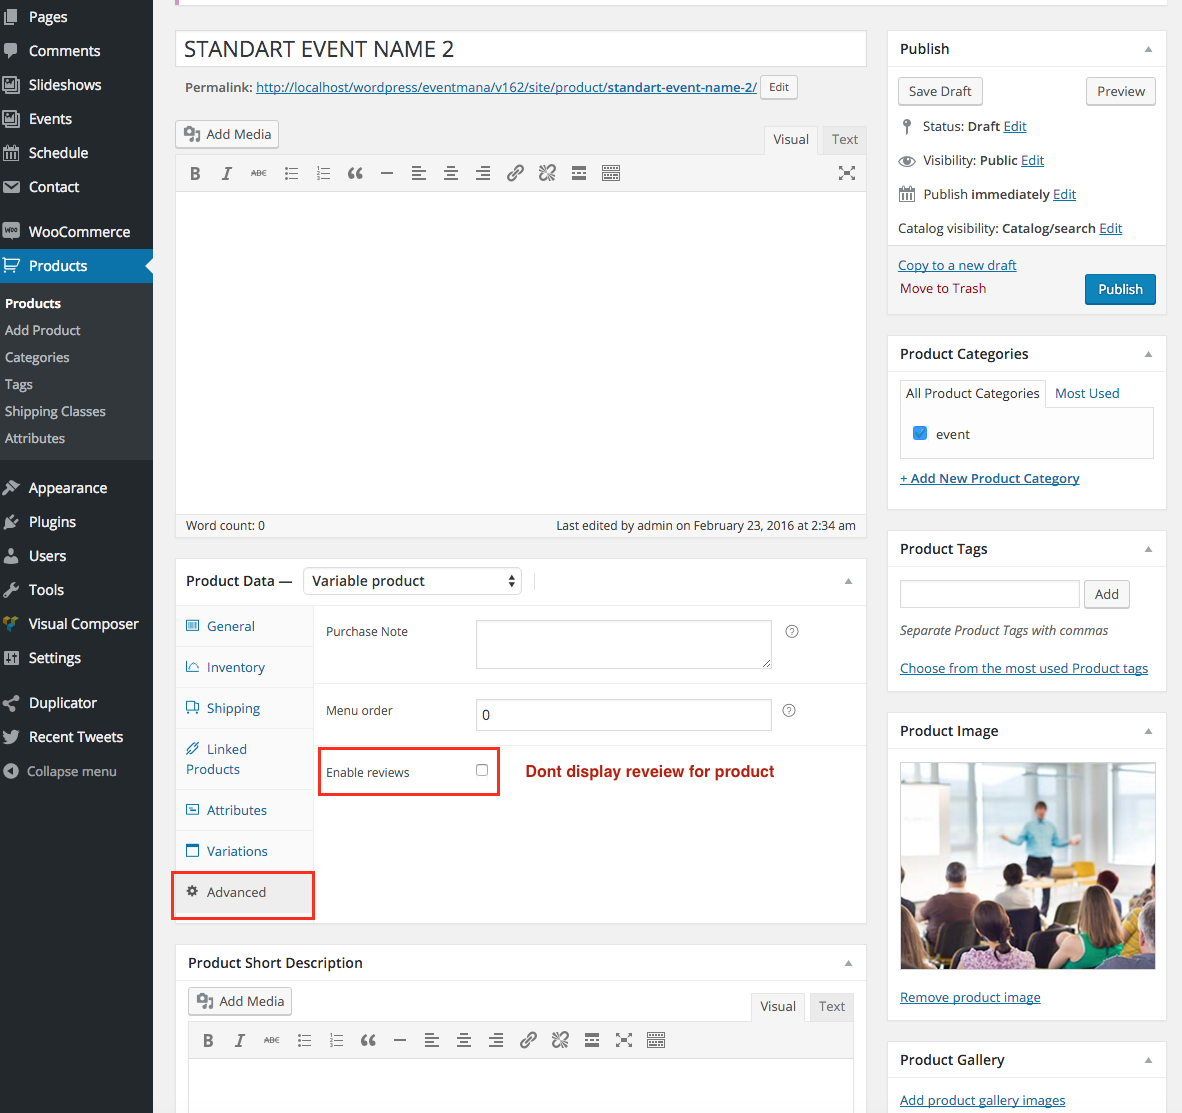
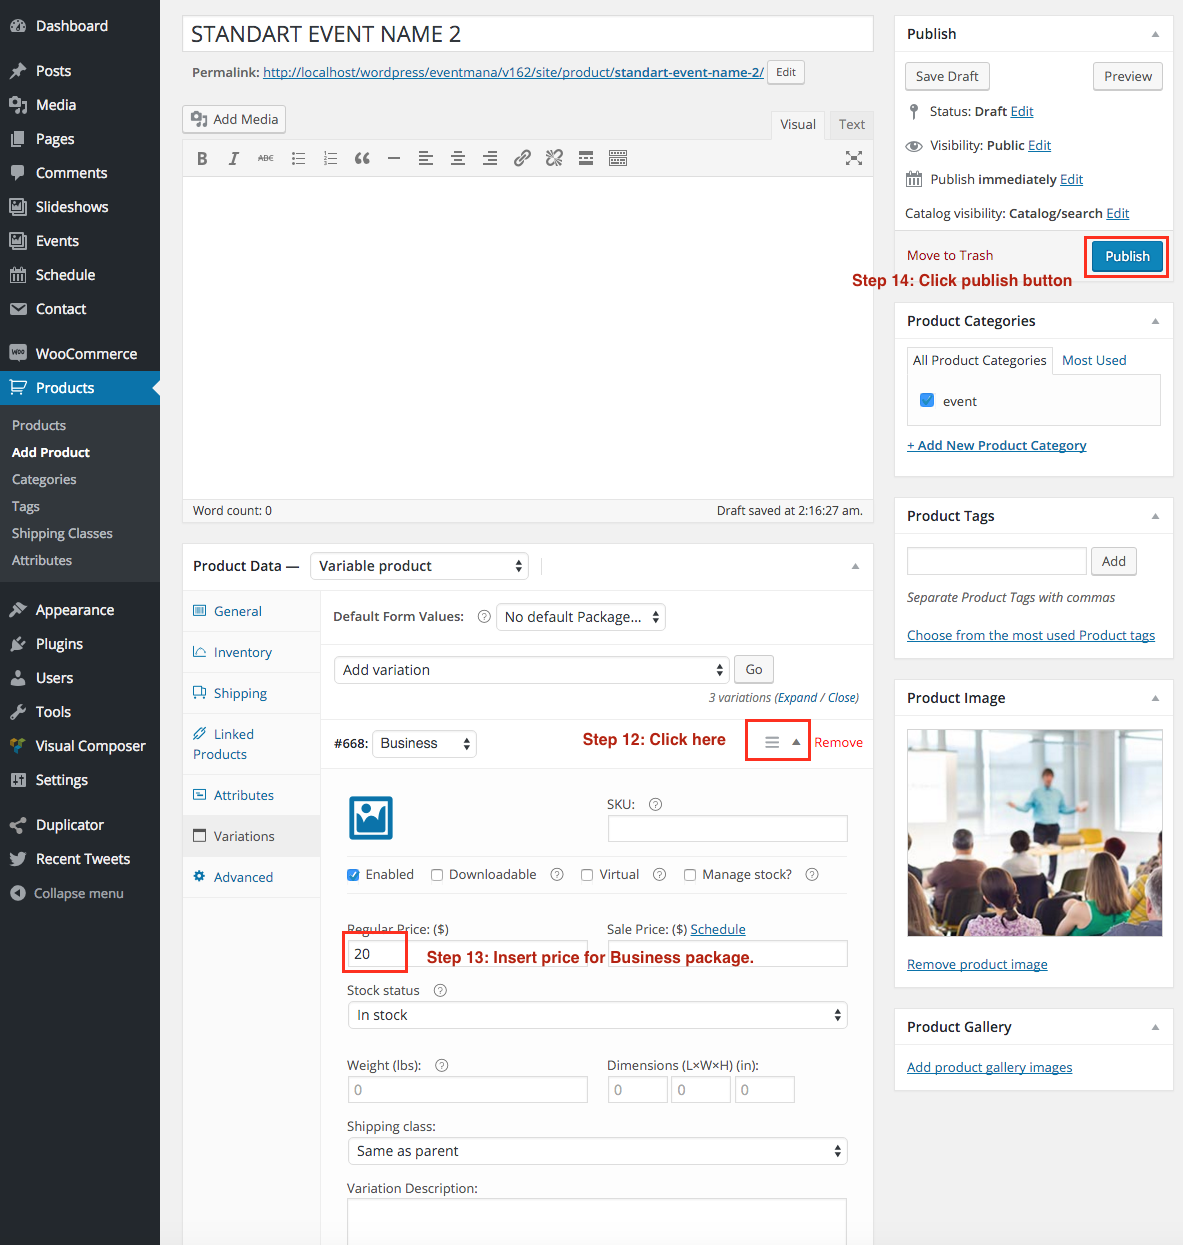
Step 4: Create Product


Step 5: Insert product link to event
- Go to Events >> All events >> Choose an event to edit

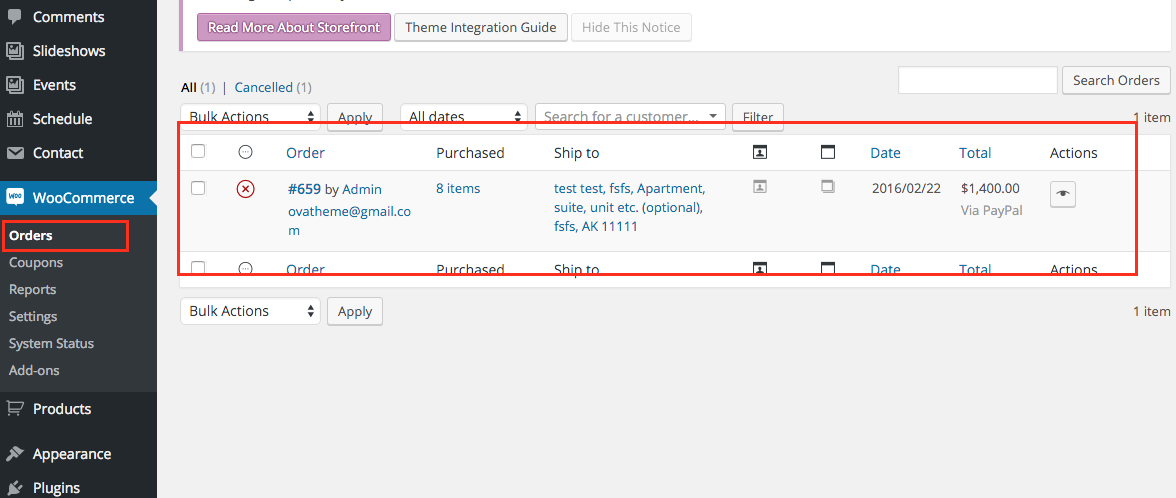
Step 6: Manage Order
[eventmana_slideshow slug_group="home-1" orderby="ID" order="DESC" count="2" auto_slider="true" duration="3000" navigation="true" loop="true" class="" /]
slug_group: Insert slug of group. For instalce: home-1. You can find in Slideshows >> Group
orderby: Insert ID | title | date | modified | random
order: DESC | ASC
count: Insert number. Example: 10
auto_slider: true | false
duration: Insert number (ms). Example: 3000
navigation: true | false
loop: true | false
class
[eventmana_slideshow_multi_bg slug_group="home-1" orderby="ID" order="DESC" count="2" auto_slider="true" duration="3000" navigation="true" loop="true" height_desk="768px" height_ipad="768px" height_mobile="768px" class="" /]
slug_group: Insert slug of group. For instalce: home-1. You can find in Slideshows >> Group
orderby: Insert ID | title | date | modified | random
order: DESC | ASC
count: Insert number. Example: 10
auto_slider: true | false
duration: Insert number (ms). Example: 3000
navigation: true | false
loop: true | false
height_desk: Height of slideshow like 768px
height_ipad: Height of slideshow like 768px
height_mobile: Height of slideshow like 768px
class
[eventmana_countdown end_day="" end_month="" end_year="" display_format="dHMS" timezone="0" years="years" months="months" weeks="weeks" days="days" hours="hours" minutes="minutes" seconds="seconds" year="year" month="month" week="week" day="day" hour="hour" minute="minute" second="second" id="unique_id" class="" ]
end_day: For example: 10
end_month: Insert from 1 to 12. For example: 5
end_year: For example: 2015
display_format: Display Format: dHMS. d: Day, H: Hour, M: Month, S: Second. You can insert HMS or dHM or dH. default dHMS
timezone: The timezone (hours or minutes from GMT) for the target times.
For example:
If Timezone is UTC-9:00 you have to insert -9
If Timezone is UTC-9:30, you have to insert -9*60+30=-570.
Read about UTC Time: http://en.wikipedia.org/wiki/List_of_UTC_time_offsets
years: Insert your language
months: Insert your language
weeks: Insert your language
days: Insert your language
hours: Insert your language
minutes: Insert your language
seconds: Insert your language
year: Insert your language
month: Insert your language
week: Insert your language
day: Insert your language
hour: Insert your language
minute: Insert your language
second: Insert your language
id: If you want use 2 countdown in a page, you have to insert 2 different ID
class: Insert your class
[eventmana_heading icon="" icon_bg="" icon_color="" title="" desc="" display_slash="" class="" /]
icon: Insert font awesome. You can find it here: http://fortawesome.github.io/Font-Awesome/icons/. Example: fa-heart
icon_bg: Background of icon. Example: #555555
icon_color: Color of icon. Example: #cccccc
title:
desc:
display_slash: true | false
class:
[eventmana_eventfilter array_slug="" count="10" order_by="ID" order="DESC" alltext="All" ticketdetail="Tickets & Details" icon="fa-star" tab_active="" style="style1" class="" /]
array_slug: Insert slugs. From Left sidebar >> Events >> Group >> See Slug column in list category. For example: festival,conference,playground
count: Item count for each category
order_by: ID | title | date | modified | rand
order: DESC | ASC
alltext: Change All text in filter navigation
ticketdetail: Change label of button
icon: Insert font awesome
tab_active: Insert a slug of event group, like festival. if empty will active All tab
style: style1 | style2
class
[eventmana_feature icon="" title="" desc="" label_button="" button_link="" target="" class="" /]
icon: Insert font awesome
title
desc
label_button
button_link
target: _blank or empty field
class
[eventmana_hotel item_slide="4" duration="3000" autoplay="true" navigation="true" loop="true" class="" ][eventmana_hotel_item image="" title="" rate="5" desc="" label_detail_button="" link_detail_button="#" target_detail_button="_blank" label_detail_book="" link_detail_book="#" target_detail_book="_blank" class=""/][/eventmana_hotel]
For eventmana_hotel shortcode
item_slide: Count items each slide
duration: Duration ms. 1000ms=3s
autoplay: true | false
navigation: true | false
loop: true | false
For eventmana_hotel_item shortcode
image: Insert link of image
title
rate: Insert from 1 to 5
desc
label_detail_button
link_detail_button
target_detail_button: _blank or empty field
label_detail_book
link_detail_book
target_detail_book: _blank or empty field
class
[eventmana_testimonial duration="3000" autoplay="true" dots="true" loop="true" style="style1" class=""][eventmana_testimonial_item image="" description="" author="" subtitle="" style="style1" class=""/][/eventmana_testimonial]
For eventmana_testimonial shortcode
duration: Duration ms. 1000ms=3s
autoplay: true | false
dots: true | false
loop: true | false
style: style1 | style2
class
For eventmana_testimonial_item shortcode
image: Link of image
description
author
subtitle
style: style1 | style2 like parent
class
[eventmana_speaker item_slide="4" duration="3000" autoplay="" navigation="" loop="" class="" ][eventmana_speaker_item image="" name="" job="" desc="" link="" target="" social="" class="" /][/eventmana_speaker]
For eventmana_speaker shortcode
item_slide: Count items each slide
duration:Duration ms. 1000ms=3s
autoplay: true | false
navigation: true | false
loop: true | false
class
For eventmana_speaker_item shortcode
image: link of image
job
desc
link
target: _blank or empty
social
class
[eventmana_latestblog count="3" showdate="true" showcomment="true" showdescription="true" showreadmore="true" readmore_text="read more" item_slide="4" duration="3000" autoplay="true" navigation="true" loop="true"/]
count: Total item display
showdate: true | false
showcomment: true | false
showdescription: true | false
showreadmore: true | false
readmore_text: Insert text
item_slide: count items in each slide
duration: Duration ms. 1000ms=3s
autoplay: true | false
navigation: true | false
loop: true | false
[eventmana_location defineid="map-canvas" latitude="40.9807648" longitude="28.9866516" zoom="12" heading="" fontclass="" button_name="" button_font_class="" button_link="" marker_title="" style_icon="rhex" target_link="_blank" class="" /]
defineid: If you use 2 location shortcode in a page, you have to insert 2 different id
latitude: Insert latitude parameter for google map. For instance: 40.9807648
longitude: Insert longitude parameter for google map. For instance: 28.9866516
zoom: Insert zoom parameter for google map. Default 12
heading
fontclass: Insert awesome class beside heading
button_name
button_font_class: Insert awesome class beside button
button_link
marker_title: Insert marker title
style_icon: rhex | crcle | wohex
target_link: _blank or empty field
class
[eventmana_gallery icon="" filter="Photos:photos,Videos:videos,Gallery:gallery" all_text="" class=""][eventmana_gallery_item thumbnail="" alt="" lightbox_image="" title="" cat="" filter="" class="" /][/eventmana_gallery]
For eventmana_gallery shortcode
icon: Insert font awesome
filter: Insert filter like: Photos:photos,Videos:videos,Gallery:gallery. Note: Photos is name filter, photo is slug that you will insert in gallery item element
all_text: Insert text
class:
For eventmana_gallery_item shortcode
thumbnail: link of image thumbnail
alt: alt of image
lightbox_image: link of large image
title
cat: Category like Photo, Video
filter: insert slug in Gallery item. like photo, video
class
[eventmana_imgcarousel duration="3000" autoplay="true" navigation="true" loop="true" class="" ][eventmana_imgcarousel_item image="" alt="" class="" /][/eventmana_imgcarousel]
For eventmana_imgcarousel shortcode
duration: Duration ms. 1000ms=3s
autoplay: true | false
navigation: true | false
loop: true | false
class
For eventmana_imgcarousel_item shortcode
image: Link of image
alt: alt of image
class
[eventmana_schedule array_slug="" schedule_order_by="ID" schedule_order="DESC" schedule_count="100" schedule_display_thumbnail="1" schedule_display_time="1" schedule_display_author="1" schedule_display_author_job="1" schedule_display_speaker="1" schedule_display_desc="1" schedule_display_social="1" schedule_icon_time="" schedule_icon_microphone="" speakers_text="" class="" /]
array_slug: Insert slug of level 1 category. for instance: day-01, day-02, day-03, day-04<br/>You will find all category slug in Schedule >> Categories
schedule_order_by: ID | title | date | modified | rand
schedule_order: DESC | ASC
schedule_count: Insert number. For example: 100
schedule_display_thumbnail: 1 | 0
schedule_display_time: 1 | 0
schedule_display_author: 1 | 0
schedule_display_author_job: 1 | 0
schedule_display_speaker: 1 | 0
schedule_display_desc: 1 | 0
schedule_display_social: 1 | 0
schedule_icon_time: Insert fontaesome for time icon
schedule_icon_microphone: Insert fontaesome for microphone icon
speakers_text: Insert text
class
[eventmana_pricing name="" pricing_style="ca" value="" currency="" feature="nofeature" name_button="" link_button="" extra_link="true" product_id="" attribute_id="" variation_id="" variation_name="" class=""]Insert content[/eventmana_pricing]
name: Name of package. For instance: Personal
pricing_style: ca | ac
value: Value of package. For instance: 111
currency: Currency of package. For instance: $
feature: nofeature | featured
name_button: Name Button of package. For instance: Register
link_button: Link Button of package. For instance: if extra link is false: #register else if extra link is true: http://sitename.com
extra_link: true | false
product_id: Insert ID of woocommerce
attribute_id: Insert slug of attribute of woocommerce
variation_id: Insert ID of variation of woocommerce
variation_name: Name of variation
class
[eventmana_faq id="" class=""][eventmana_faq_item id_parent="" title="" desc="" id="" open="" class=""/][/eventmana_faq]
For eventmana_faq shortcode
id: If you use 2 faq in a page, you have to use 2 different id
class
For eventmana_faq_item shortcode
id_parent: Id of faq parent. for example: accordion1
title
desc
id
open: in | no_in
class
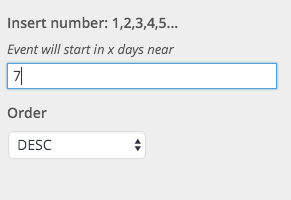
[eventmana_event_slider order_by="ID" order="DESC" count="5" label_button="Tickets & details" class="" /]
order_by: ID | title | date | modified | rand
order: DESC | ASC
count: Insert number: 5
label_button: Tickets & details
class:
[eventmana_iframe_eventbrite id="" class=""/]
id: Find ID. This is your event in eventbrite.com : https://www.eventbrite.com/e/sell-imevent-wordpress-theme-tickets-18691767580 => your have to insert ID is 18691767580 in shortcode
class: