Aleb -Event and Conference Onepage wordpress theme
Version 1.0.5
- created: 10/25/2015
- latest update: 06/28/2016
- by: Ovatheme
- email: ovatheme@gmail.com
Overview
Support
Note: If you contact us directed at ovatheme@gmail.com, please attach info about purchase code:
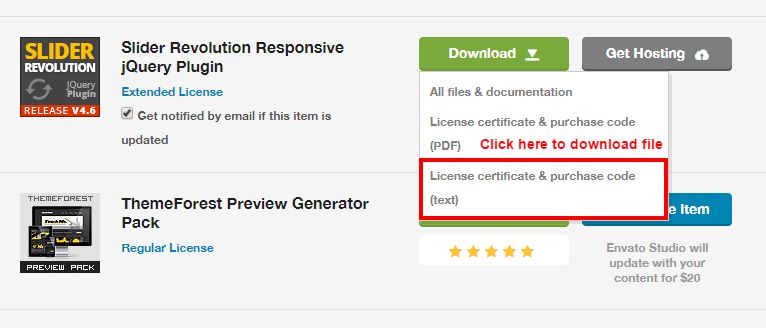
Then open file and find "Item Purchase Code" like
Item Purchase Code: cdf581e0-ed42-41a2-ab3f-26bb5fb9c874
General info
WordPress Information
To install this theme you must have a working version of WordPress already installed.
To install this theme you must have a working version of WordPress already installed. If you need help installing WordPress, follow the instructions in WordPress Codex or you can watch the Instructional Video. Below are all the useful links for WordPress information.
- WordPress Codex – general info about WordPress and how to install on your server
- Instructional Video – How To install wordpress
- First Steps With WordPress – general information that covers a wide variety of topics
- FAQ New To WordPress – the most popular FAQ’s regarding WordPress
- WP101 Basix Training videos – some great videos from WPTuts on WordPress
Requirements For Our Theme
To use theme, you must be running WordPress 4.0 or higher, PHP5 or higher, and mysql 5 or higher. We have tested it with Mac, Windows and Linux. Below are a list of items you should ensure your host can comply with.
- Check to ensure that your web host has the minimum requirements to run WordPress.
- Always make sure they are running the latest version of WordPress
- You can download the latest release of WordPress from official WordPress website
- Always create secure passwords FTP and Database
How to use this documentation
How to install theme:
1: Read "installing the theme" section
2: Read "Config in page" section
3: Read "Customizer" in theme
4: Read custom post type
5: Read config in extra plugins: contact form 7, mailchimp
6: Read "Translations" section: Translate text in theme
Installing the Theme
Once you have setup a copy of WordPress, there are two ways you can go about installing the theme:
- Install via Wordpress
- Install via FTP
Install via Wordpress
For example: Install theme events
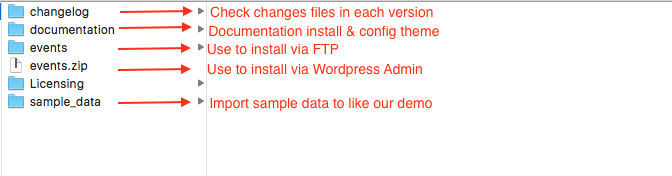
Step 1 - Unzip the downloaded package from Themeforest. Find the folder theme and inside it find the file events.zip
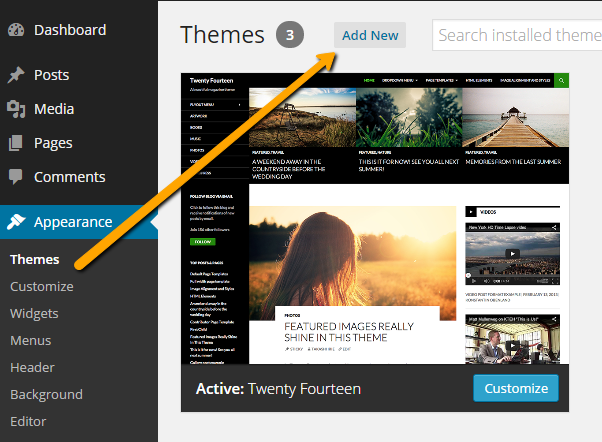
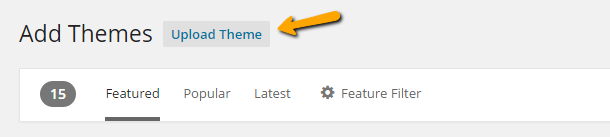
Step 2 - Login to your WordPress dashboard, go to Appearance > Themes >> Click "Add New" >> Click "Upload theme"
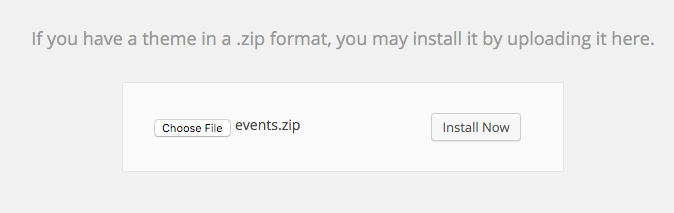
Step 3 - Click "Choose file" and find the file "events.zip" on your computer. Click "Install Now"
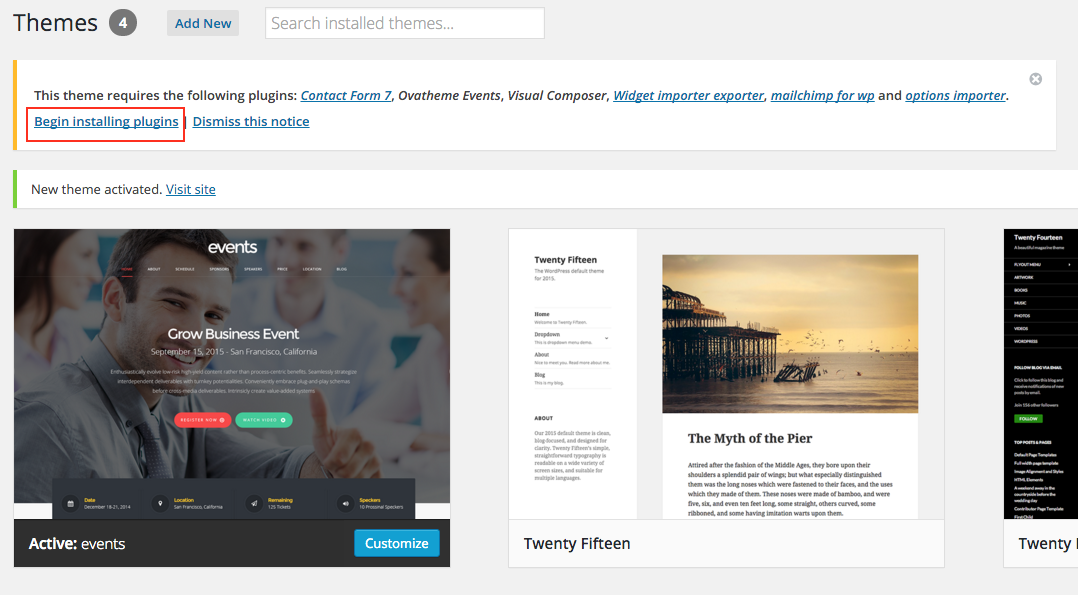
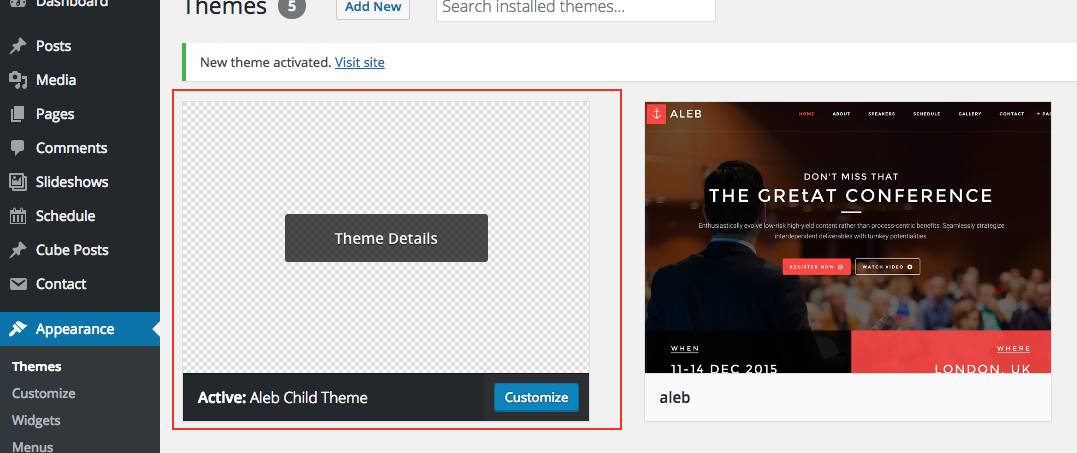
Step 4 - Activate the theme: Go to Appearance > Themes and Activate.

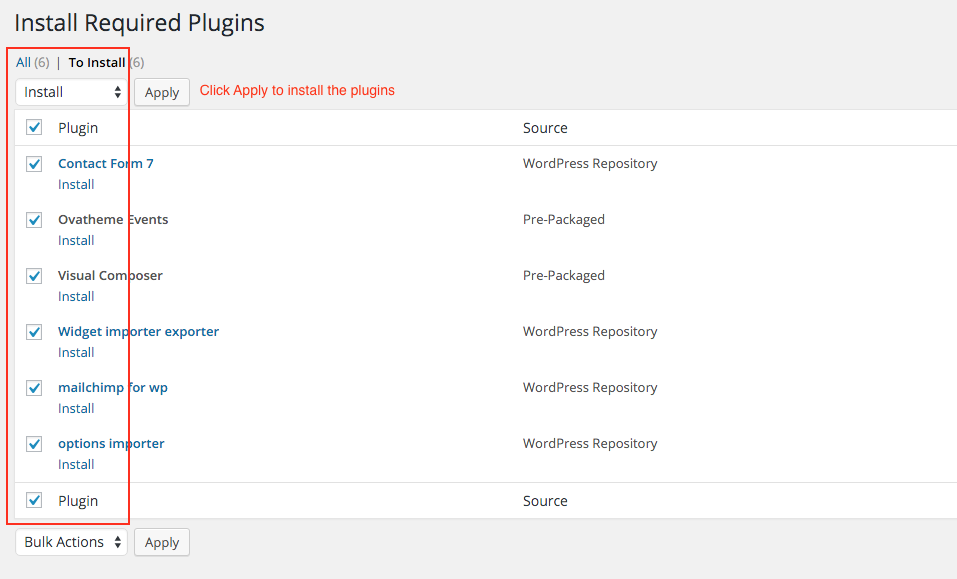
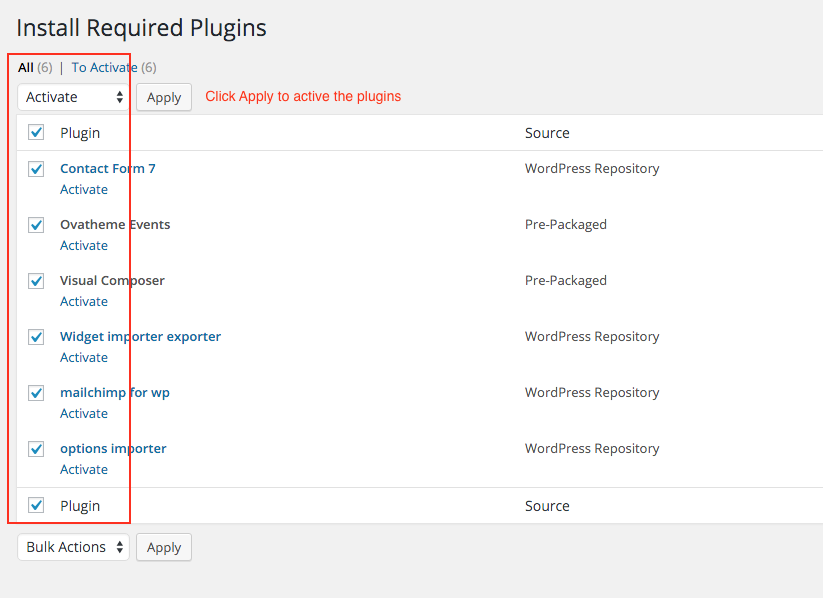
Step 5: Install Plugins
Step 6: Import Sample data
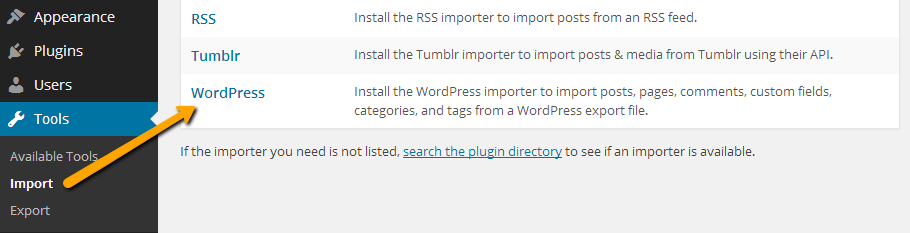
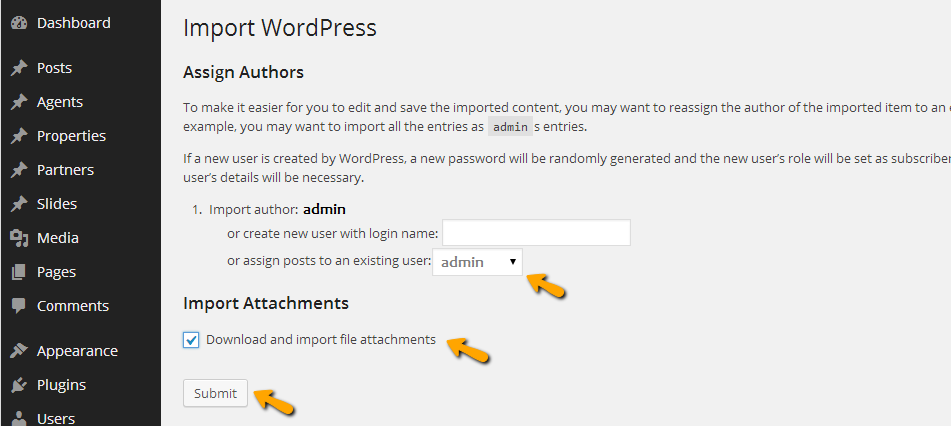
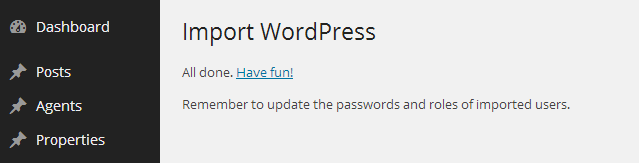
Go to the WordPress Admin > Tools > Import and click WordPress as displayed in image below.
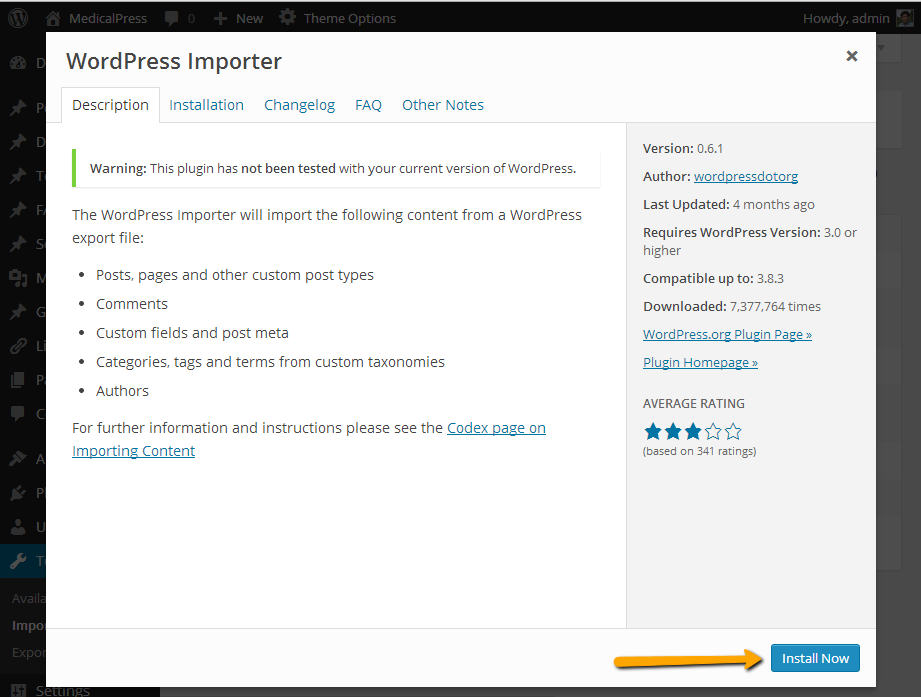
At 1st time you need to install WordPress importer plugin
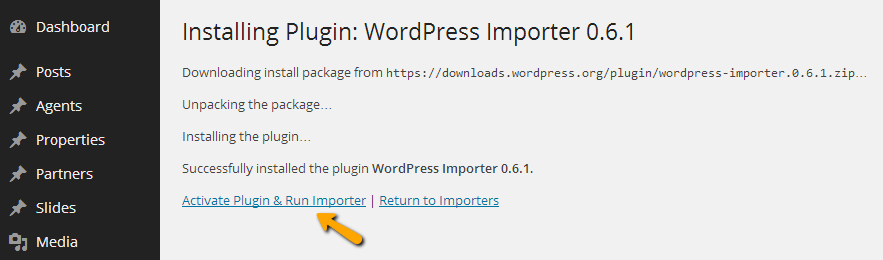
Once installed you need to activate the plugin and run the importer.
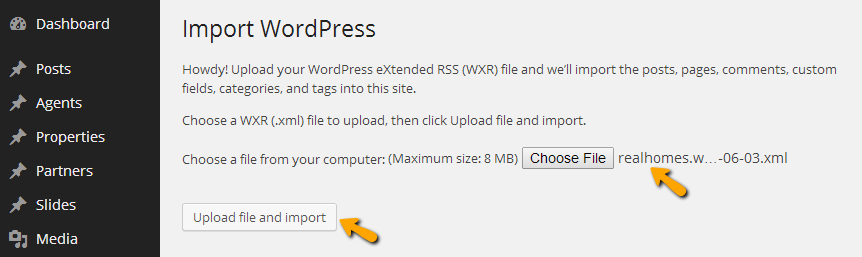
Select the XML file from sample_data folder in downloaded package that you have downloaded from themeforest.
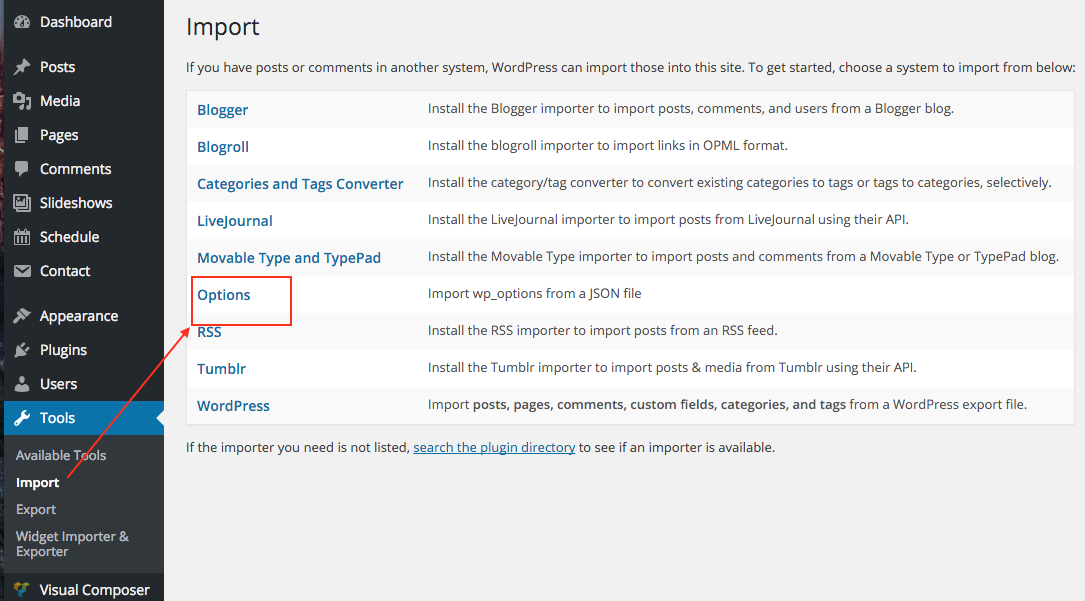
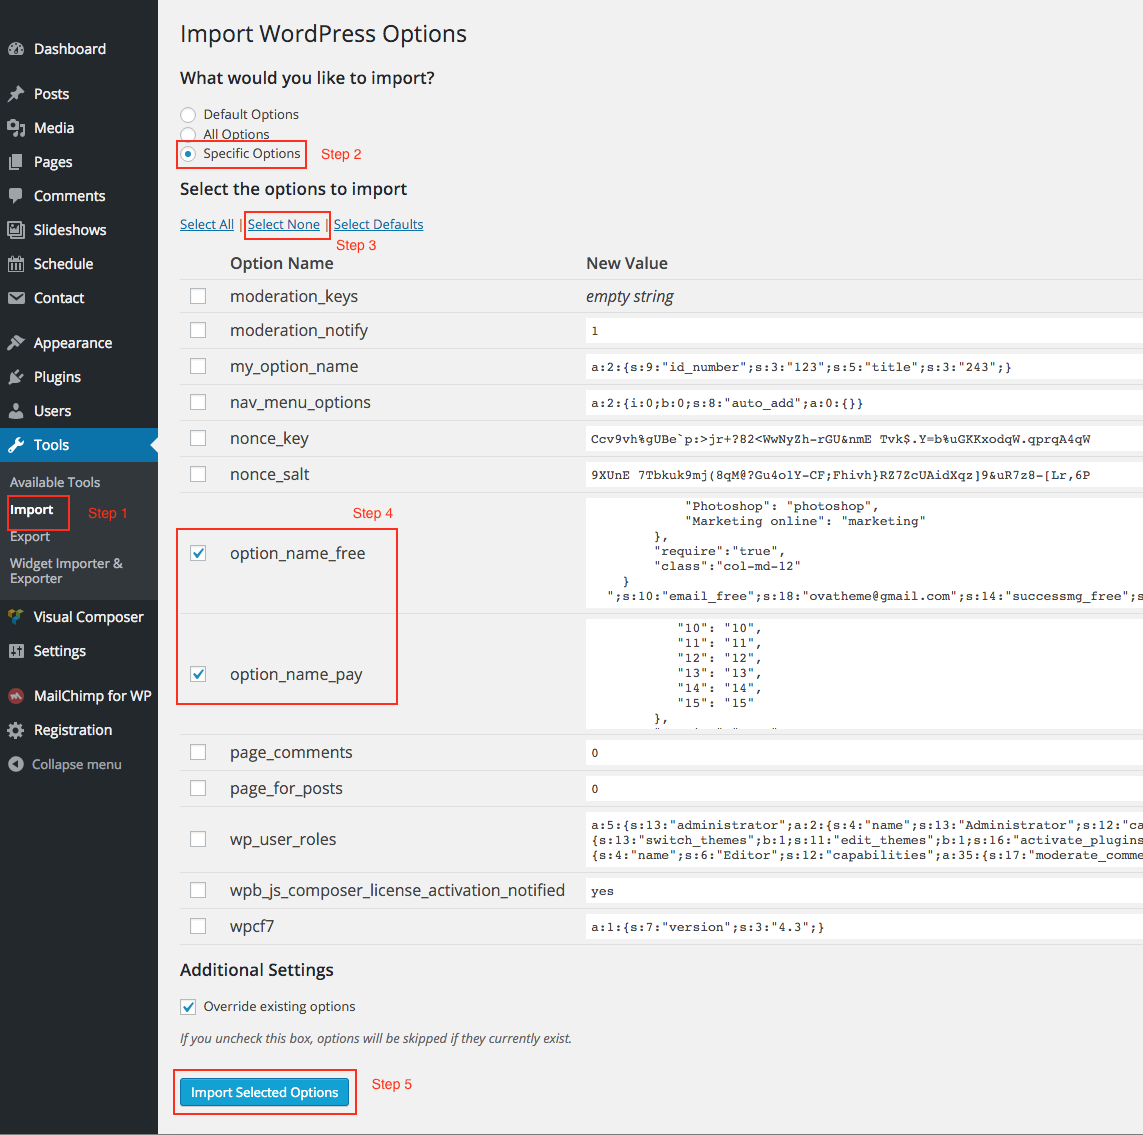
Step 8: Import Options in plugins
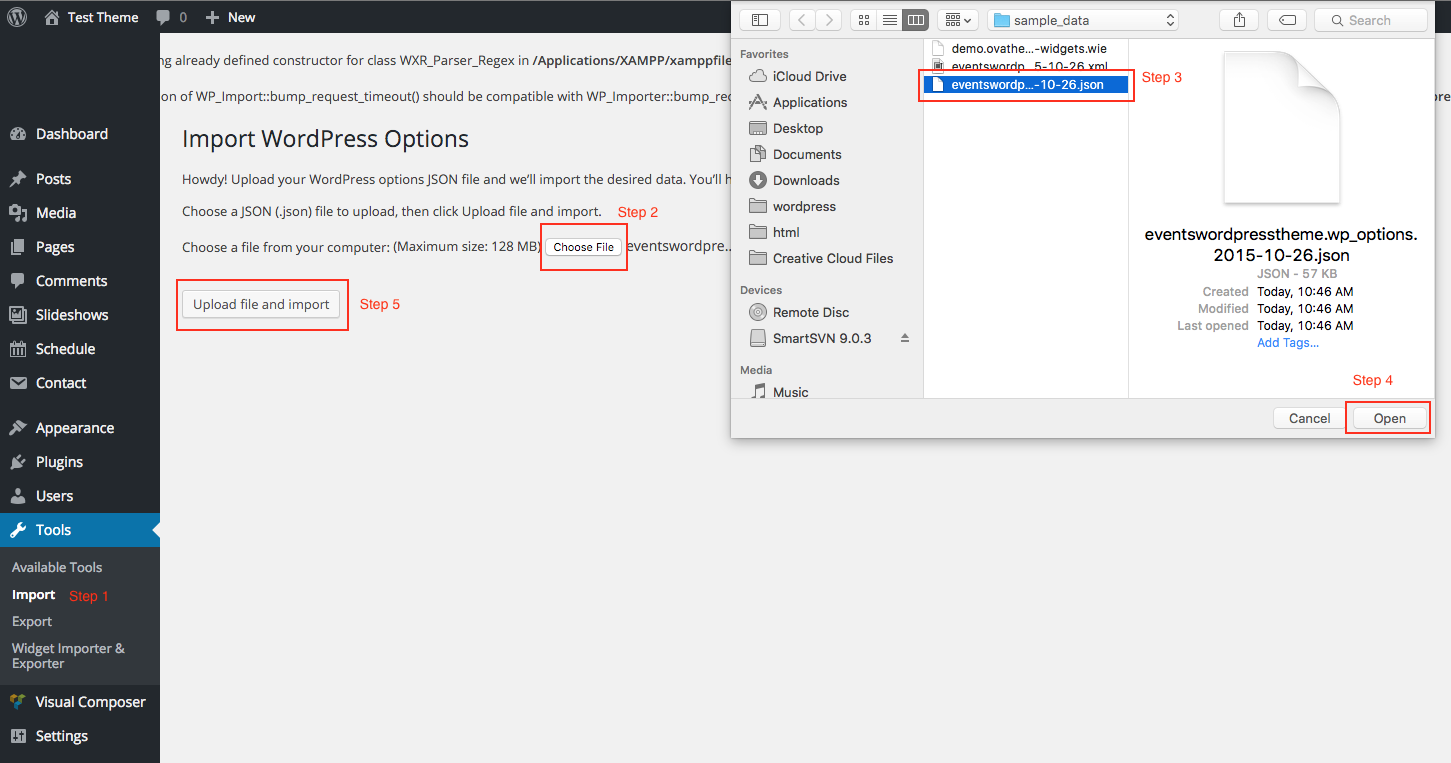
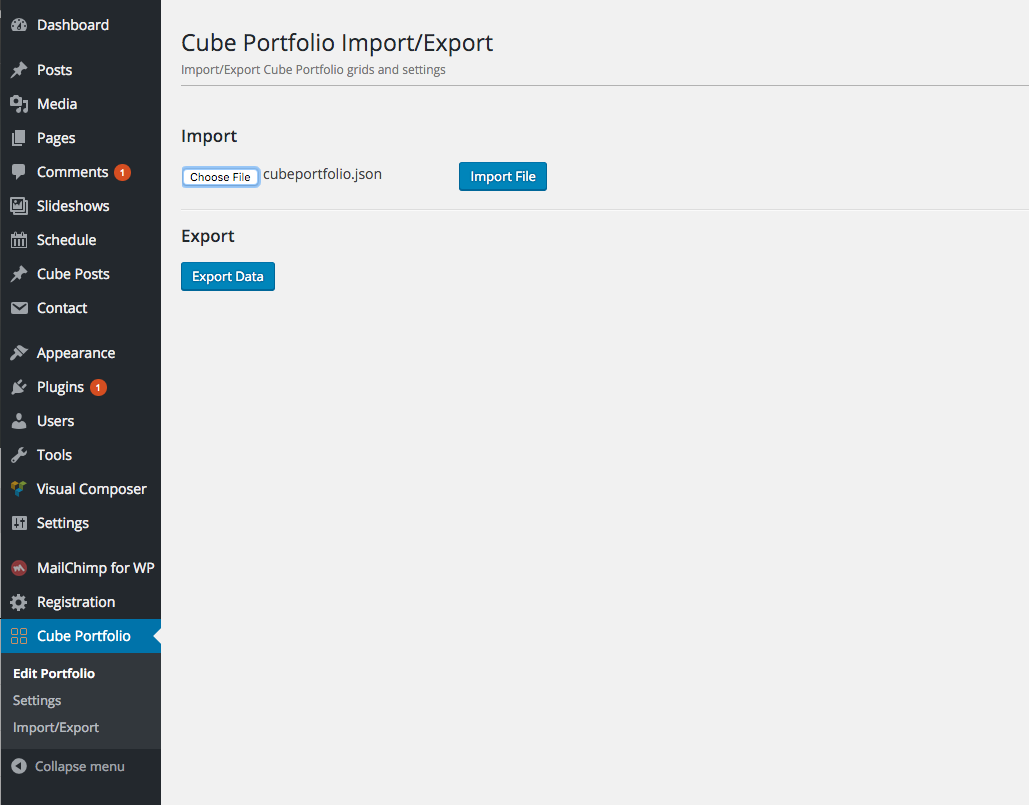
Step 9: Import samplate data for cubeportfolio (gallery section)
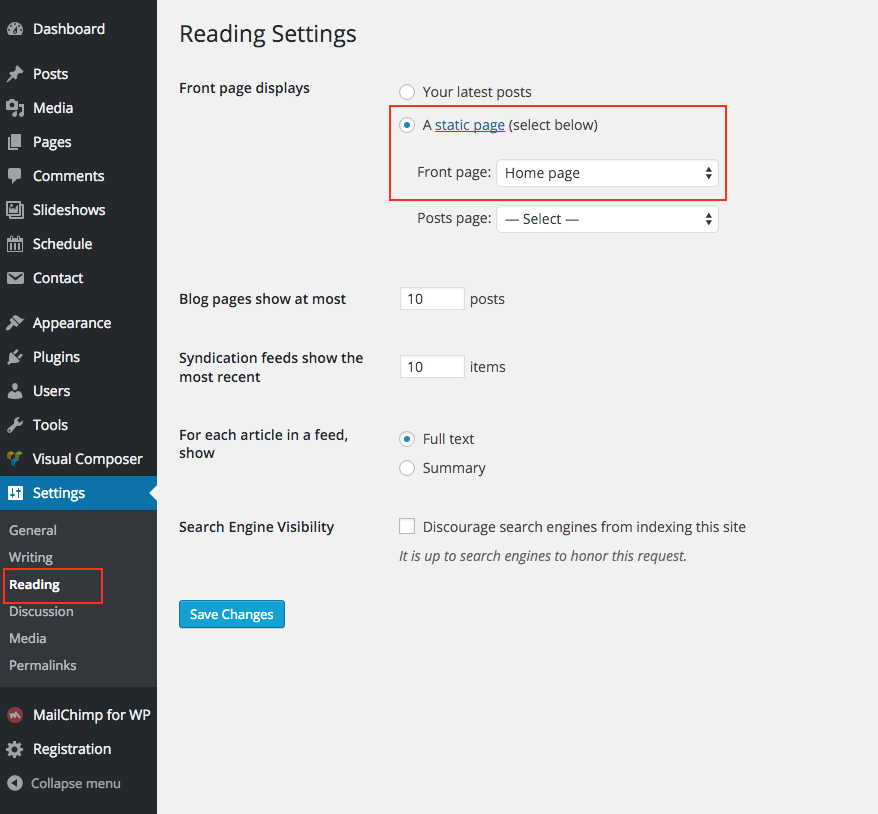
Step 10: Setup Home page
From Left bar >> Settings >> Reading
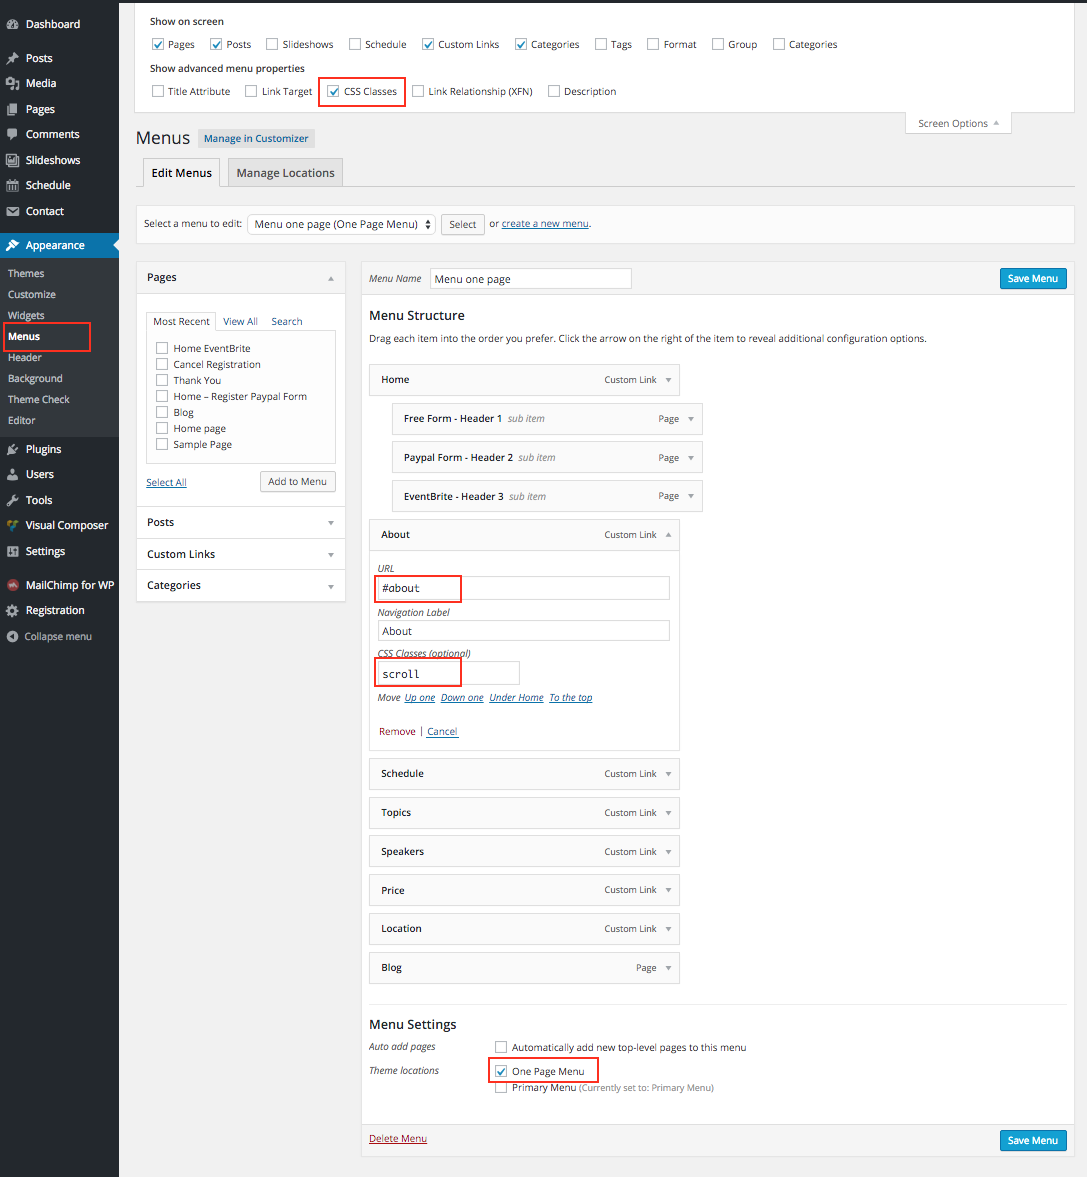
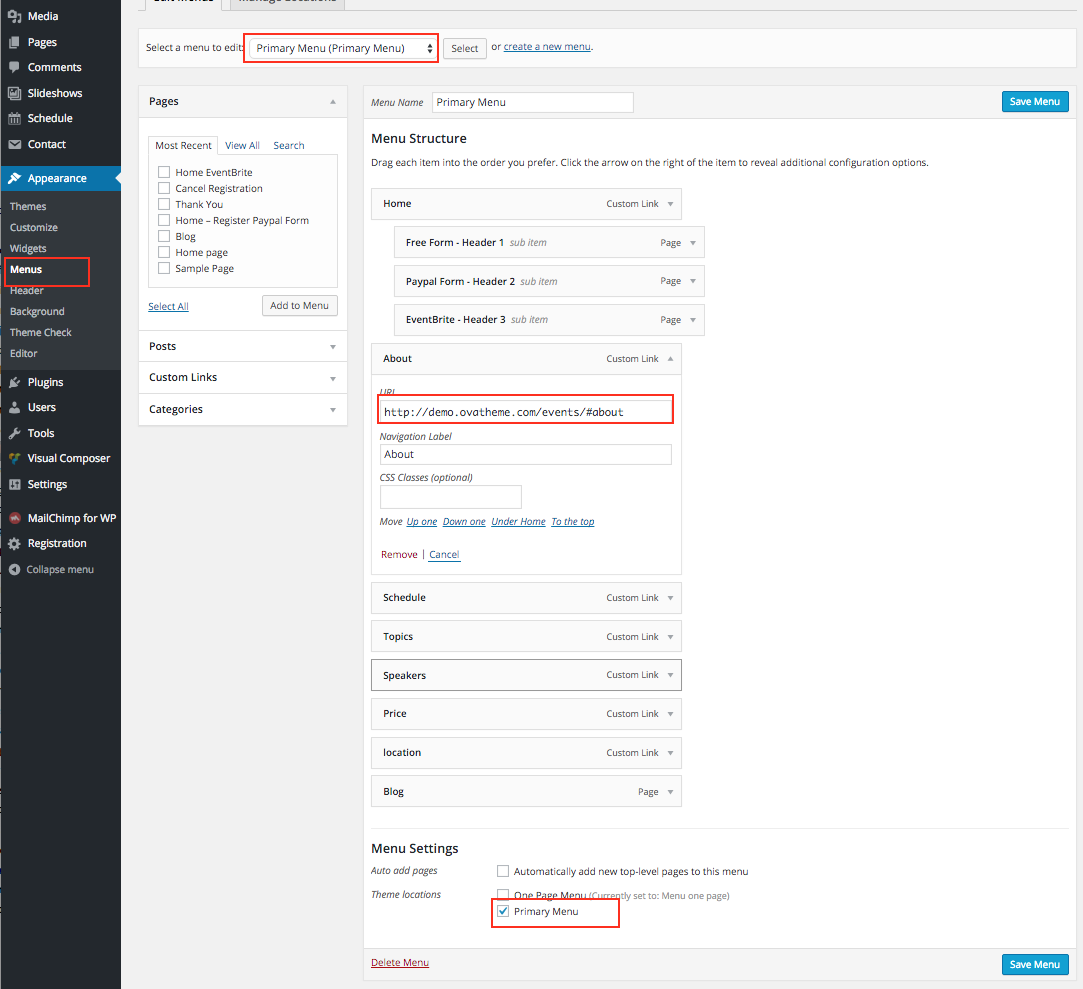
Step 11: Setup Menu
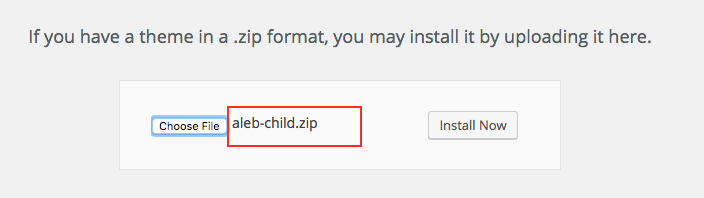
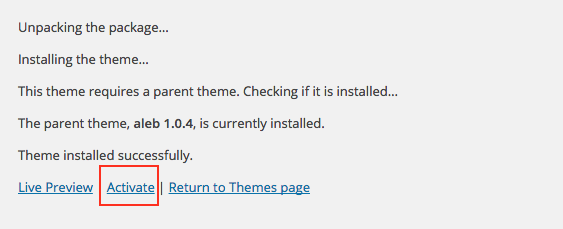
Step 12: Install child-theme
Install via FTP
|
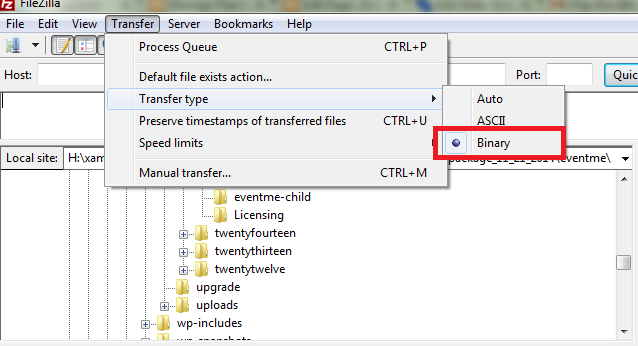
Step 1 - Please surely 'transfer type' in your FTP is 'Binary' Step 2 - Upload your-theme folder from downloaded package into wp-content > themes folder Step 3 - Read step 4,5,6,7,8,9,10 in "install via wordpress" section |
|

Update Theme
1: Automatically updated the theme when a new version is released:
Step 1: Install and Active Envato Market WordPress PluginGo to to download: https://envato.com/market-plugin/
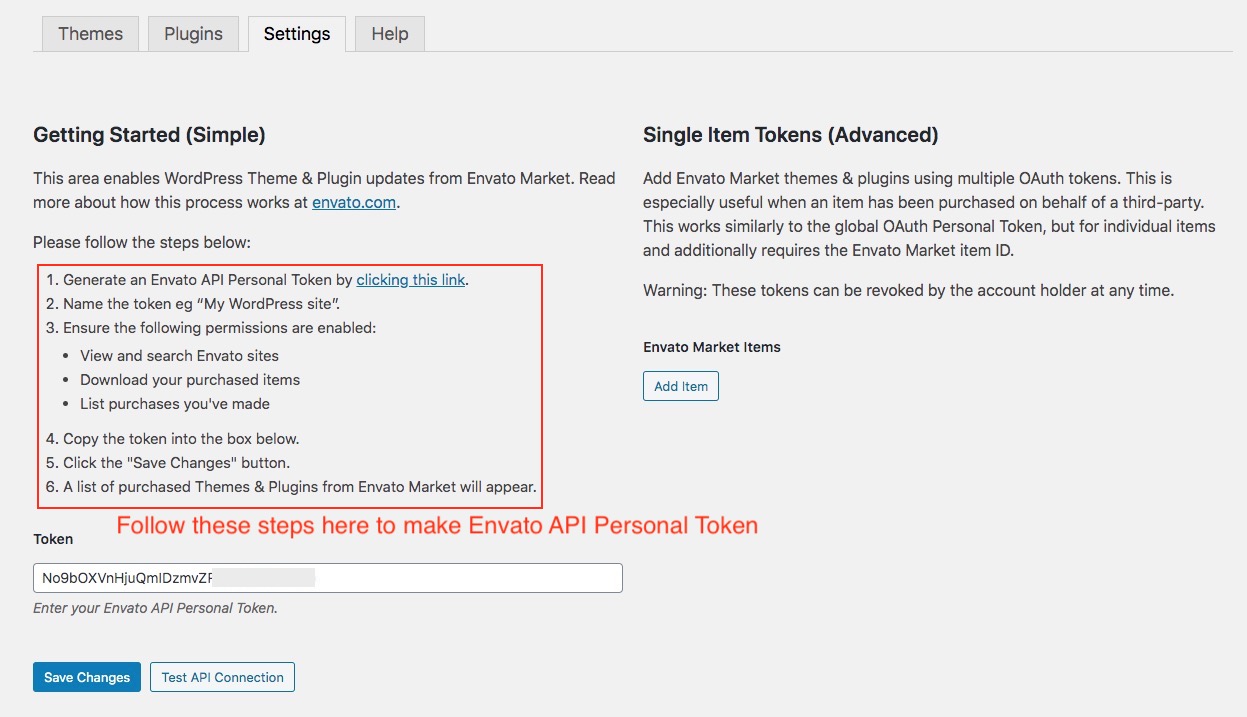
Step 2: Config Envato Market Plugin
From the left side, click: Envato Market >> Settings
Step 3: Update the theme
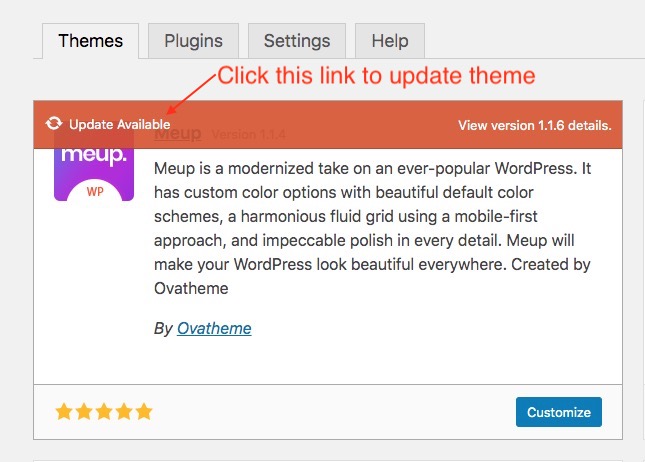
From the left side, click: Envato Market >> Themes
You will see notification for updating the theme like the bellow image. Click "update available" that is a link to update the theme automatically.
Step 4: Update Cube Portoflio Plugin
- You DON'T DELETE plugin in backend, you have to update this plugin via FTP software.
- Download package file from themeforest then unzip, you will see Cubepoftfolio folder in PLugin folder.
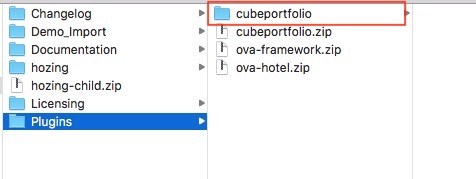
- Upload this folder to wp-content/plugins/ folder in your server.
Step 5: Update other plugin
Click Plugins menu item from left panel, you will see all plugins with notify update.

2: Update theme by manually via FTP or via WordPress Admin Panel :
Customizer
- You can use some option for theme in: Appearance >> Customize
- Global settings
+ Main layout
+ Width of site
+ Seo keywords, Description
- Font settings
+ Main color
+ Body font
+ Heading font
+ Heading Font letter spacing
- Header & Logo settings
+ Display spin
+ Logo Option
- Footer
+ Display
- Google Key Map
+ Add Google Key Map to display Map at frontend
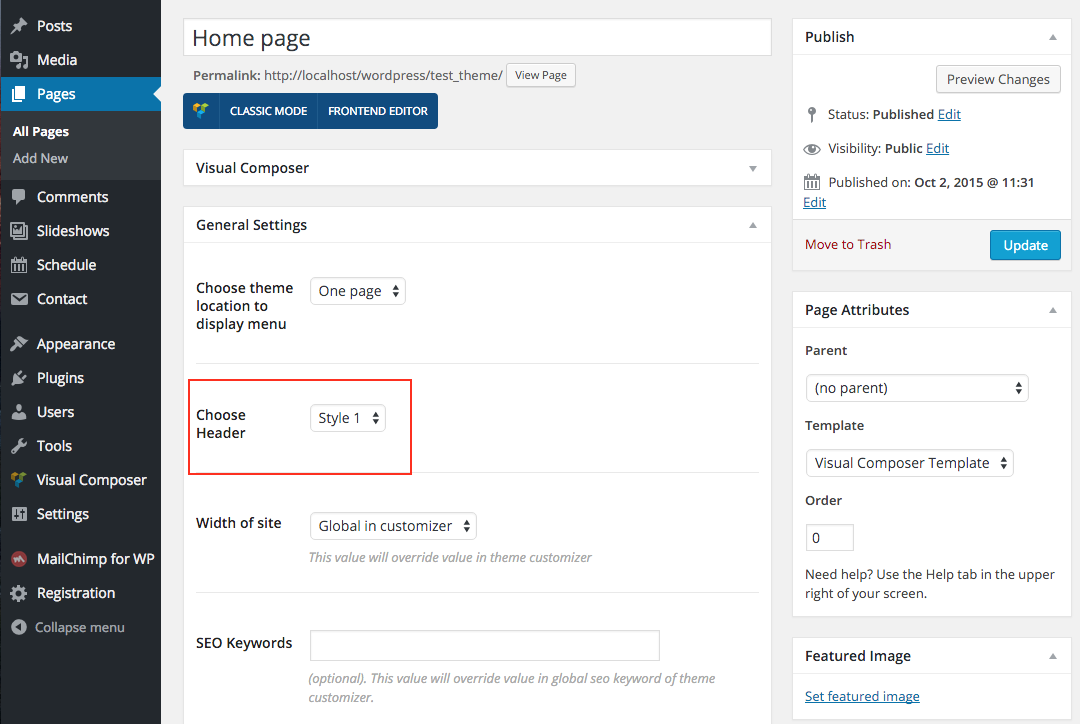
Header
- Change Logo:
Appearance >> Customize >> Choose Header & Logo settings
- Change style of header you can change in each Post or Page
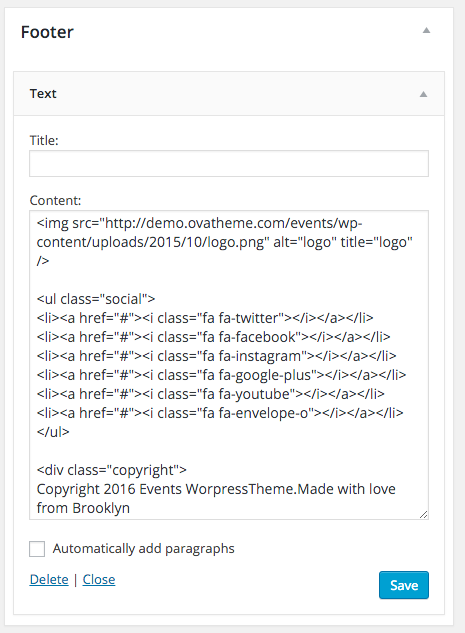
Footer
You can change footer in Widget:
Appearance >> Widget
Home page
Config Home Page
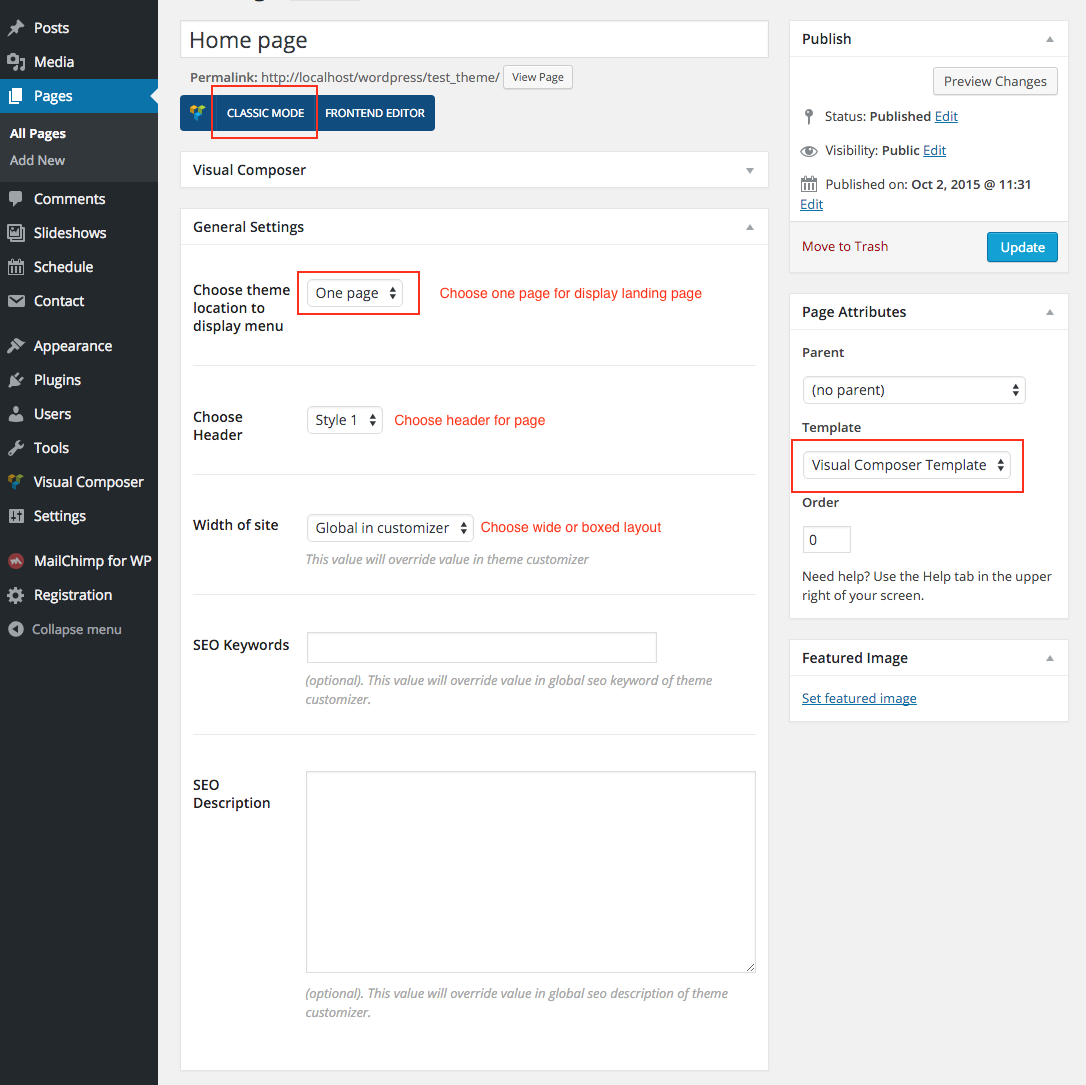
You need to know Visual Composer (VC) to add/edit element. You can find info of bellow VC
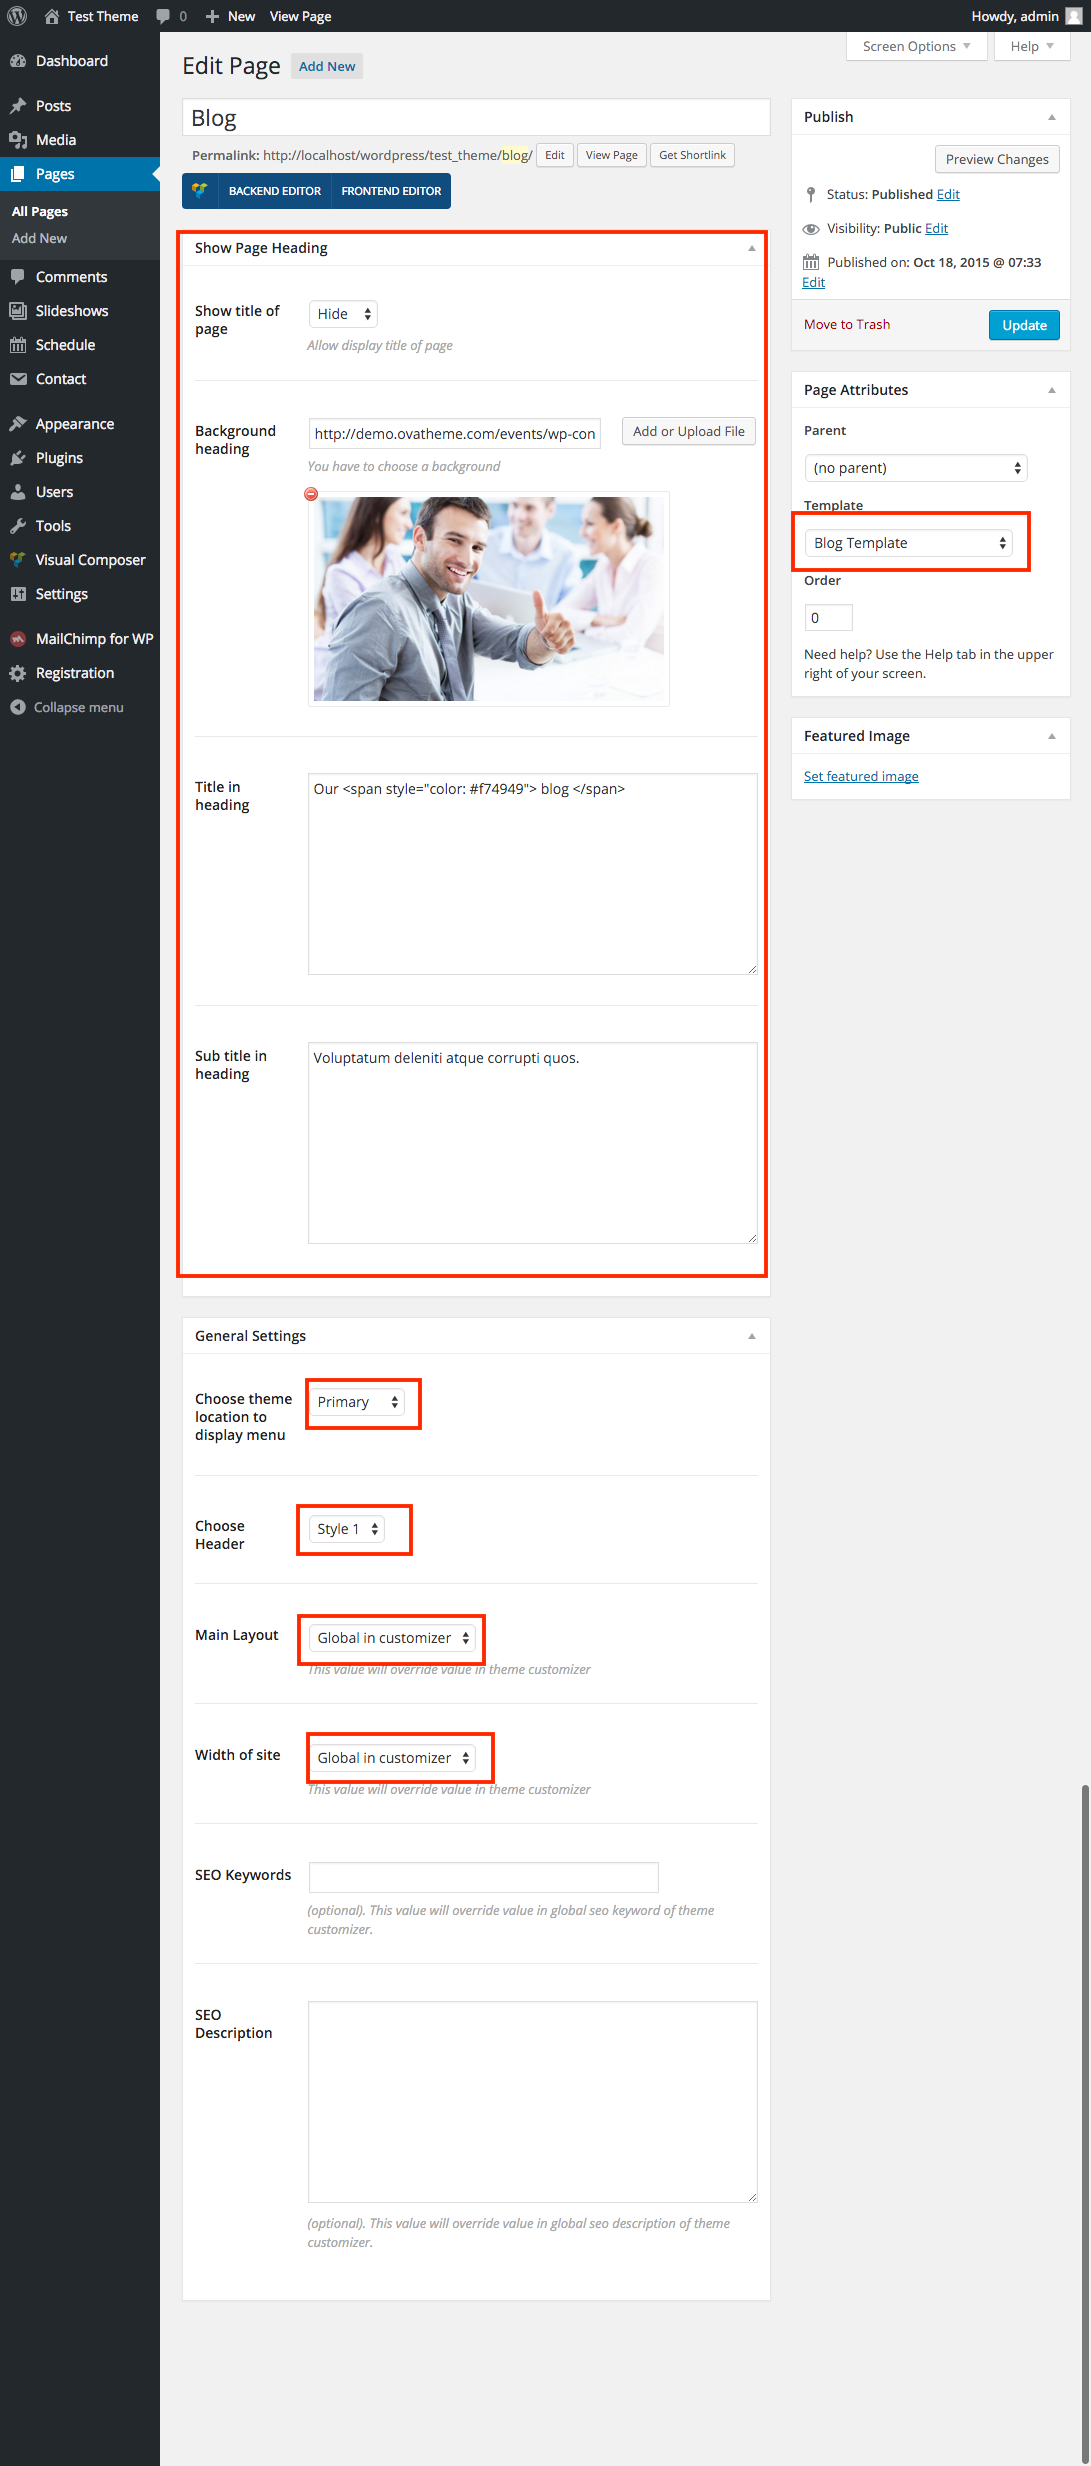
Blog page
Config Blog page
Slideshow
Create Slideshow
Step 1: Create Group
+ Slideshow >> Group
+ Insert Name for Group >> Click "Add New Group"
Step 2: Create slide for slideshow
+ Slideshows >> Add Slides
+ Choose template for slide >> Insert info for slide
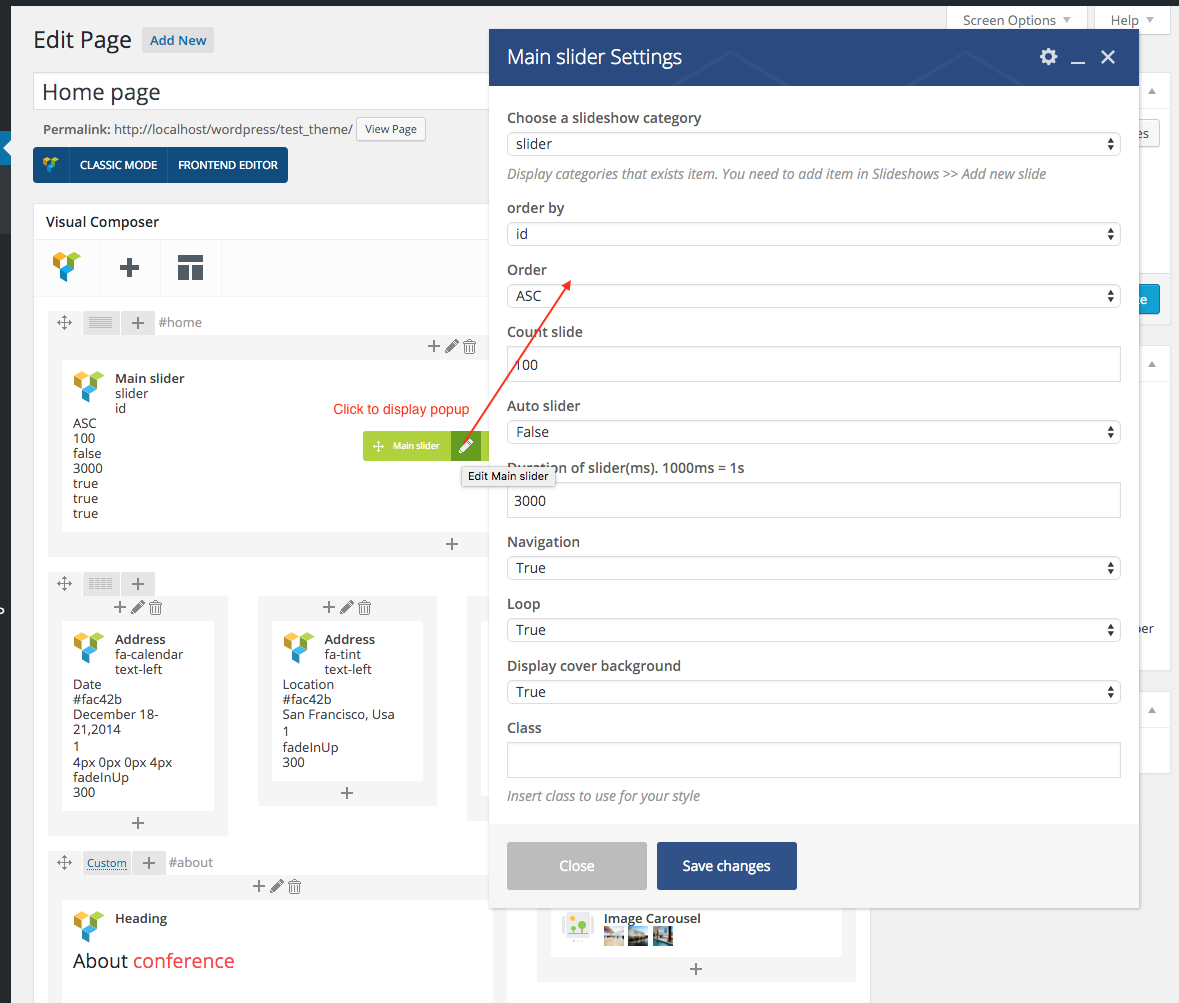
Step 3: Display slideshow
+ Use 'Slideshow' element of Visual Composer to display at frontend
Schedule
Create Schedule
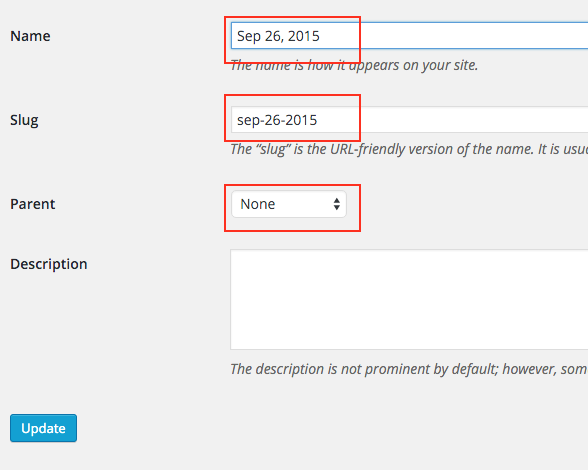
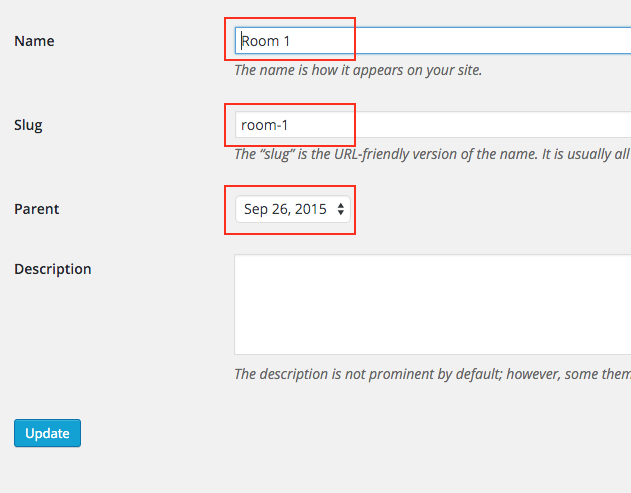
Step 1: Create Category
Create Parent Cateogry (Level 1)
+ Schedule >> Categories
+ Insert Name for category >> Click "Add New Category"
Create Child Cateogry: (Level 2)
+ Schedule >> Categories
+ Insert Name for category >> Click "Add New Category"
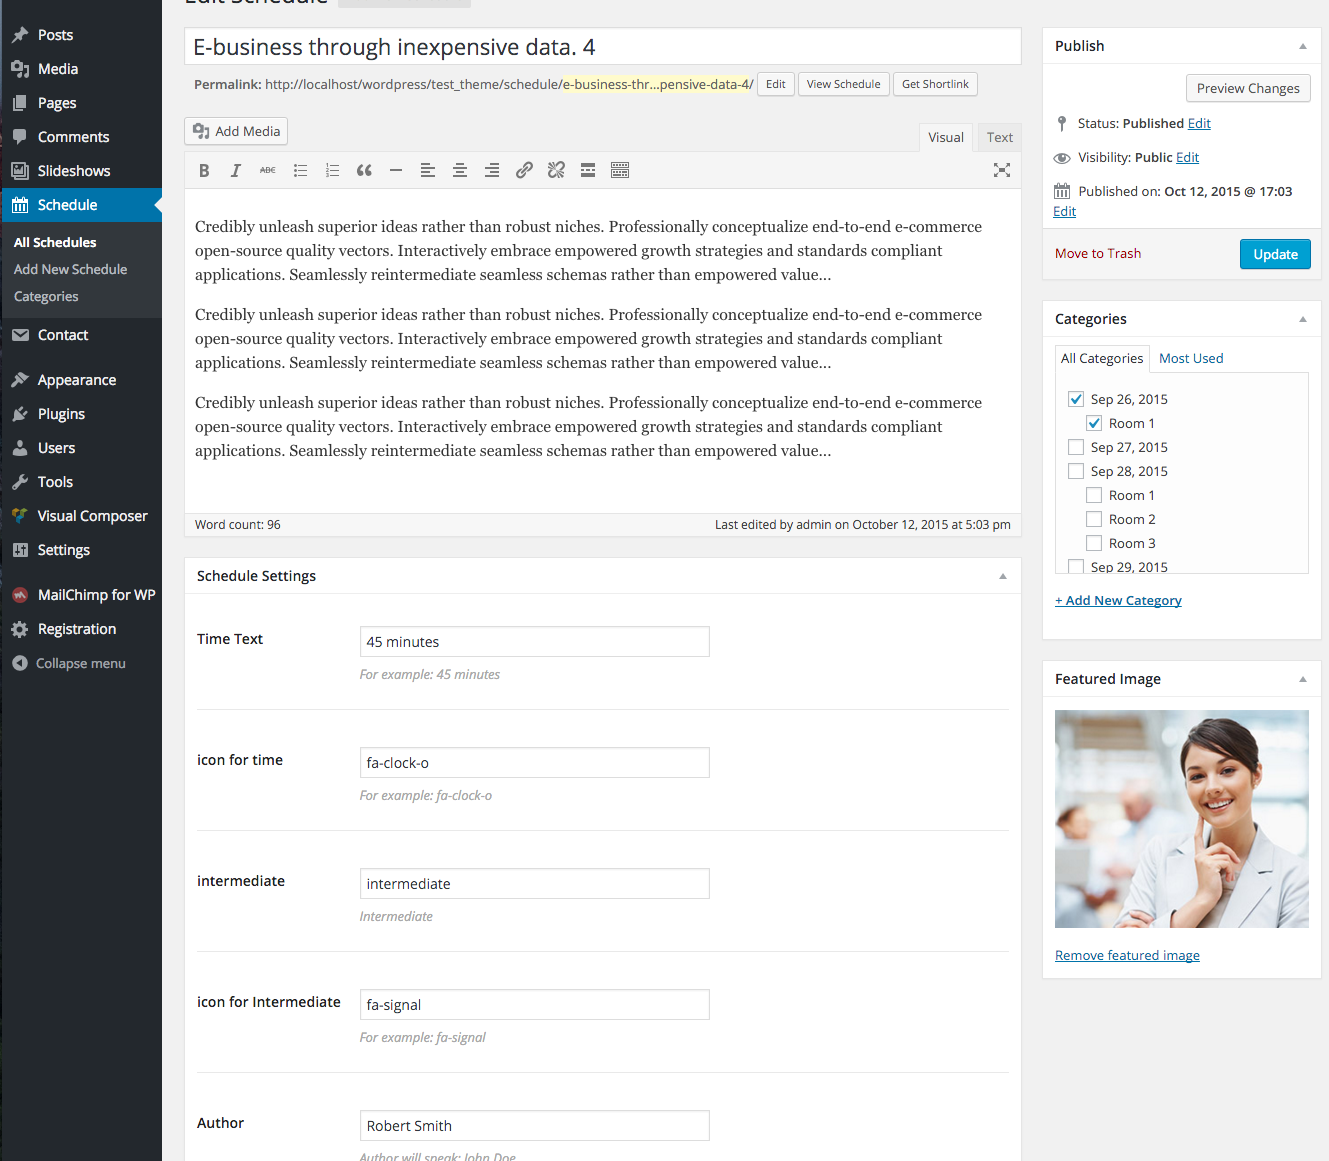
Step 2: Create item
+ Schedule >> Add New Schedule
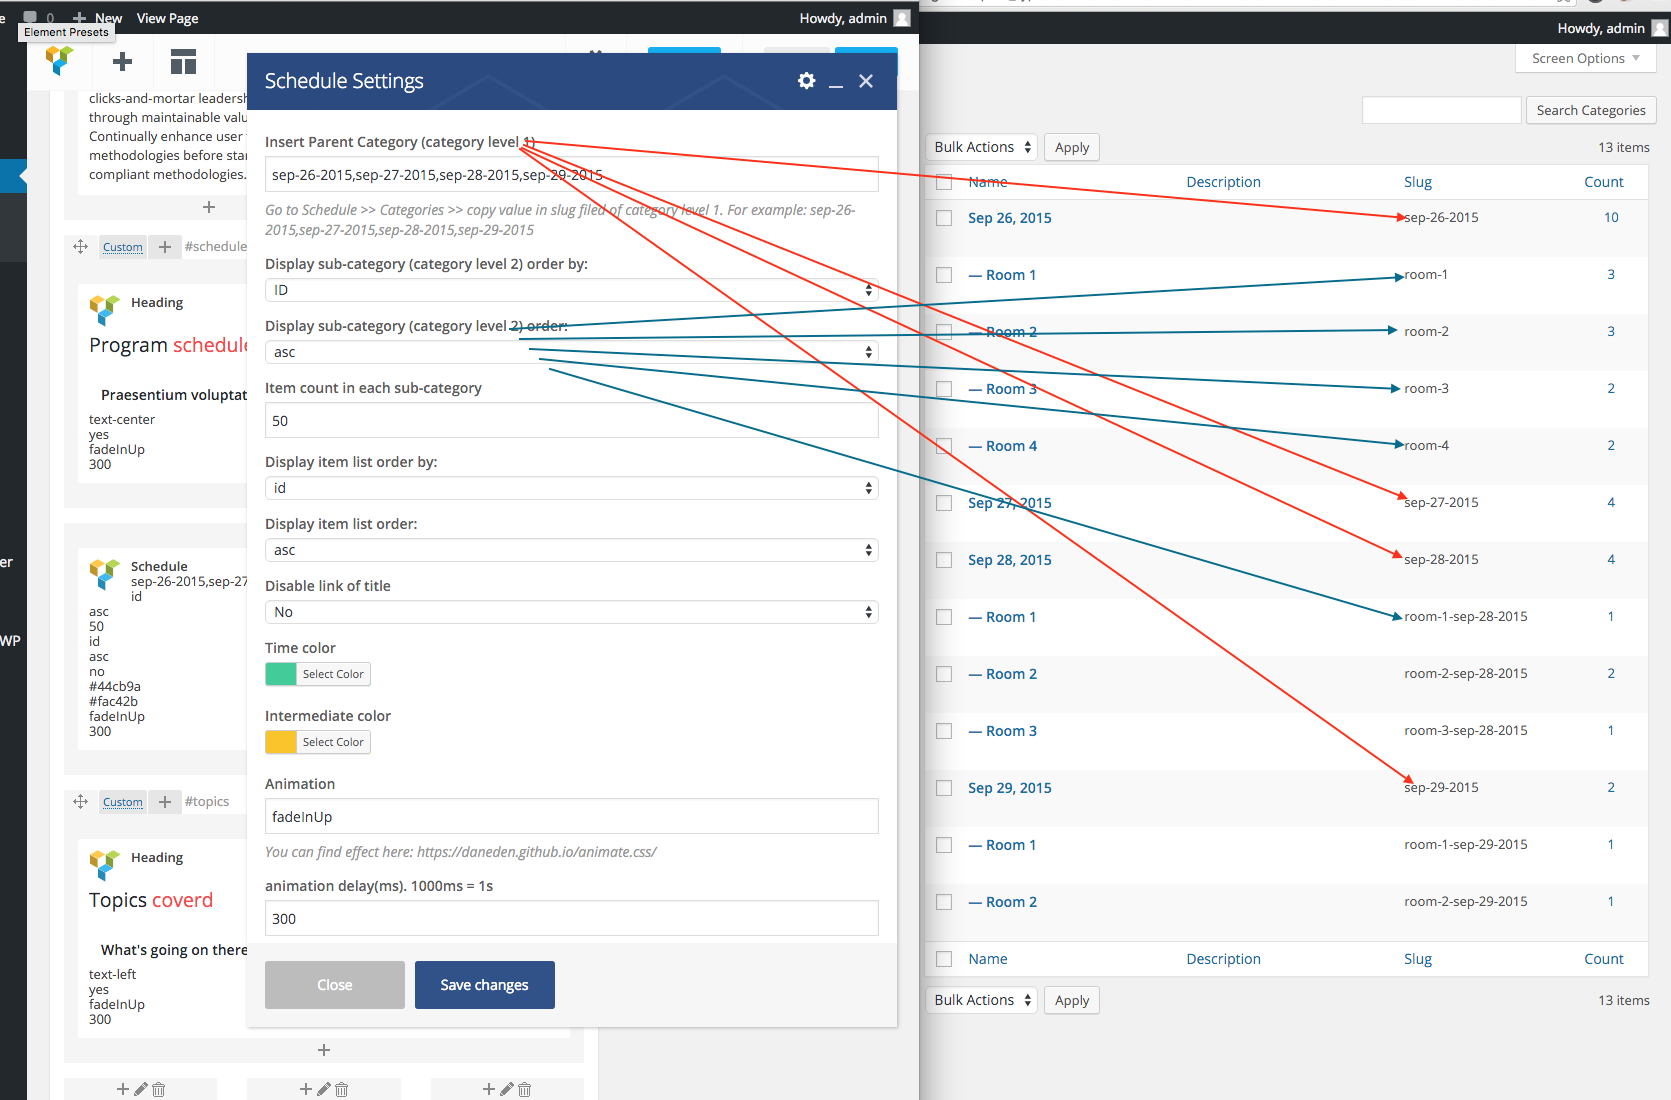
Step 3: Display slideshow
+ Use 'Schedule' element of Visual Composer to display at frontend
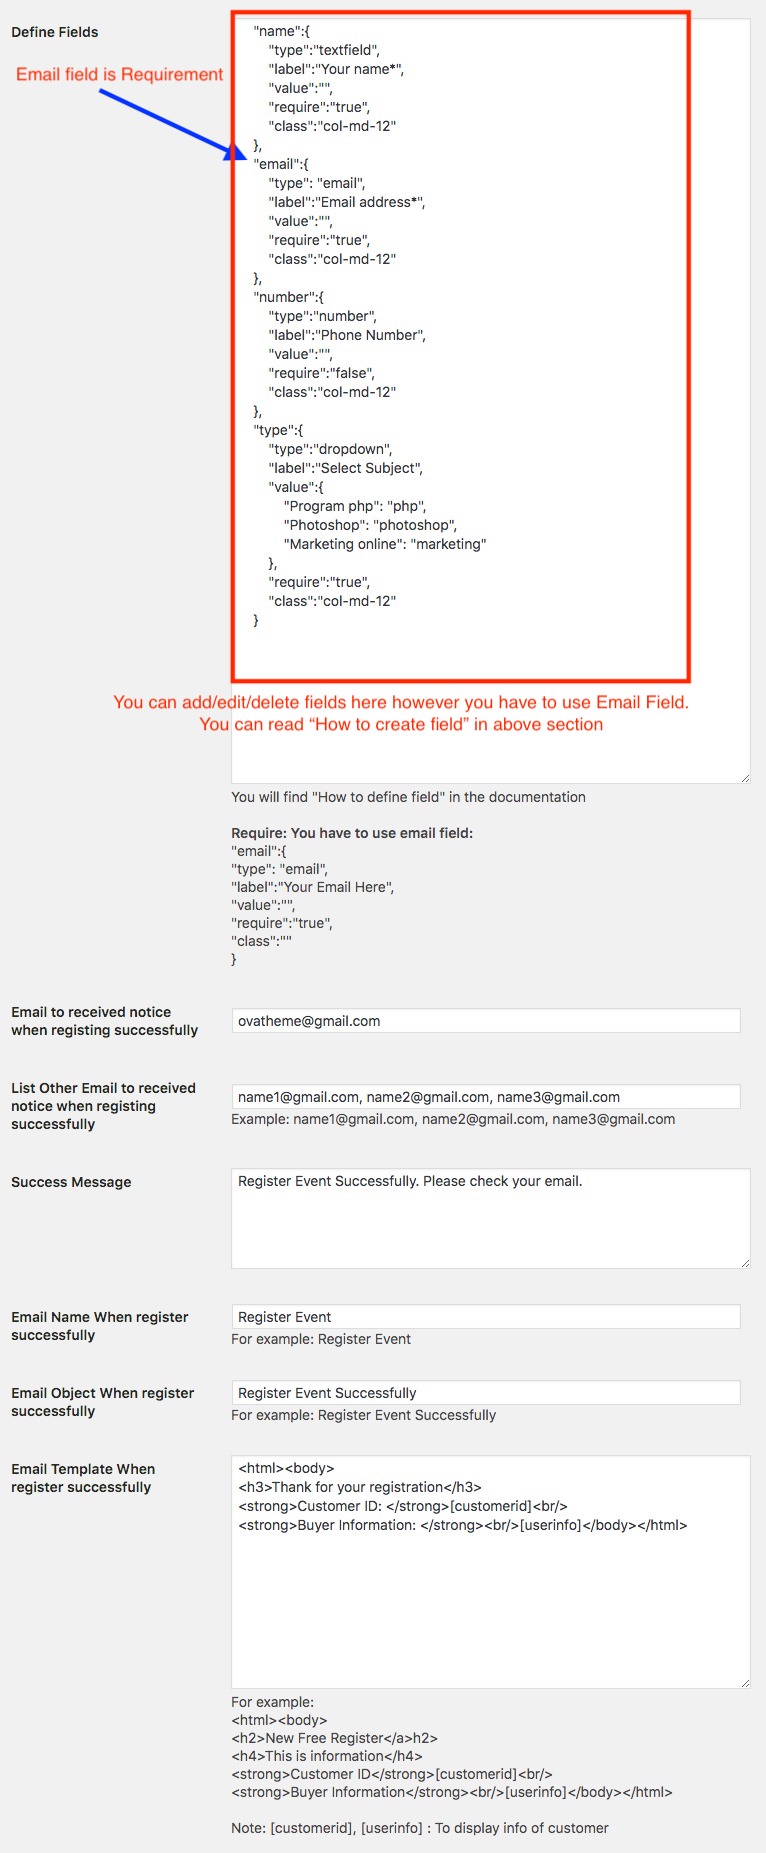
Reigster Form & Settings
How to create fields to add to Registger Form
|
Textfield syntax: type: textfield |
"uniqueid":{ "type":"textfield", "label":"label of text", "value":"", "require":"true", "class":"" } |
|
textarea syntax:
type: textarea
cols: column of textarea
rows: row of textarea
|
"uniqueid":{ "type":"textarea", "label":"label of text", "value":"", "cols":"10", "rows":"4", "require":"false", "class":"" } |
|
email syntax:
type: email
|
"uniqueid":{ "type": "email", "label":"Your Email Here", "value":"", "require":"false", "class":"" } |
|
url syntax:
type: url
|
"uniqueid":{ "type":"url", "label":"Your Url", "value":"", "require":"false", "class":"" } |
|
number syntax:
type: number
|
"uniqueid":{ "type":"number", "label":"Your Phone Number", "value":"", "require":"false", "class":"" } |
|
date syntax:
type: date
format: Insert format for date mm-dd-yy or dd-mm-yy
|
"uniqueid":{ "type":"date", "label":"Date", "value":"", "require":"false", "format":"mm-dd-yy", "class":"" } |
|
dropdown syntax:
type: dropdown
value:
Label Option 1, Label Option 2 : There are will display in option at frontend
Value Option 1, Value Option 2: Value for 2 options. If this option is price to pay for paypal, you have to insert number.
|
"uniqueid":{ "type":"dropdown", "label":"Price", "value":{ "Label Option 1": "Value Option 1", "Label Option 2": "Value Option 2" }, "require":"true", "class":"" } |
|
checkbox syntax:
type: checkbox
value:
Label Option 1, Label Option 2, Label Option 3 : There are will display in option at frontend
Value Option 1, Value Option 2, Value Option 3: Value for the options.
This field don't support require to validate
|
"uniqueid":{ "type":"checkbox", "label":"label for checkbox", "value":{ "Label Option 1": "Value Option 1", "Label Option 2": "Value Option 2", "Label Option 3": "Value Option 3" }, "class":"" } |
|
radio syntax:
type: radio
value:
Label Option 1, Label Option 2 : There are will display in option at frontend
Value Option 1, Value Option 2: Value for the options.
value_default: Default value.
This field don't support require to validate
|
"uniqueid":{ "type":"radio", "label":"label for radio", "value":{ "Label Option 1": "Value Option 1", "Label Option 2": "Value Option 2" }, "value_default":"Value Option 1", "class":"" } |
|
message syntax:
type: message
|
"uniqueid":{ "type":"message", "label":"", "value":"Please note: An One Page Event Manager", "class":"" } |
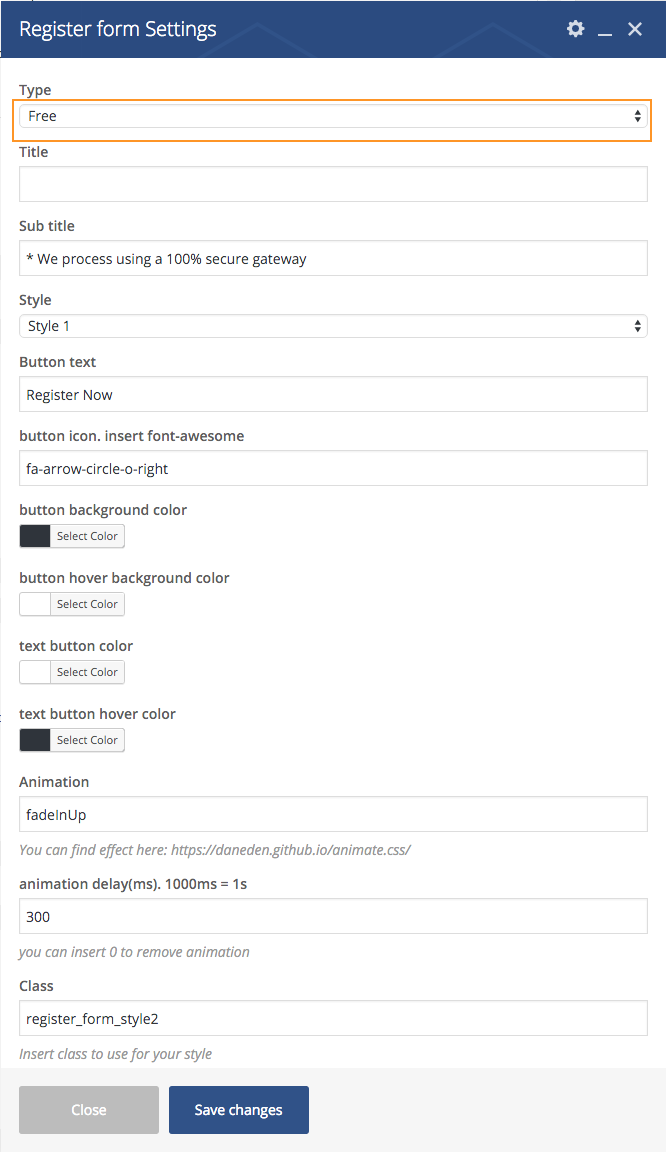
Register Free Form Setting
1: Free Form Settings
- From Left Sidebar >> Registration >> Settings Free Form
You can read above "How to create fields to add to Registger Form" section to add field in form.
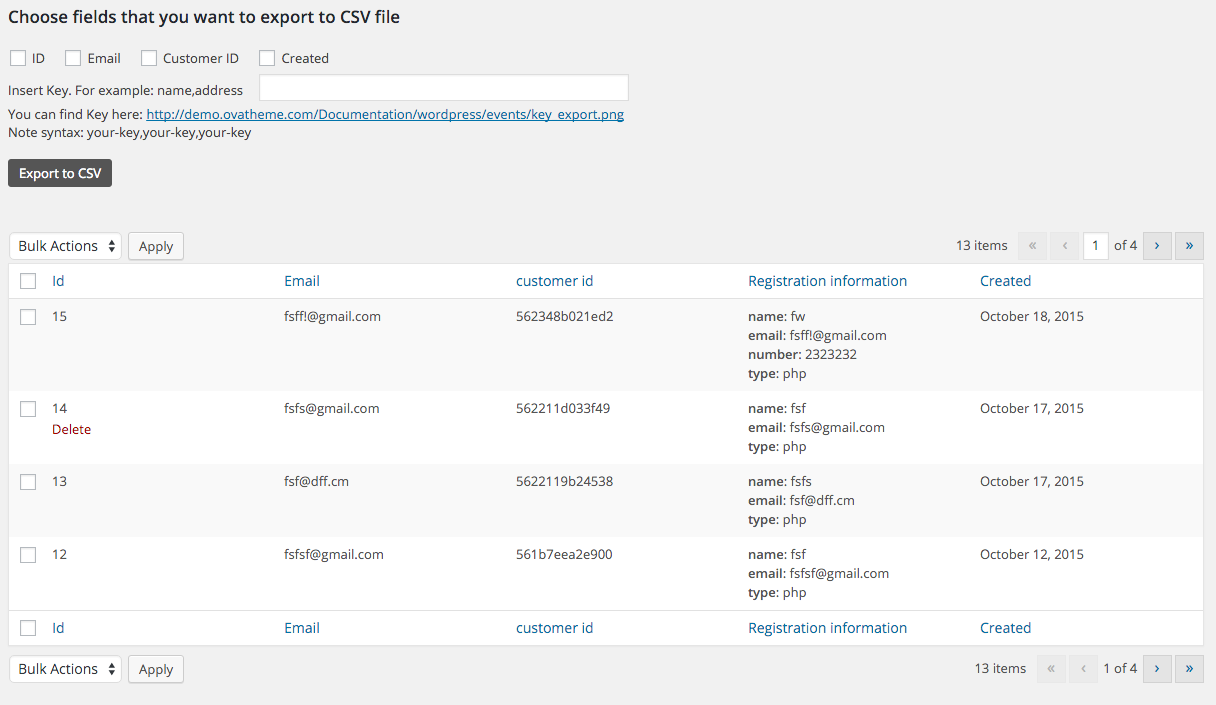
2: Registration Free List
- From Left Sidebar >> Registration >> Settings Free Form
3: Display Register free form in Frontend
Method 1: Use ''Register Form" element of visual composer
Method 2: Use Shortcode
[events_registerform type="free" title="Register Free Form" subtitle="* We process using a 100% secure gateway" style="style1" buttontext="REGISTER FORM" iconbutton="fa-arrow-circle-o-right" id="" bg_button="#f74949" bg_button_hover="#fff" text_button_color="#fff" text_button_color_hover="#f74949" animation="fadeInUp" animation_delay="0" class="" /]
Note some param:
type: free
style: style1 or style2
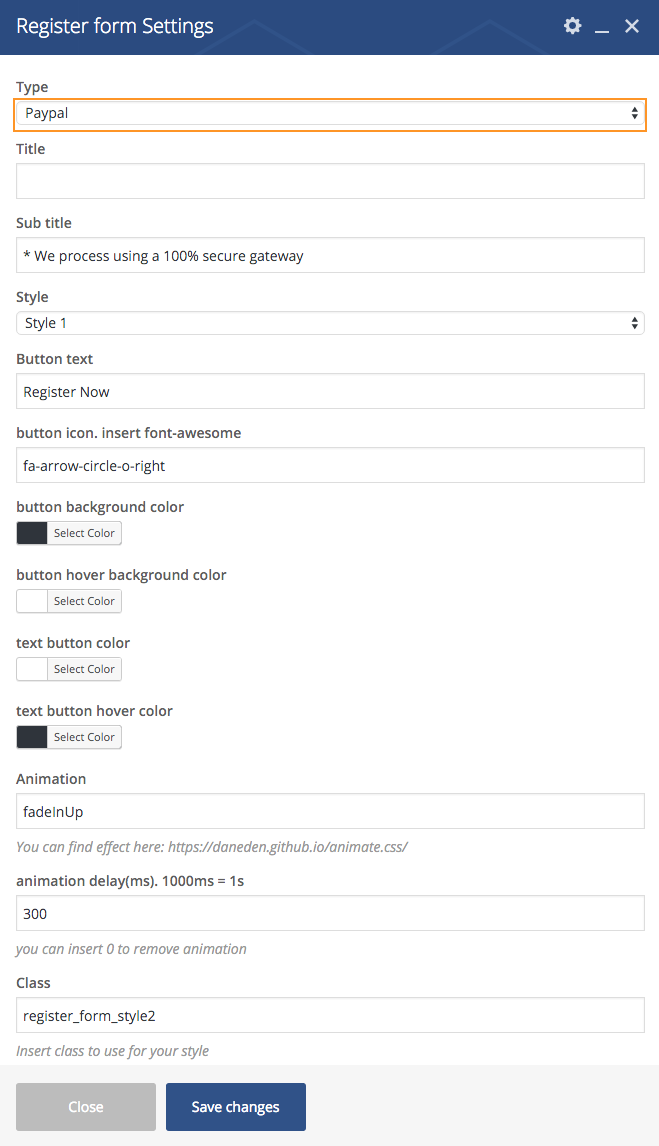
Register paypal form & settings
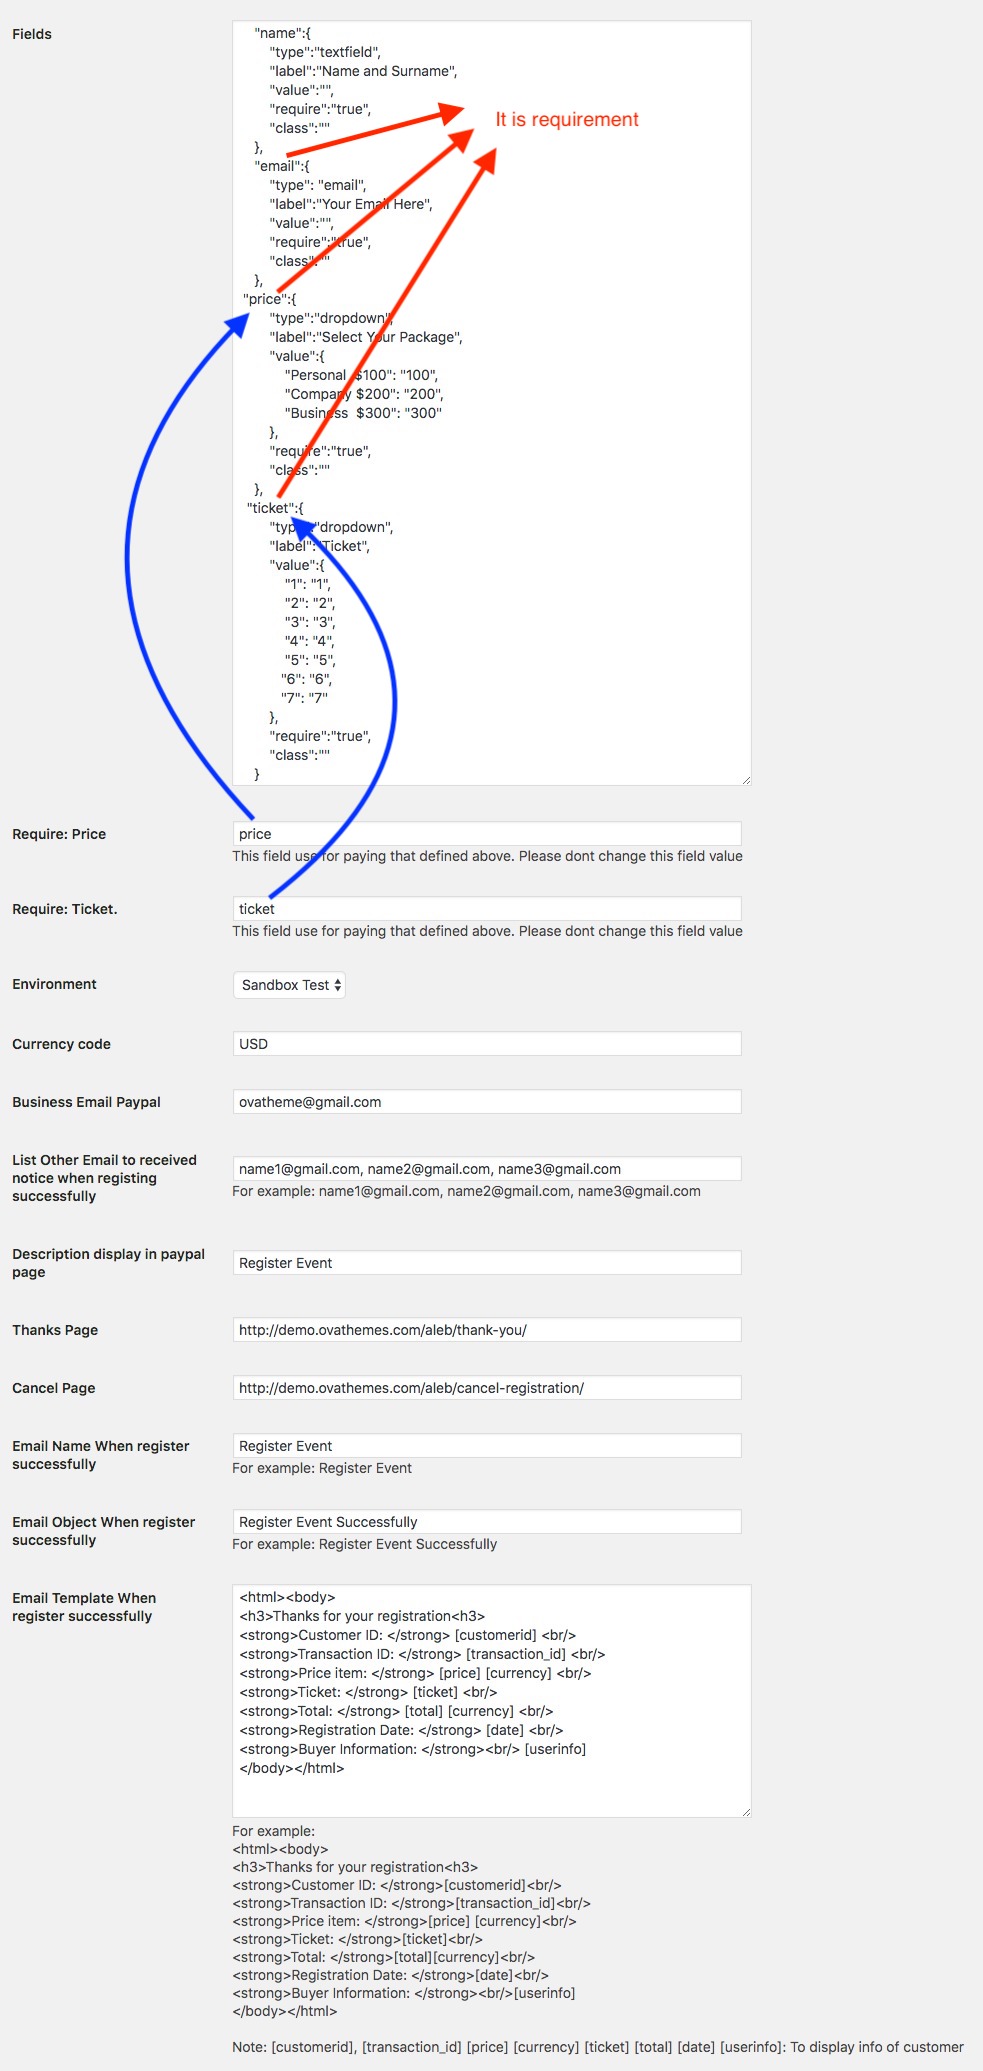
1: Paypal Form Settings
- From Left Sidebar >> Registration >> Settings for paypal
You can read above "How to create fields to add to Registger Form" section to add field in form.
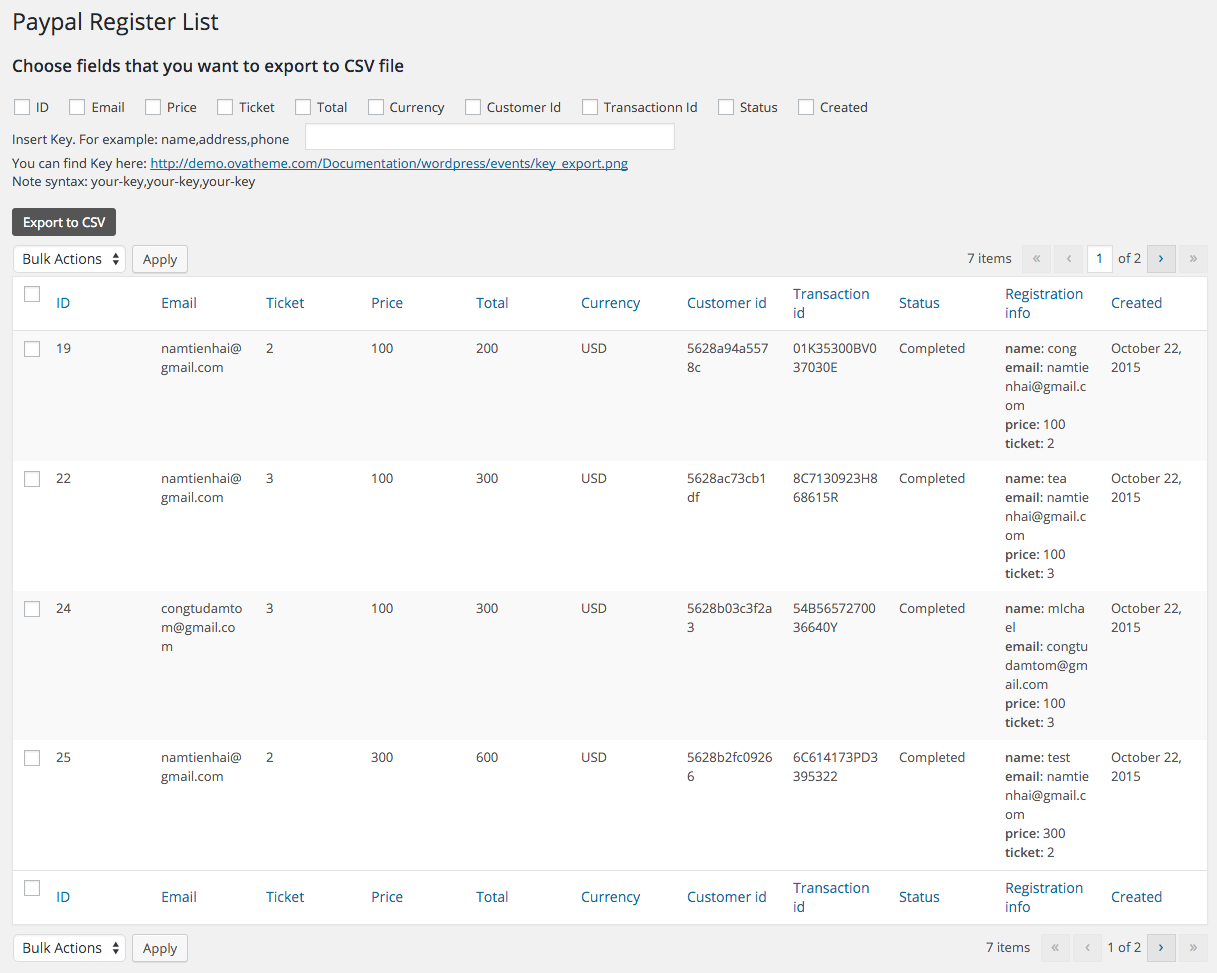
2: Registration Paypal List
- From Left Sidebar >> Registration >> Paypal registration list
3: Display Register paypal form in Frontend
Method 2: Use ''Register Form" element of visual composer
Method 2: Use Shortcode
[events_registerform type="pay" title="Register Free Form" subtitle="* We process using a 100% secure gateway" style="style1" buttontext="REGISTER FORM" iconbutton="fa-arrow-circle-o-right" id="" bg_button="#f74949" bg_button_hover="#fff" text_button_color="#fff" text_button_color_hover="#f74949" animation="fadeInUp" animation_delay="0" class="" /]
Note some params:
type: pay
style: style1 or style2
Shortcode
Countdown shortcode
[events_countdown end_day="05" end_month="1" end_year="2016" display_format="dHMS" timezone="0" years="years" months="months" weeks="weeks" days="days" hours="hours" minutes="minutes" seconds="seconds" year="year" month="month" week="week" day="day" hour="hour" minute="minute" second="second" animation="fadeInUp" animation_delay="0" class="" /]
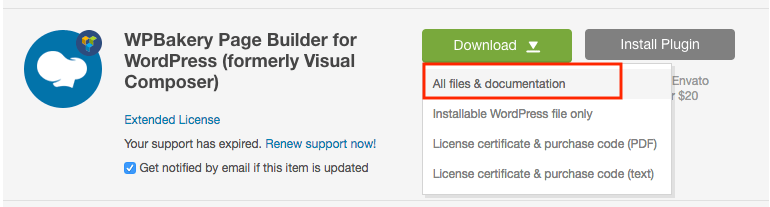
Visual Composer
OverView
You can read detail here: http://vc.wpbakery.com/
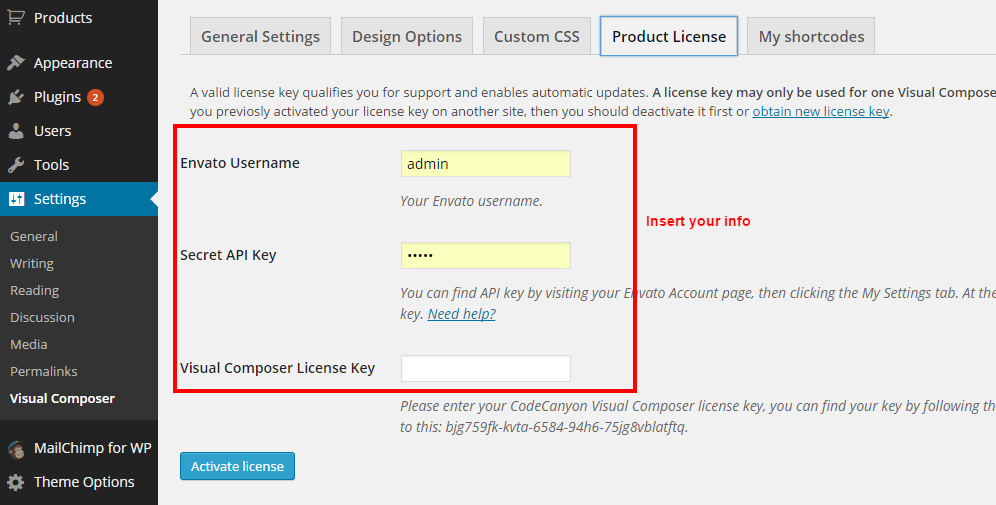
Note: If you want to auto update Visual Composer, you have to purchase "Regular License" at codecanyon (http://codecanyon.net/item/visual-composer-page-builder-for-wordpress/242431) then update info in settings of Visual Composer:
Plugins
Contact form
1: Contact Form
From Left Bar >> Contact >> Contact From >> Form tab and insert this code
<div class="events_contactform">

    <div class="col-sm-6" data-animation="fadeInUp" data-animation_delay="300"> [text* your-name class:formgroup placeholder "Name*"] </div>

    <div class="col-sm-6" data-animation="fadeInUp" data-animation_delay="300"> [email* your-email class:formgroup placeholder "Email*"] </div>

    <div class="col-sm-6" data-animation="fadeInUp" data-animation_delay="300"> [text telephone class:formgroup placeholder "Telephone"] </div>

    <div class="col-sm-6" data-animation="fadeInUp" data-animation_delay="300"> [url website class:formgroup placeholder "Website"]</div>


    <div class="col-sm-12" data-animation="fadeInUp" data-animation_delay="300">

    [textarea your-message class:formgroup placeholder "Message here..."] </div>

    <div class="col-sm-12 text-center" data-animation="fadeInUp" data-animation_delay="300"><span class="button">[submit class:events_submit "Send Message" ]<i class="fa fa-arrow-circle-right"></i></span></div>

</div>
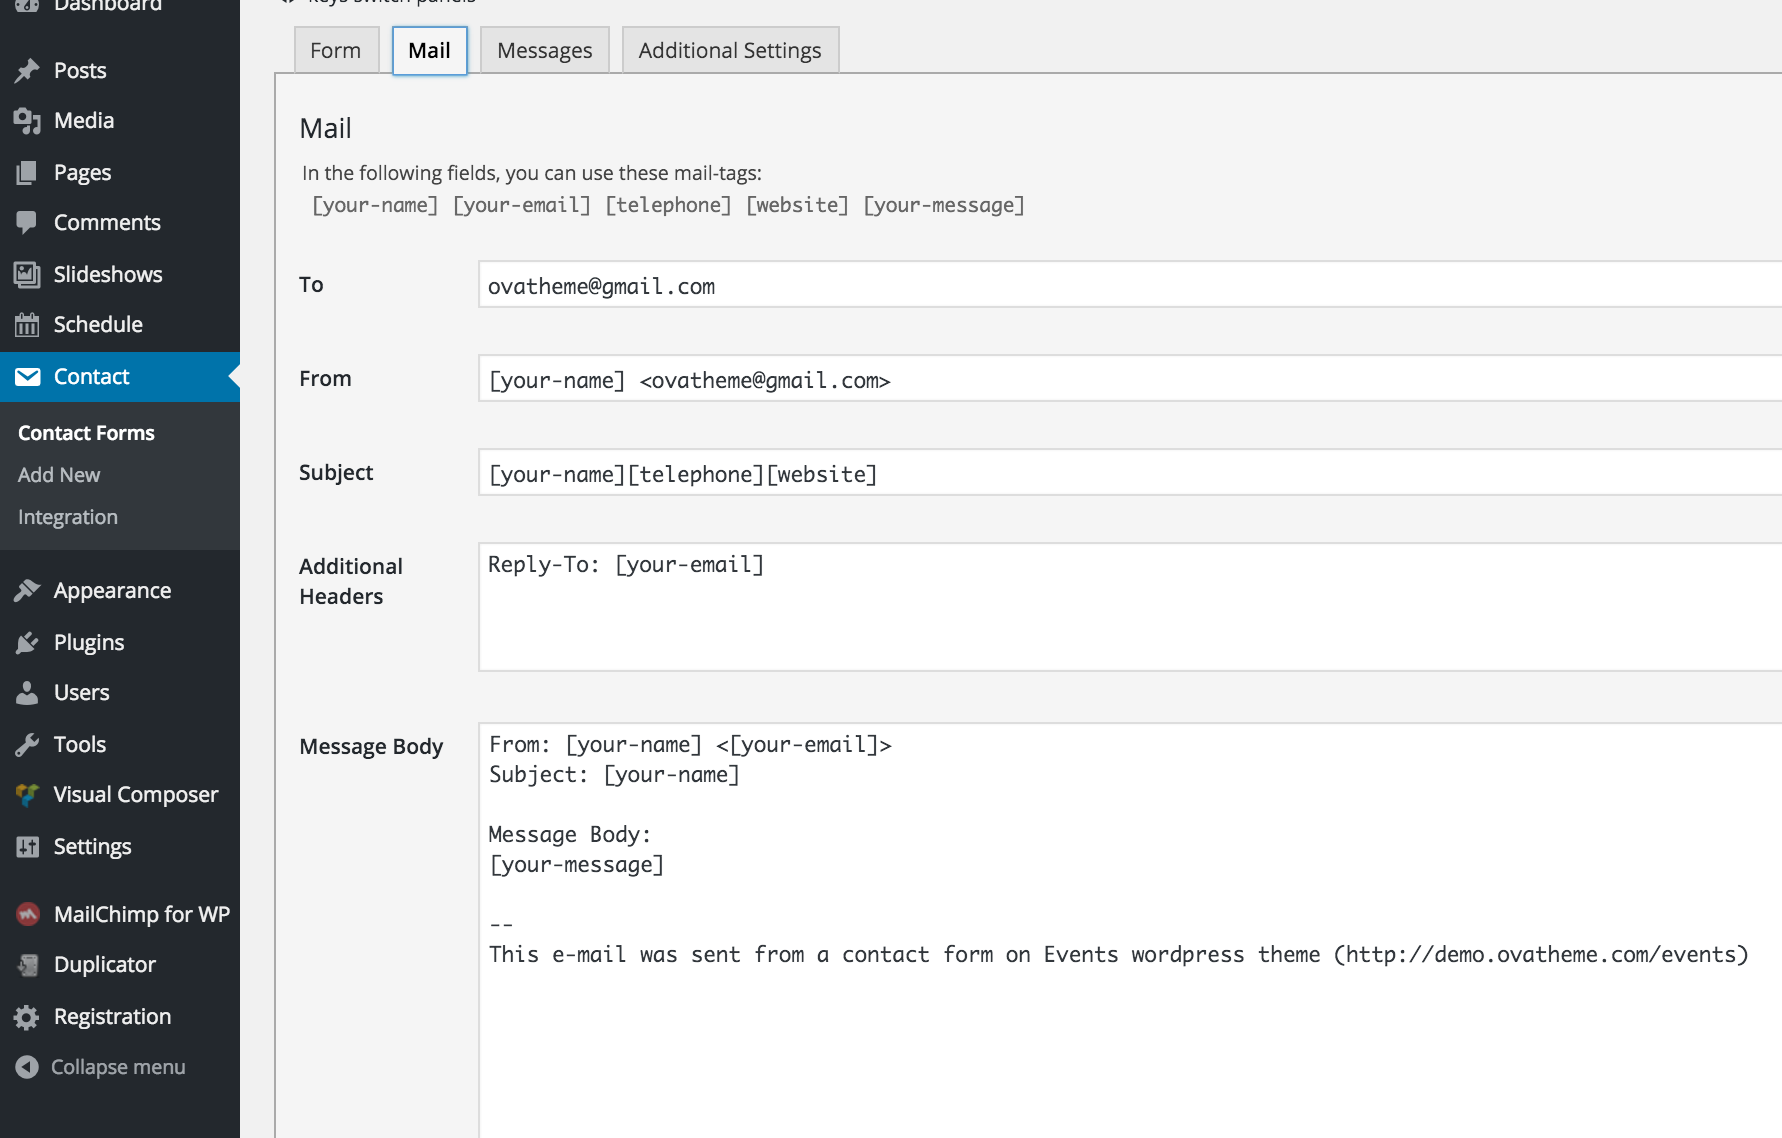
From Left Bar >> Contact >> Contact From >> Mail tab and insert this code
Mailchimp
2: Mailchimp for WP
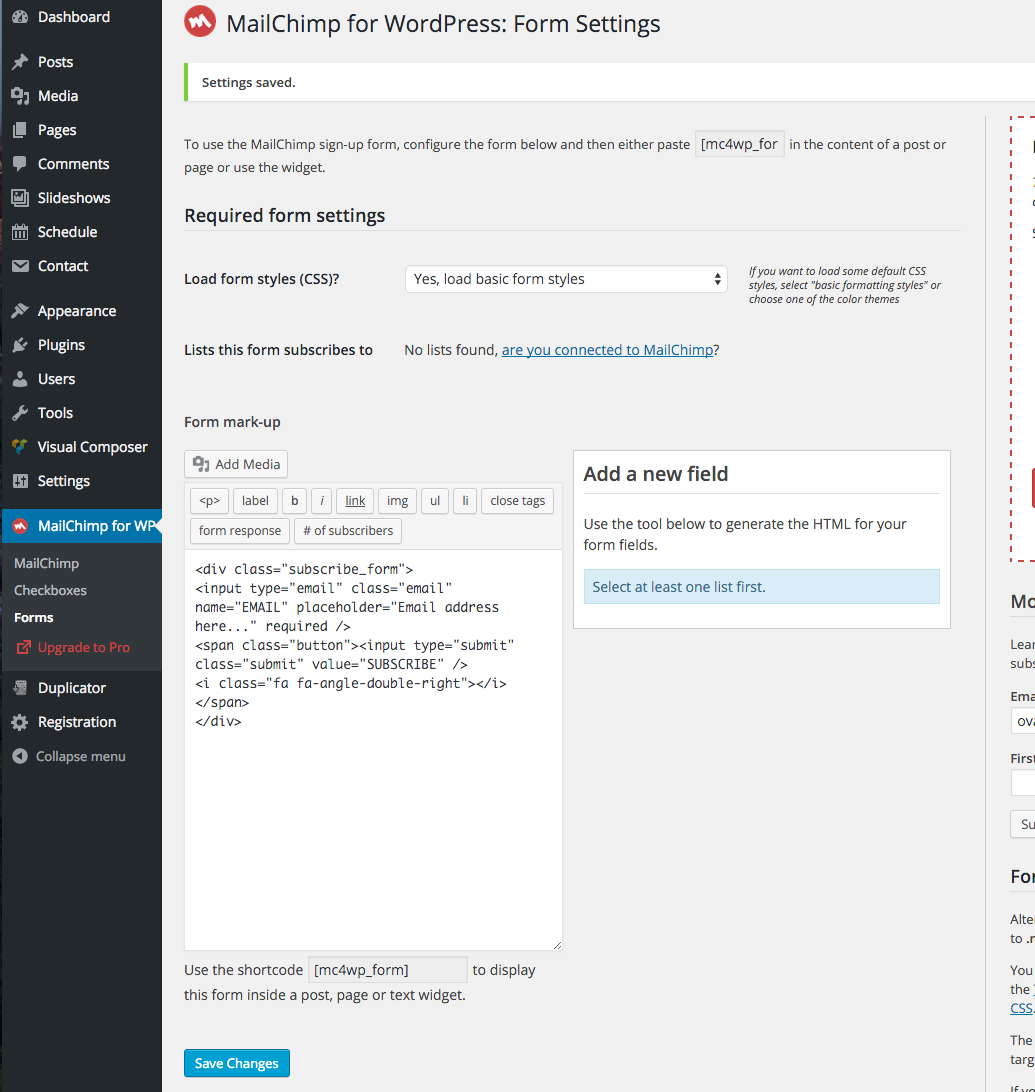
From left bar >> Mailchimp for WP >> Forms >> Insert this code in Form mark-up
<div class="subscribe_form">
<input type="email" class="email" name="EMAIL" placeholder="Email address here..." required />
<span class="button"><input type="submit" class="submit" value="SUBSCRIBE" /></span>
</div>
Translations
The theme is compatible with WPML plugin, thus can be translated into multiple languages. Follow this link for guide. You can also use POEdit plugin for translation.
- Located the .po file in folder /languages.
- Open the file with POEdit and translate the texts into your preferred language.
- When complete, you’ll want to save the file twice, as two separate files – a .po file and a .mo file. When you save the files, you must name them according to your language code. Find a list of language codes at WordPress in your Language. As an example, the language code for English is en_EN, so you would save the translated files as en_EN.po first, then en_EN.mo.
- When that’s done, simply upload the files to your theme folder.
Codestyling Localization is a good alternative for POEdit. It also works with .po/.mo files and is very easy to use.